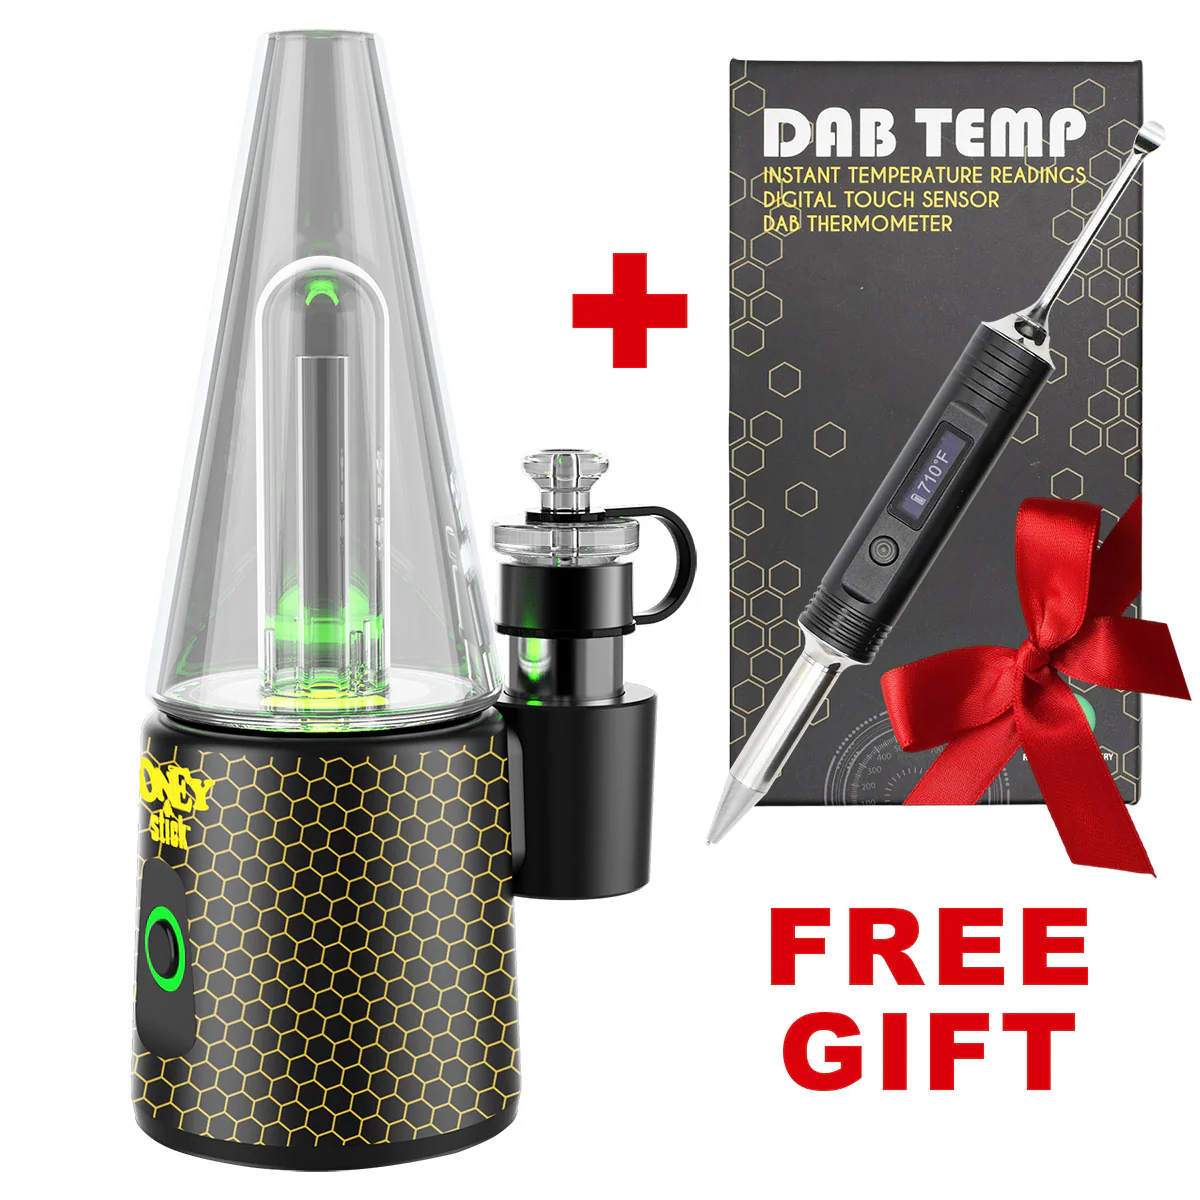
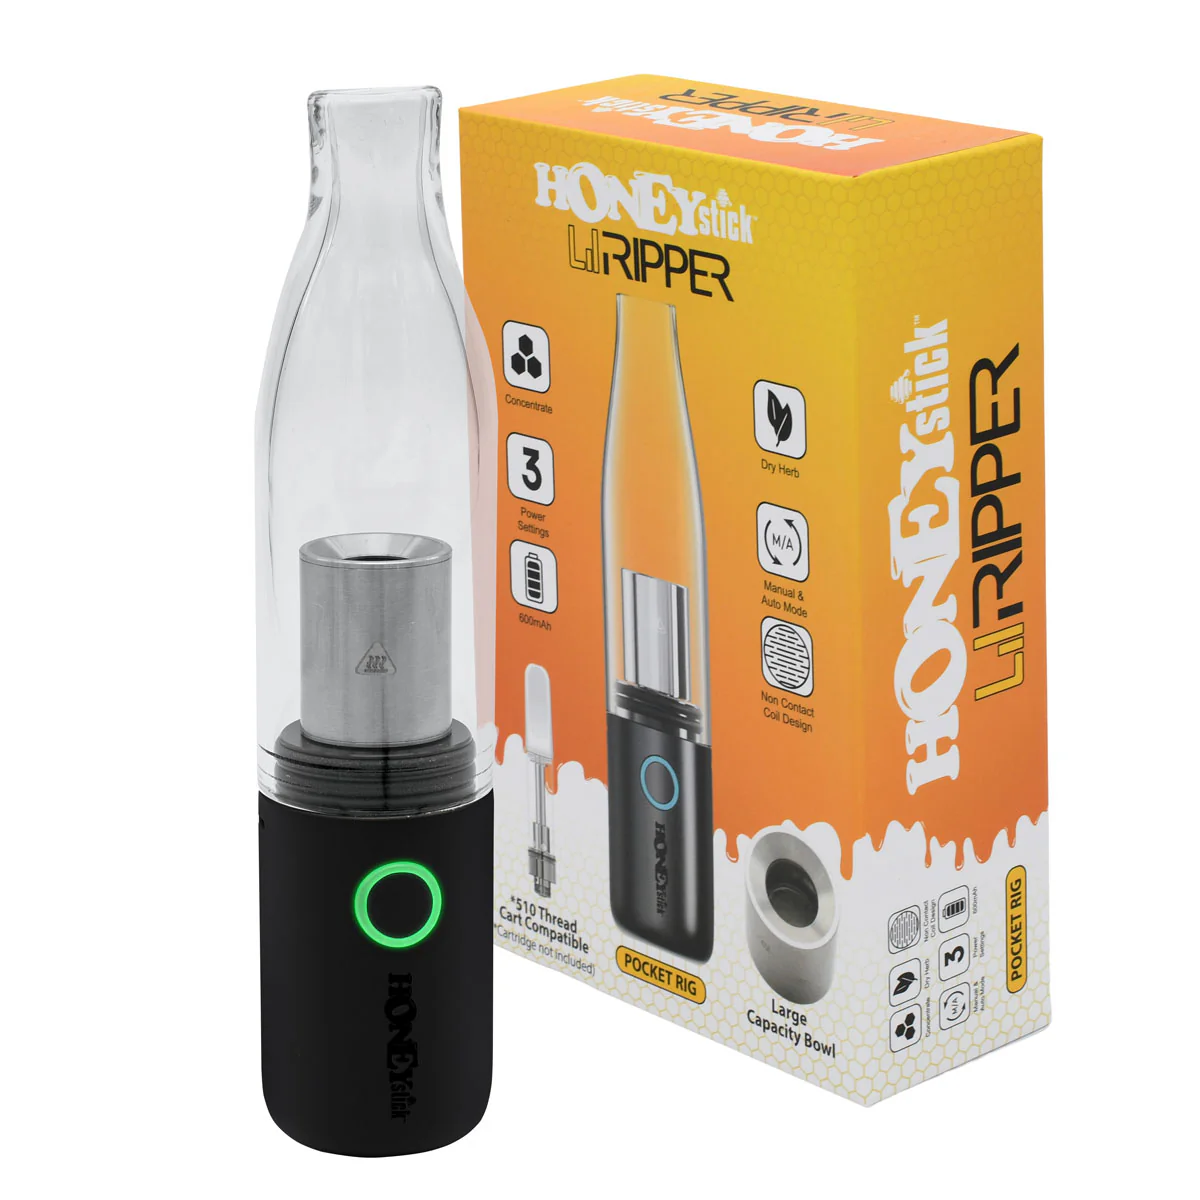
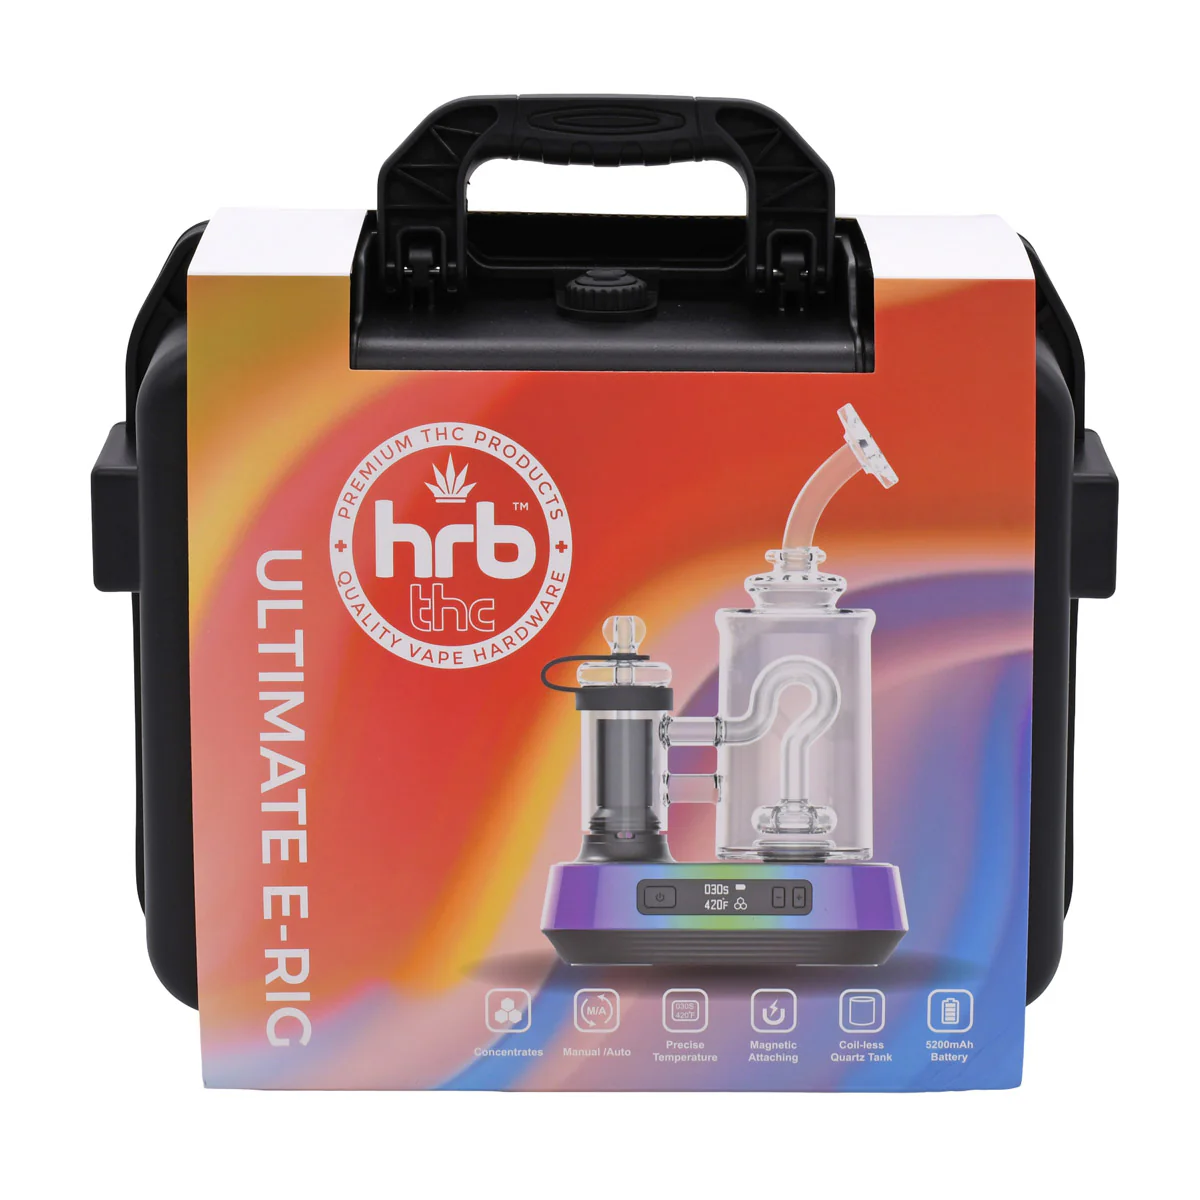
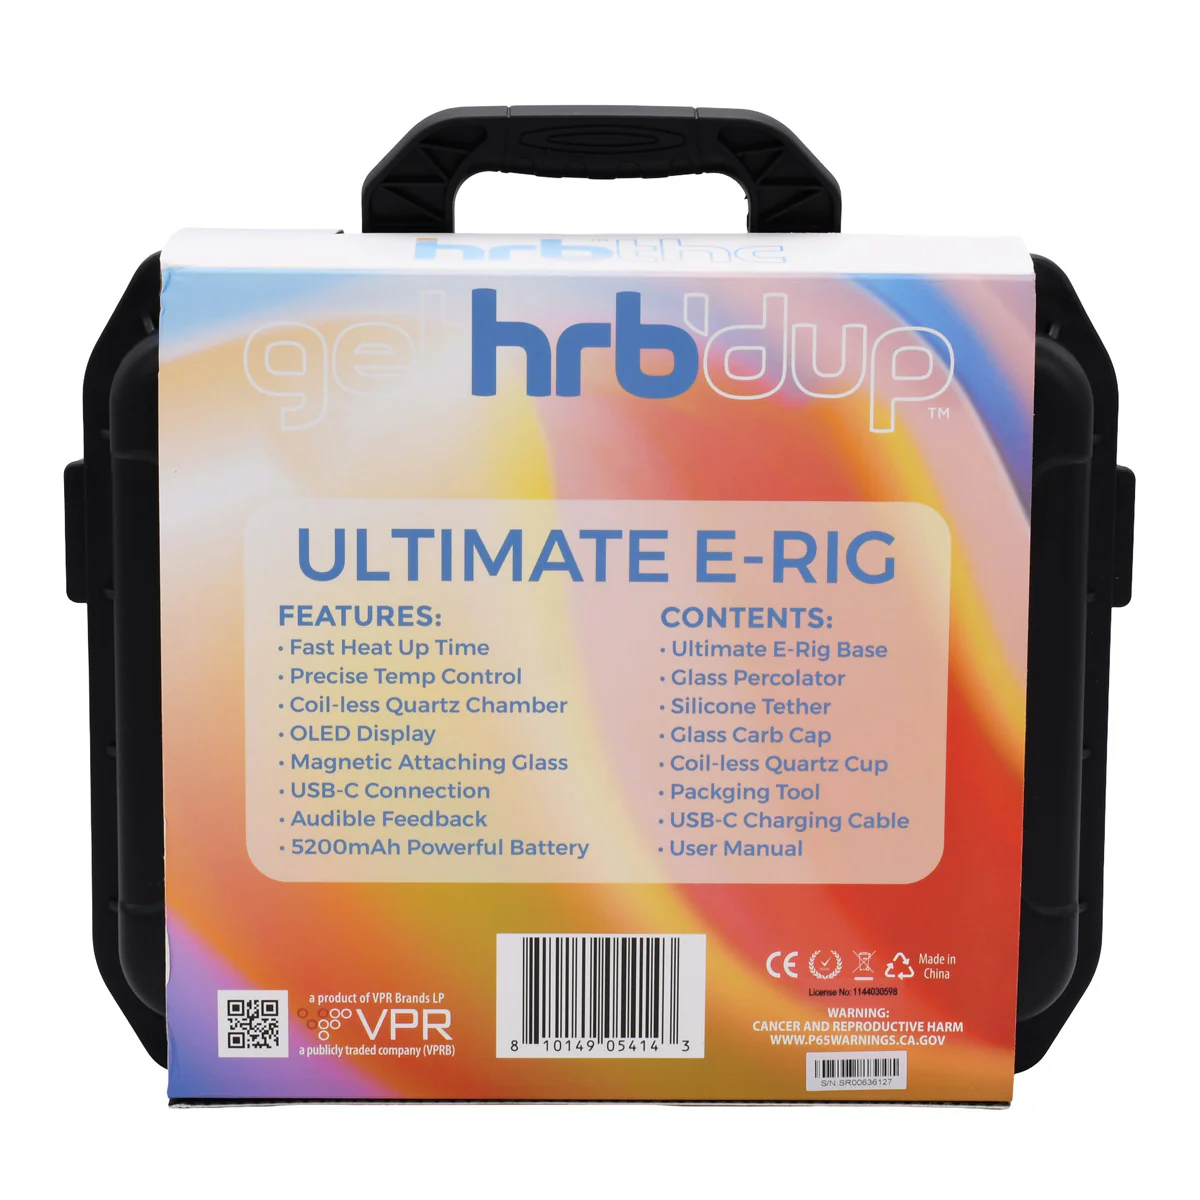
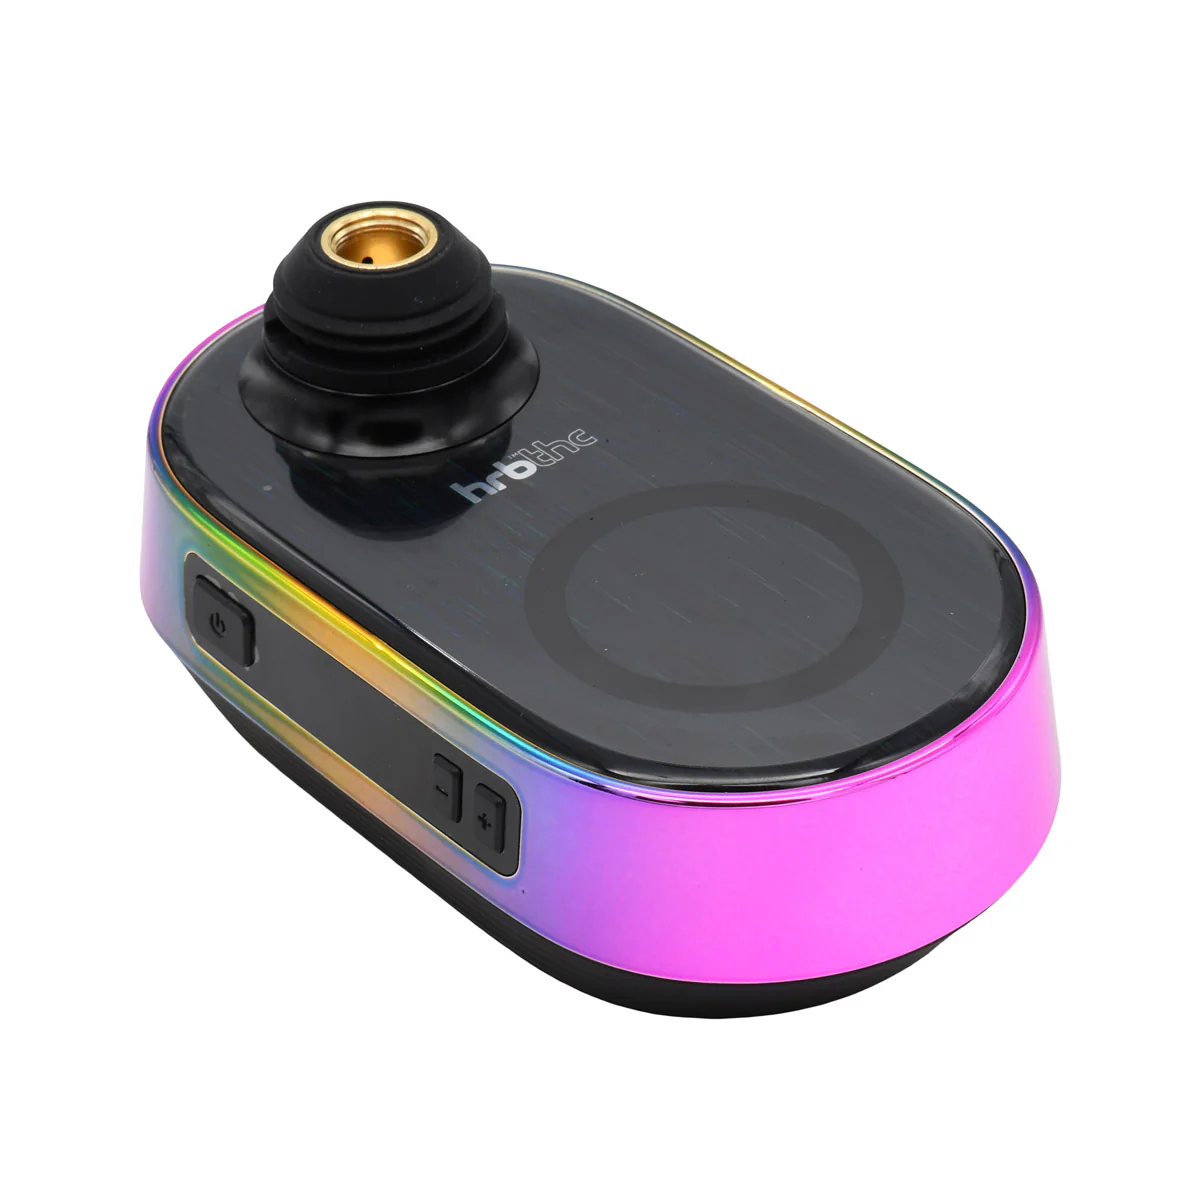
Hrb'Dup Ultimate E-Rig for Dab Concentrates
Introducing the HRB'Dup E-Rig: Ultimate Powerhouse Electric Rig for Dab Concentrates.
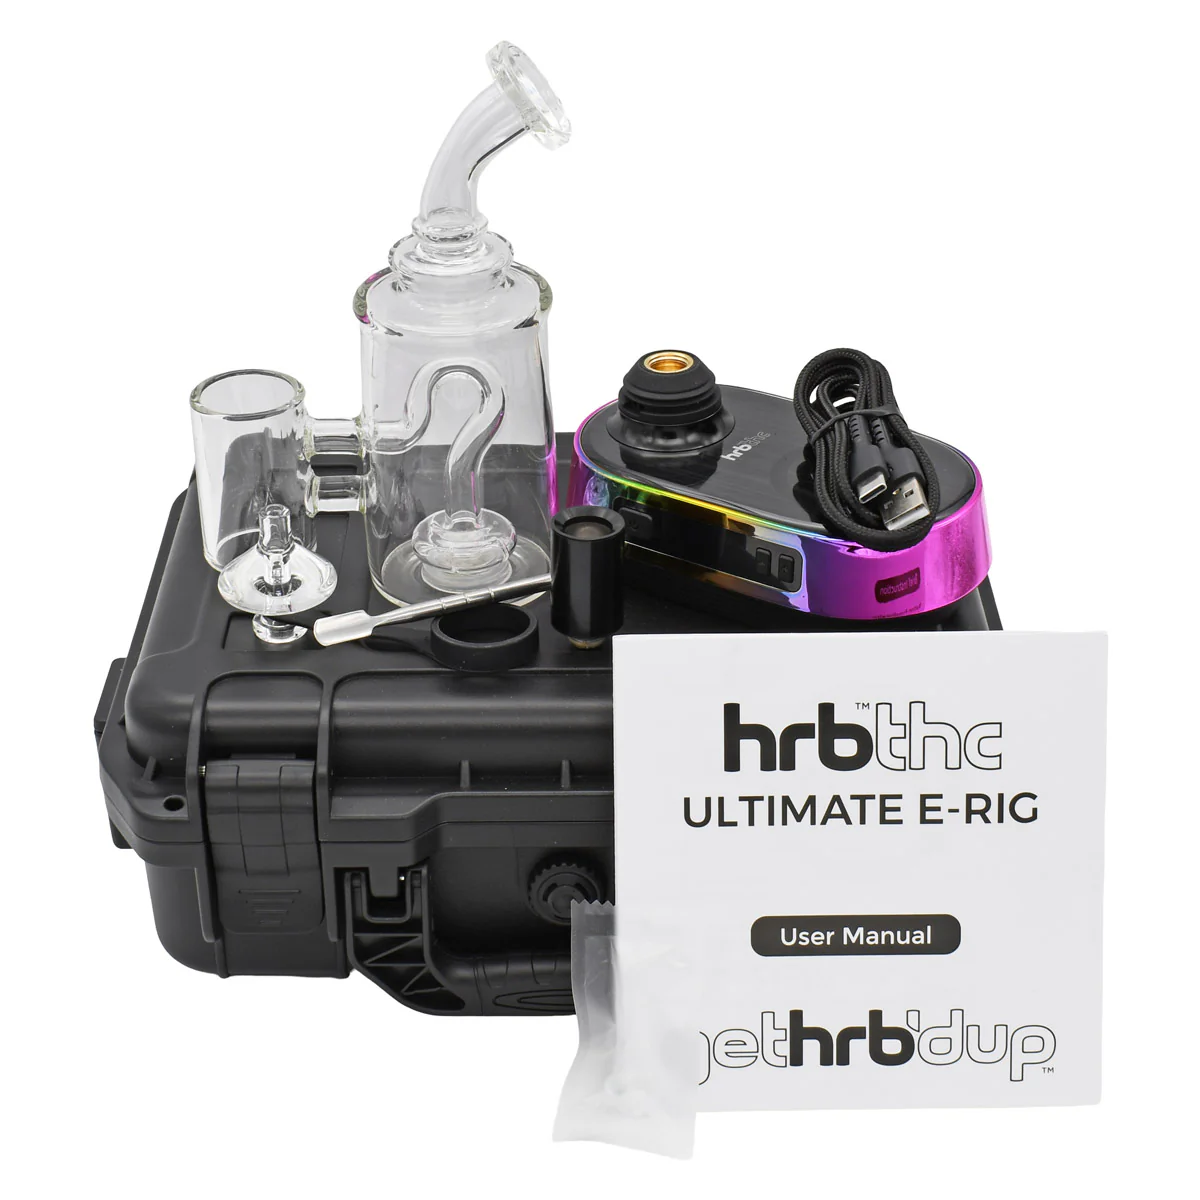
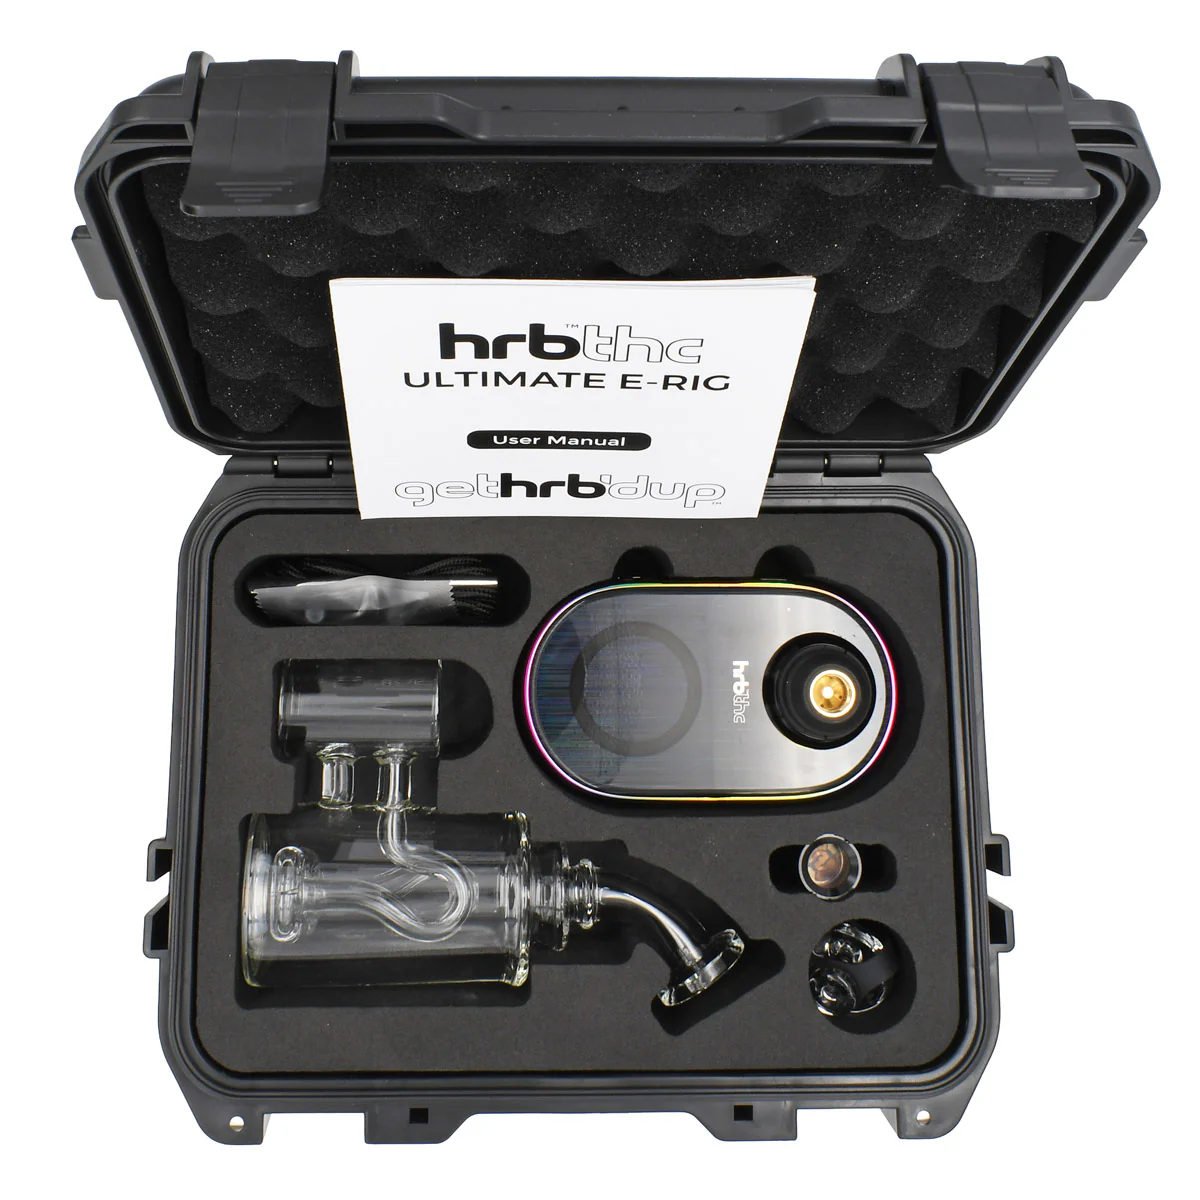
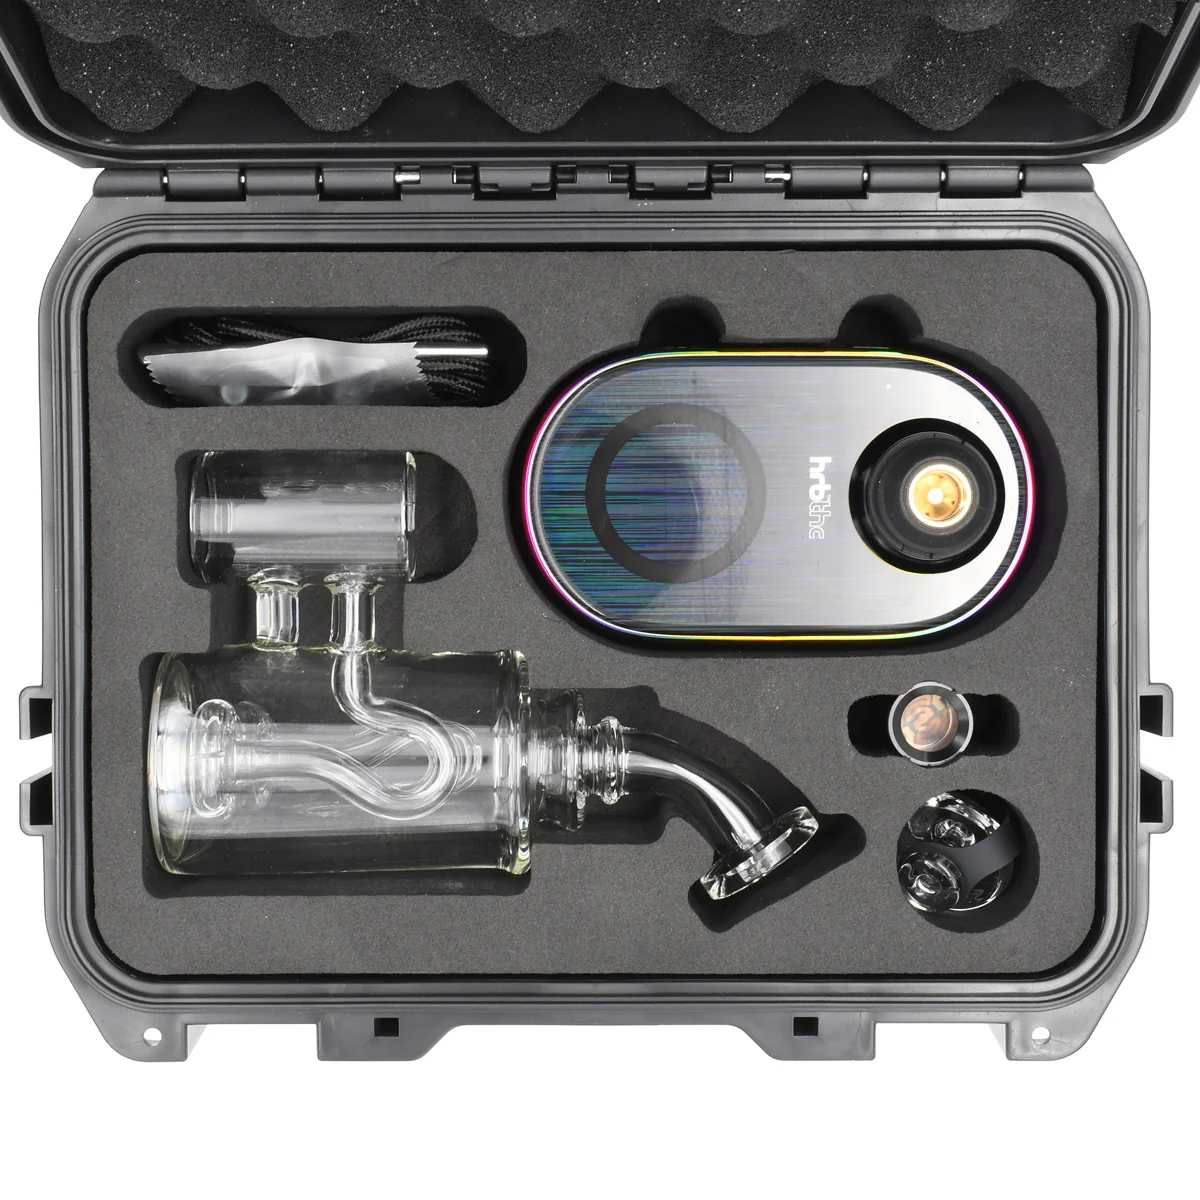
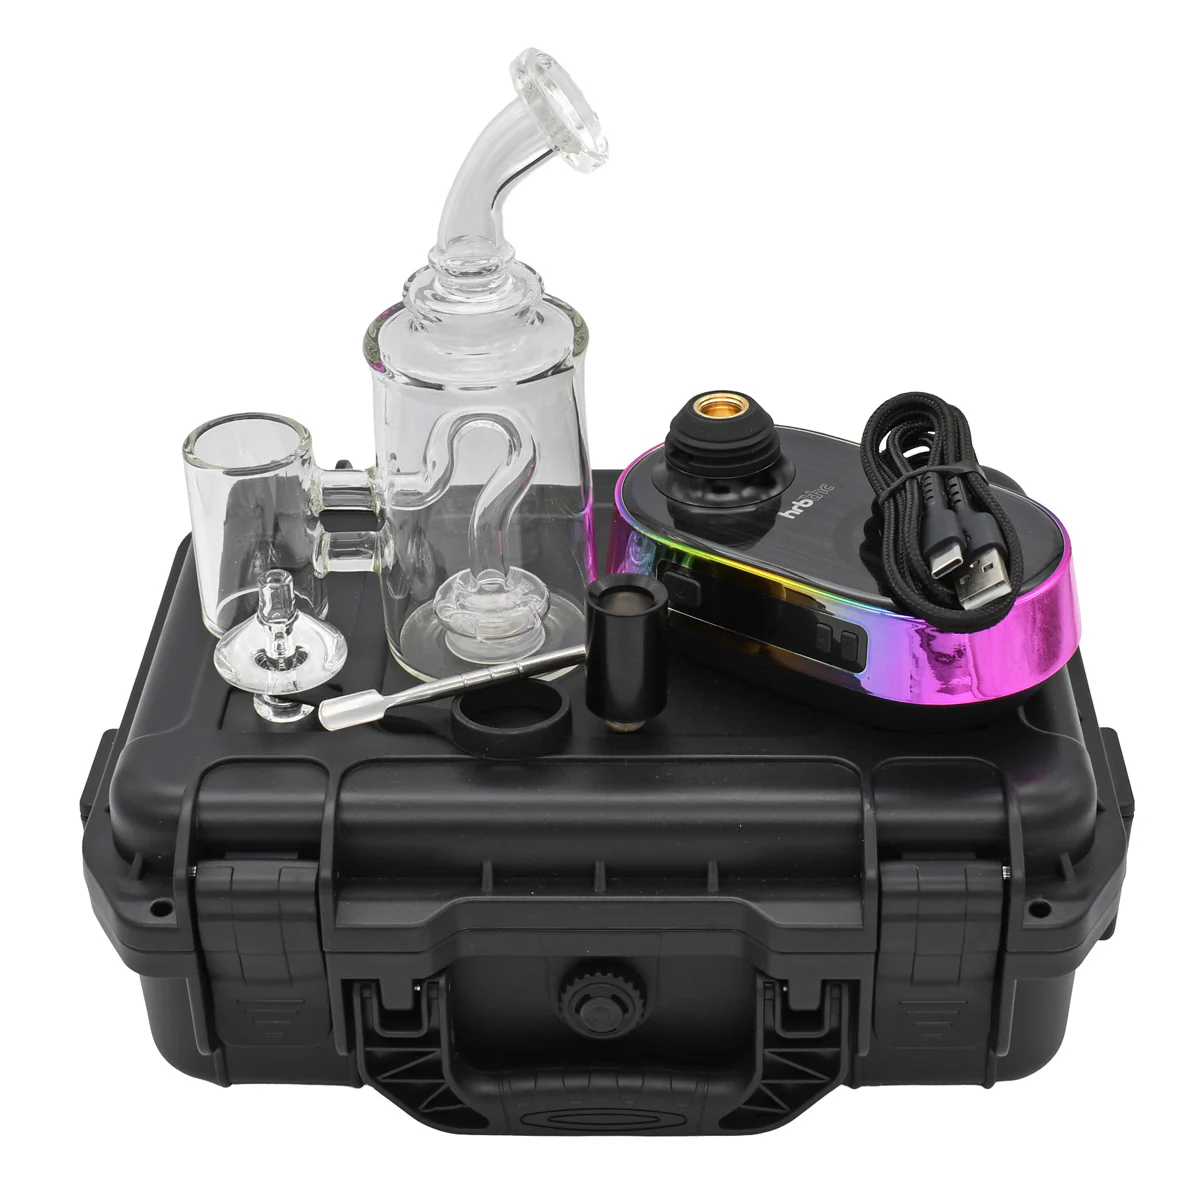
HRB Dup E-Rig Kit Contains:
- FREE GIFT 1 x DAB-Temp Digital Thermometer
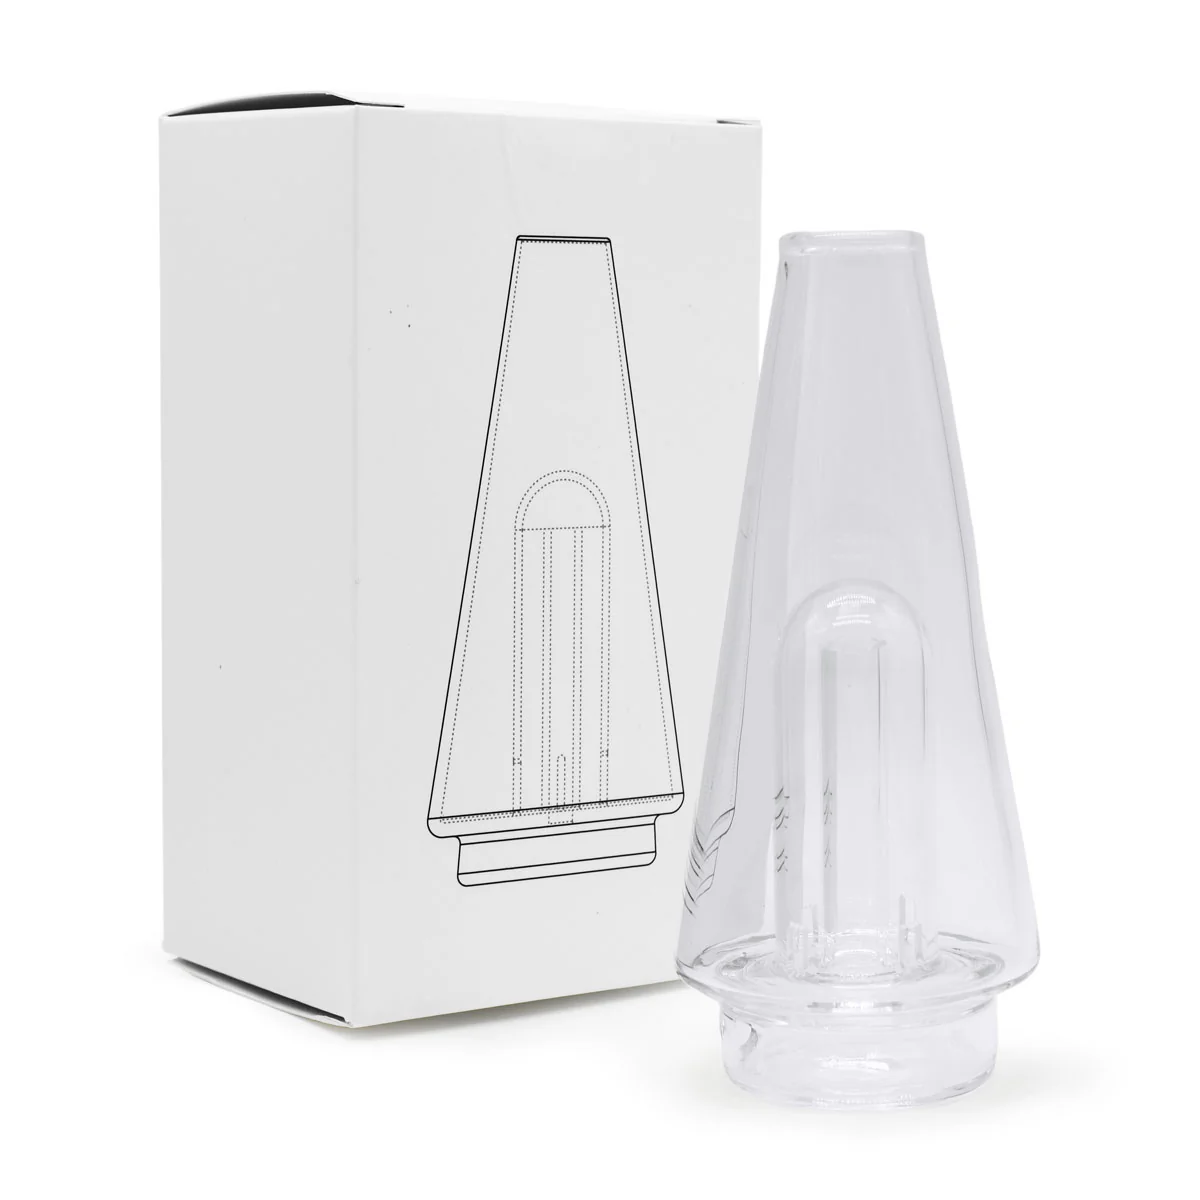
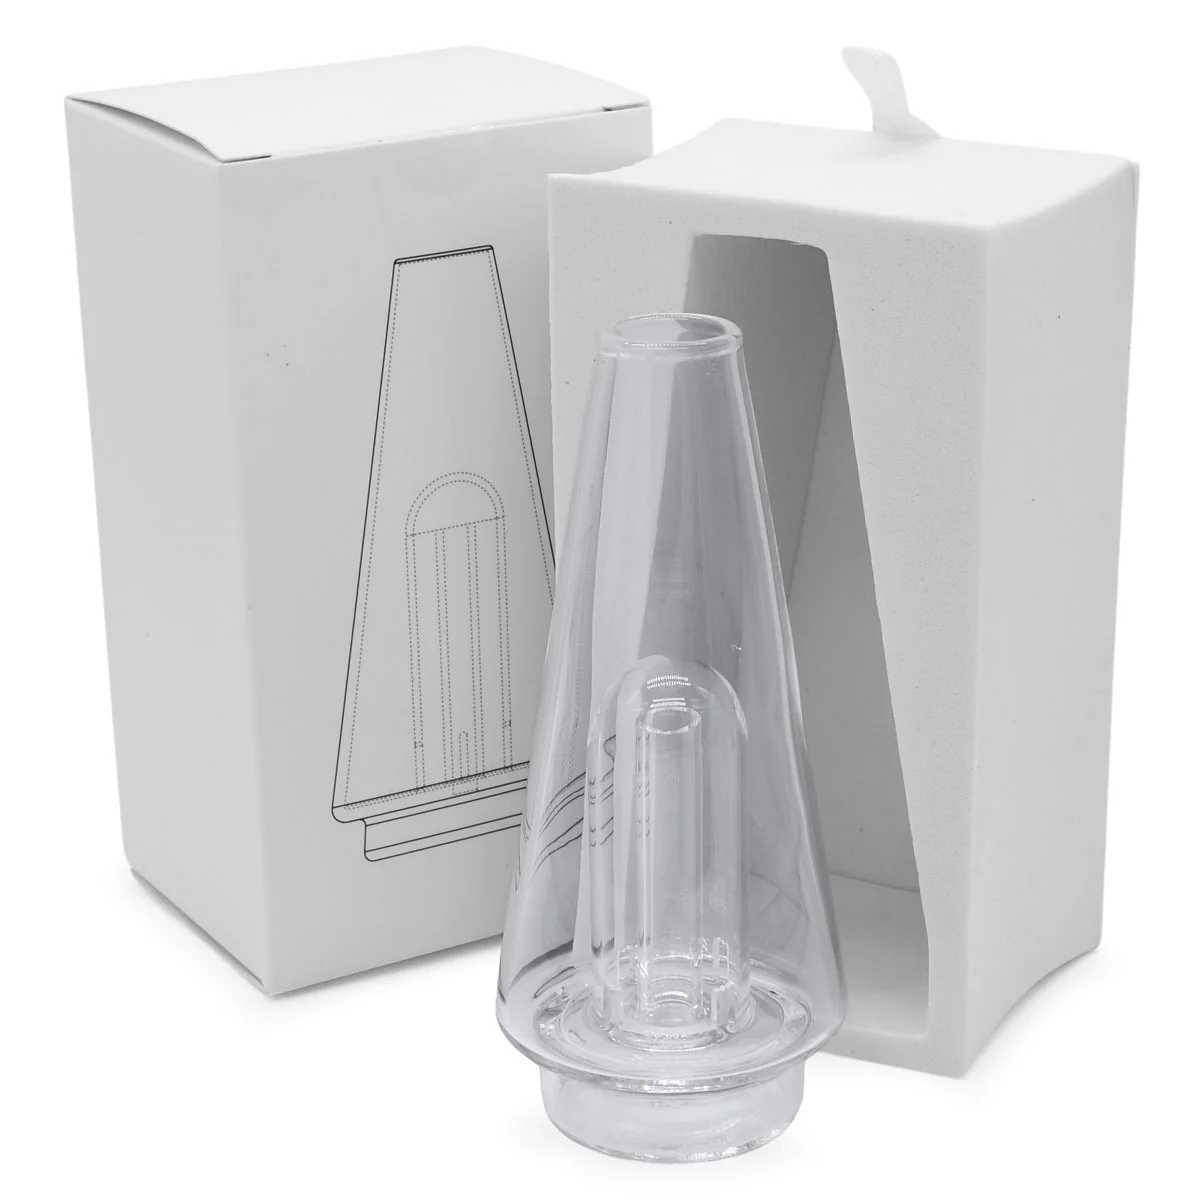
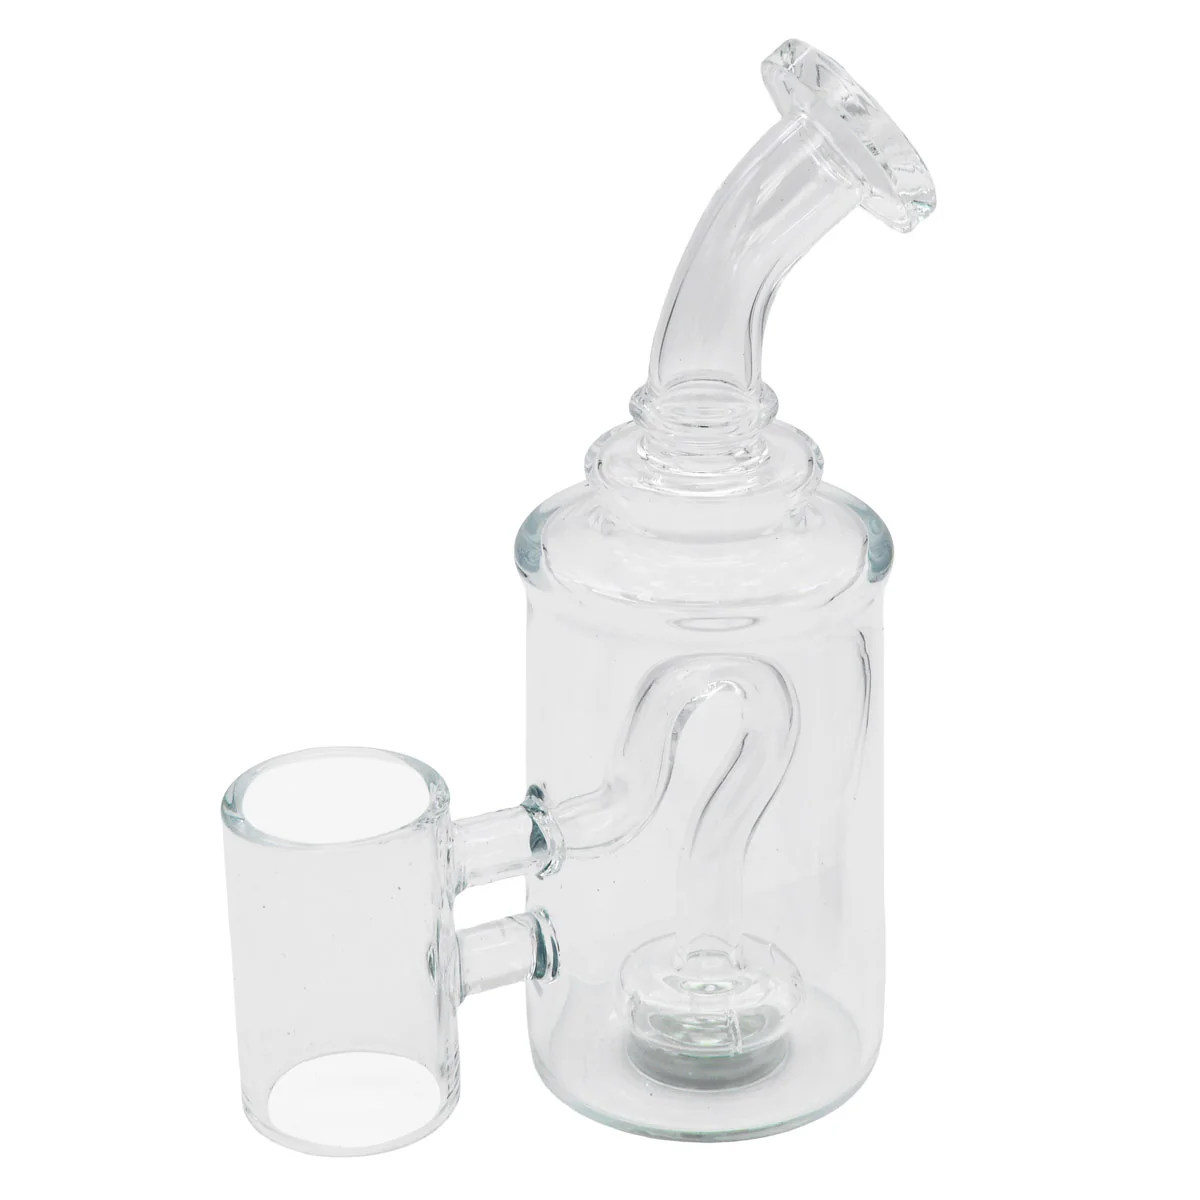
- Glass Percolator (Magnetic Attaching To Base)
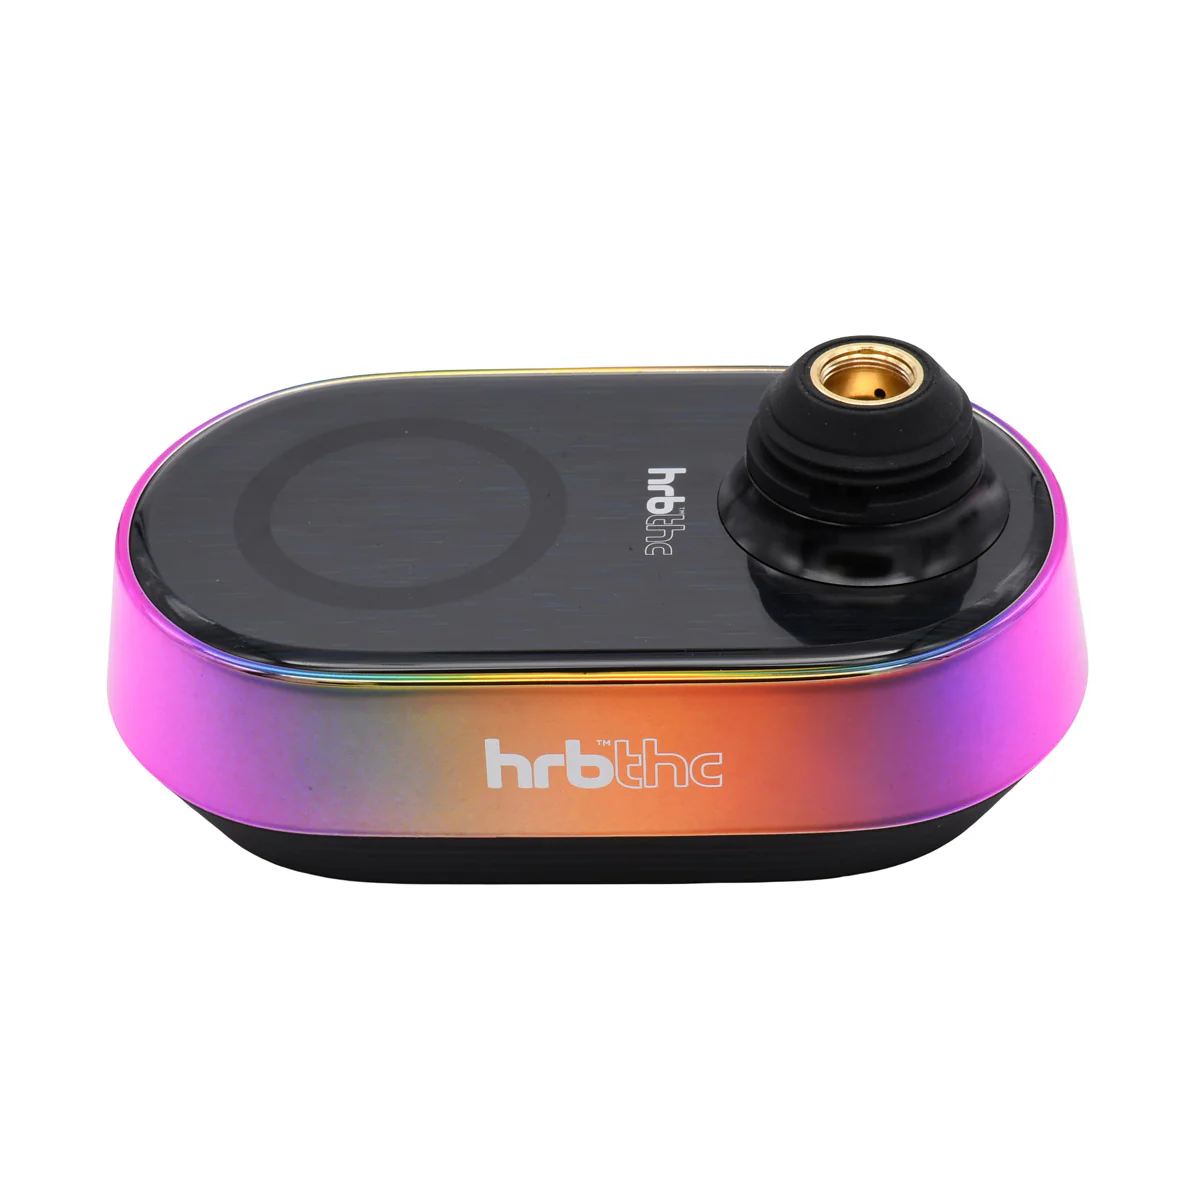
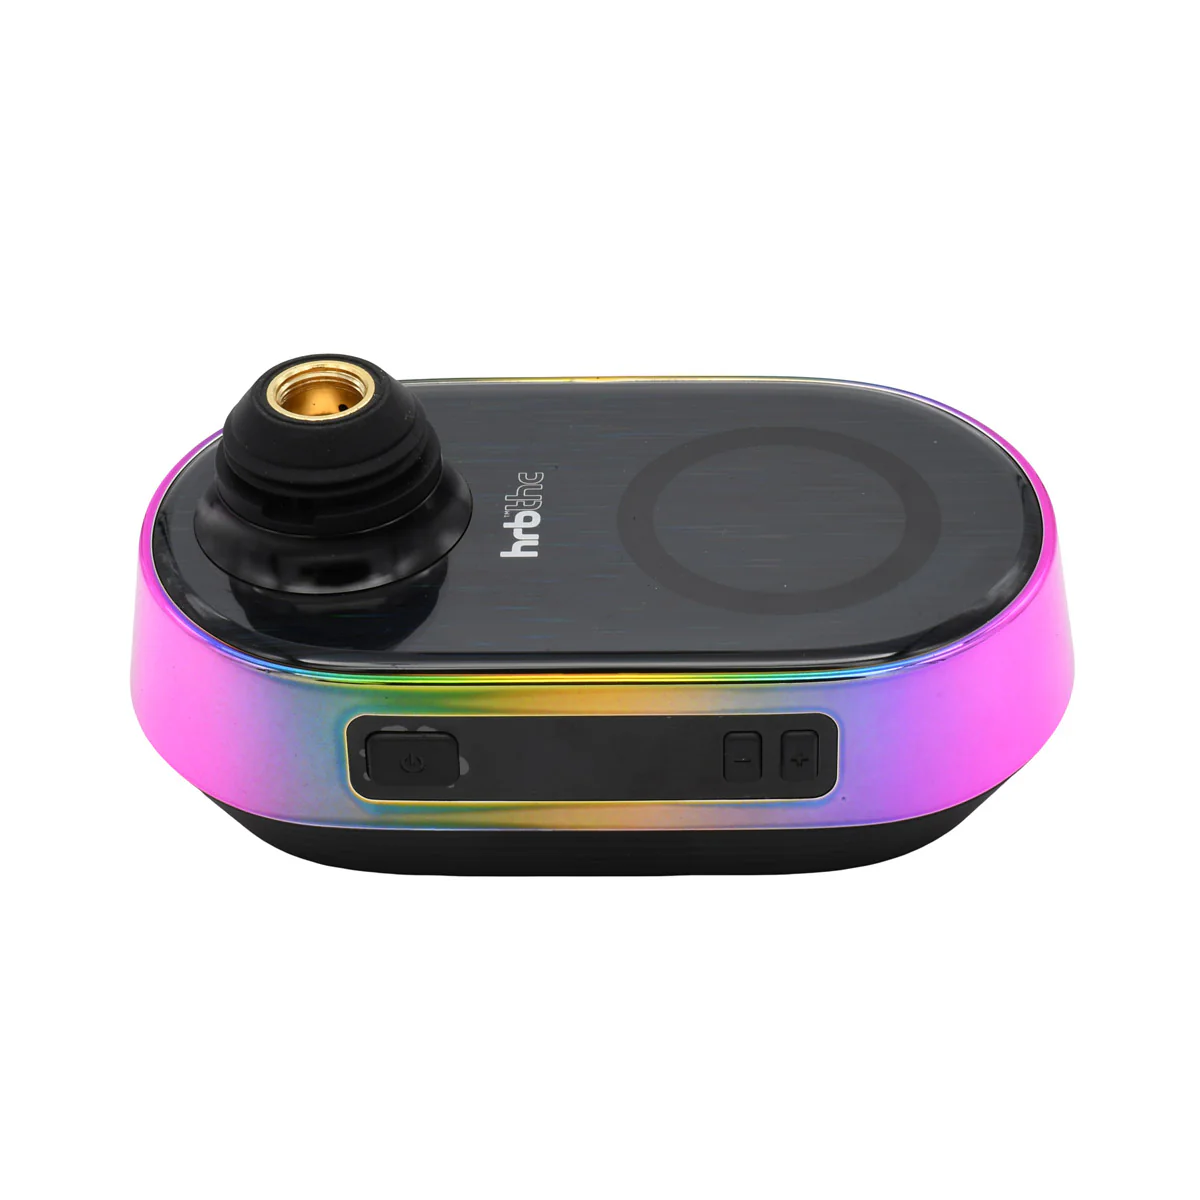
- Ultimate Erig Base With 5200mAh Battery
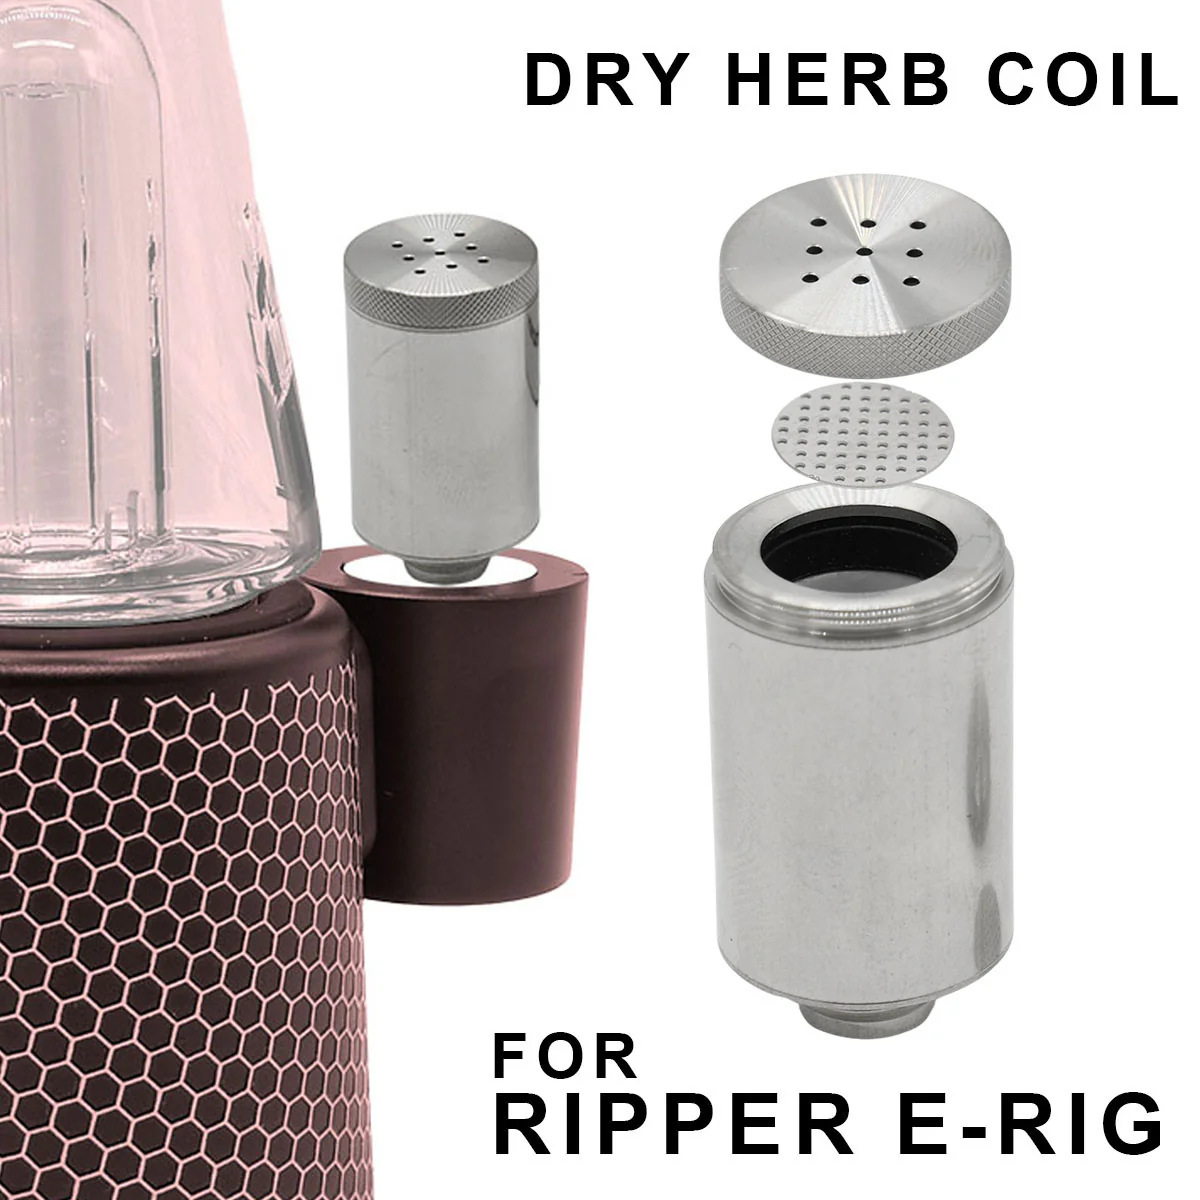
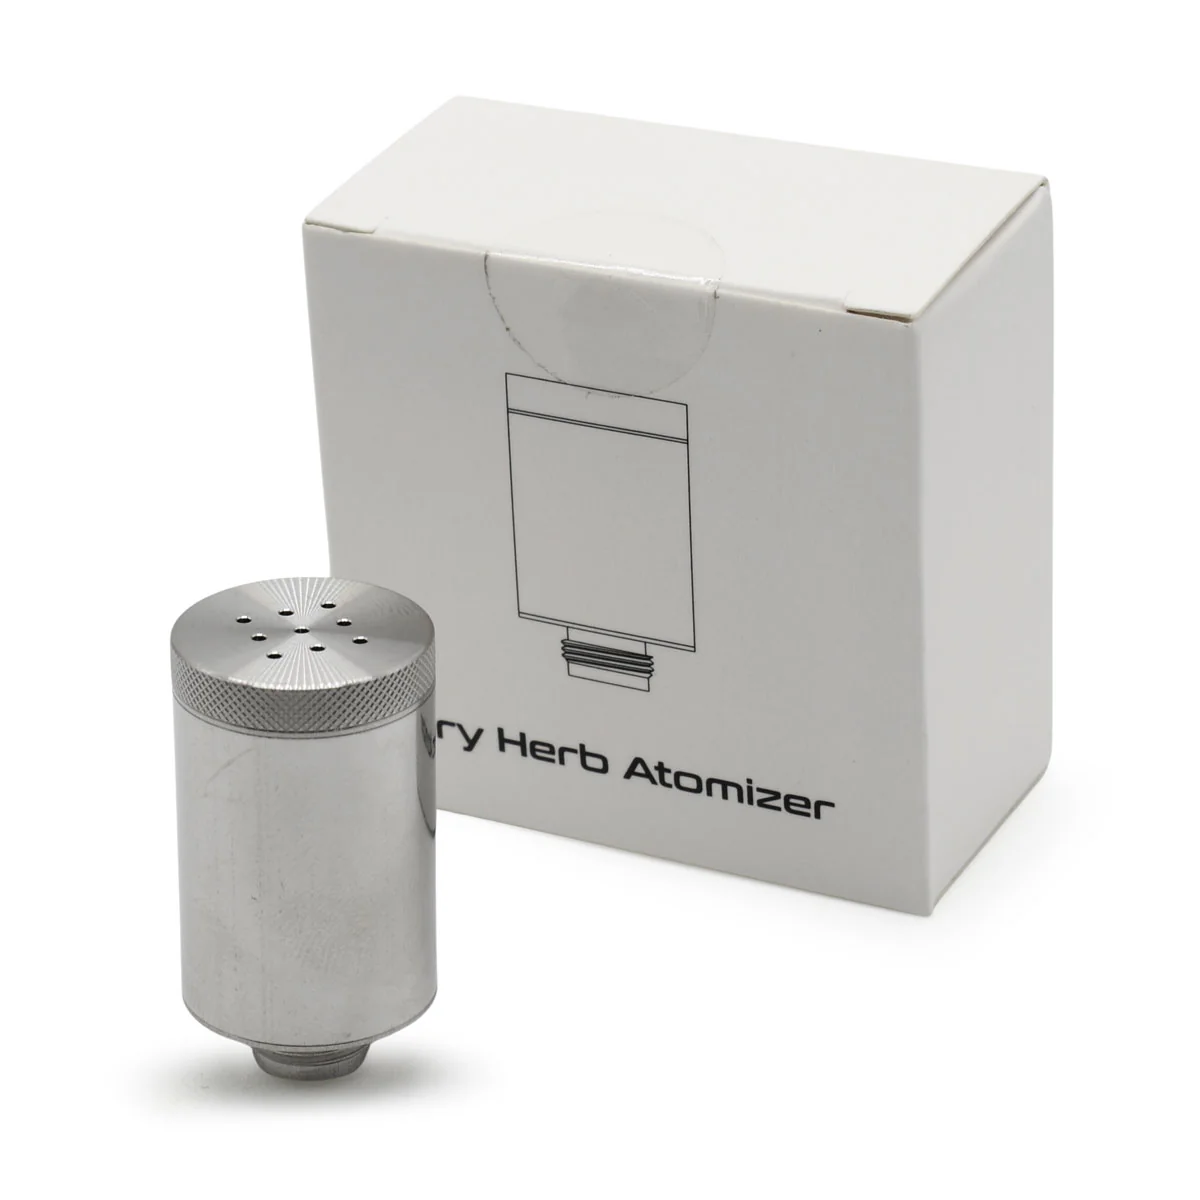
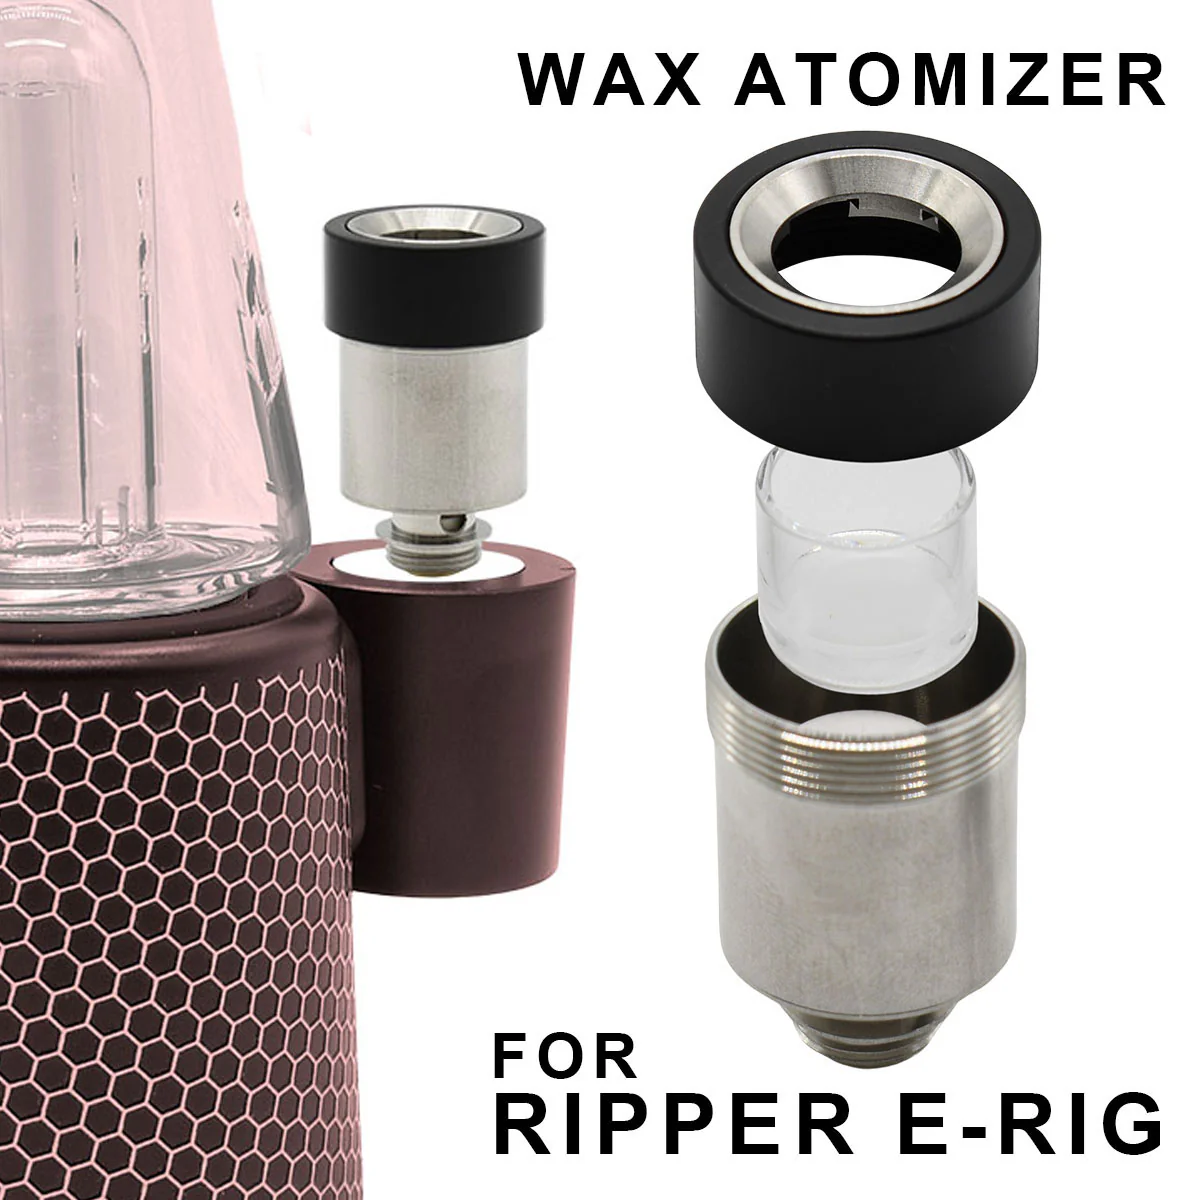
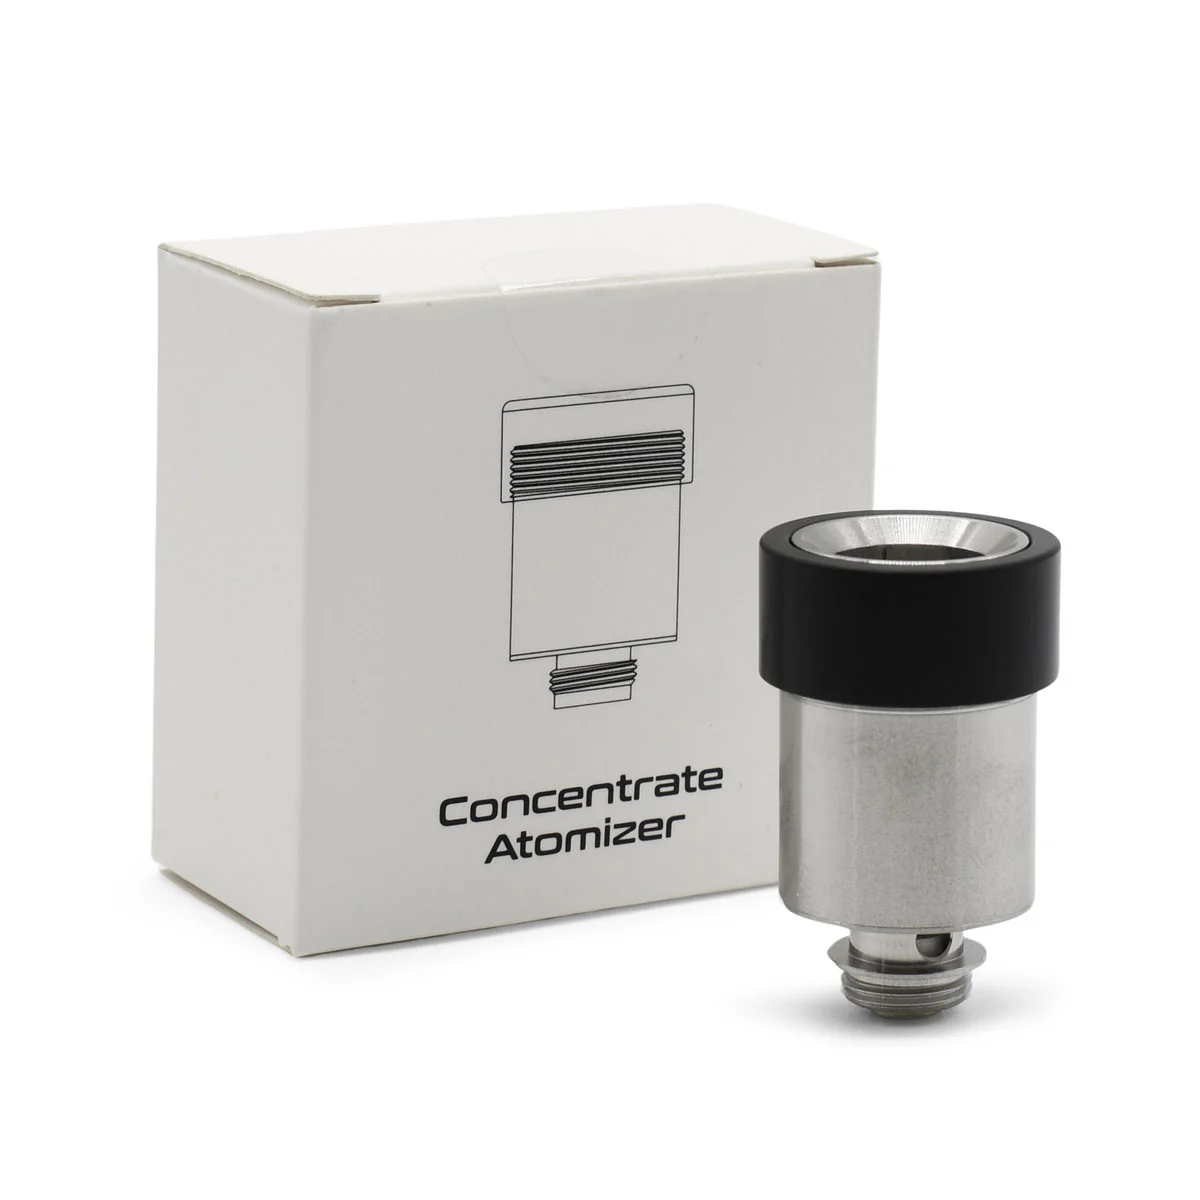
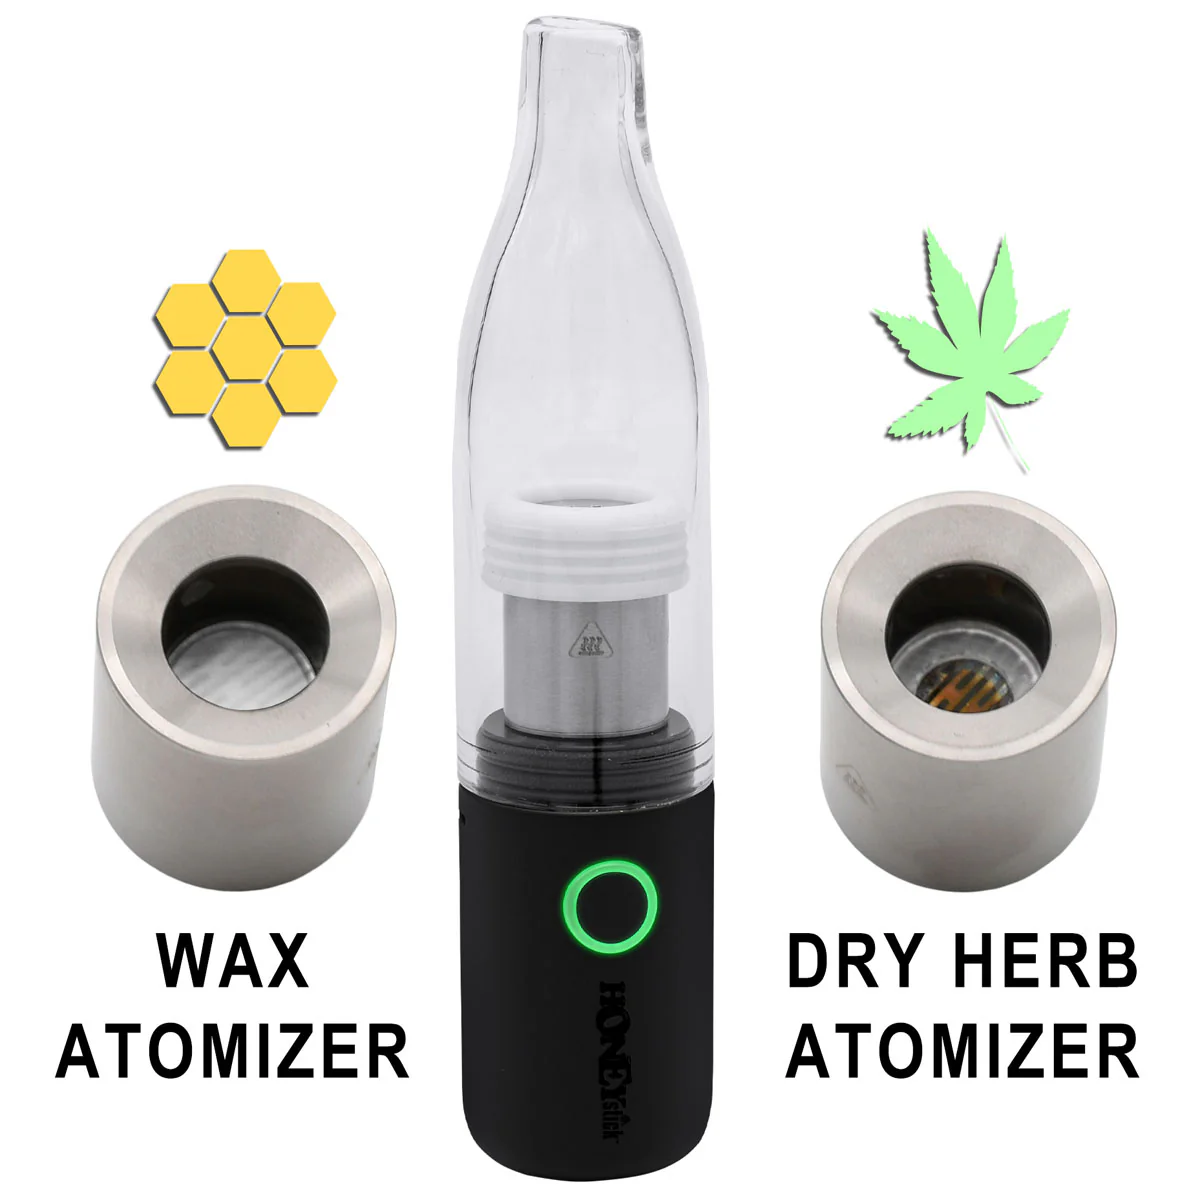
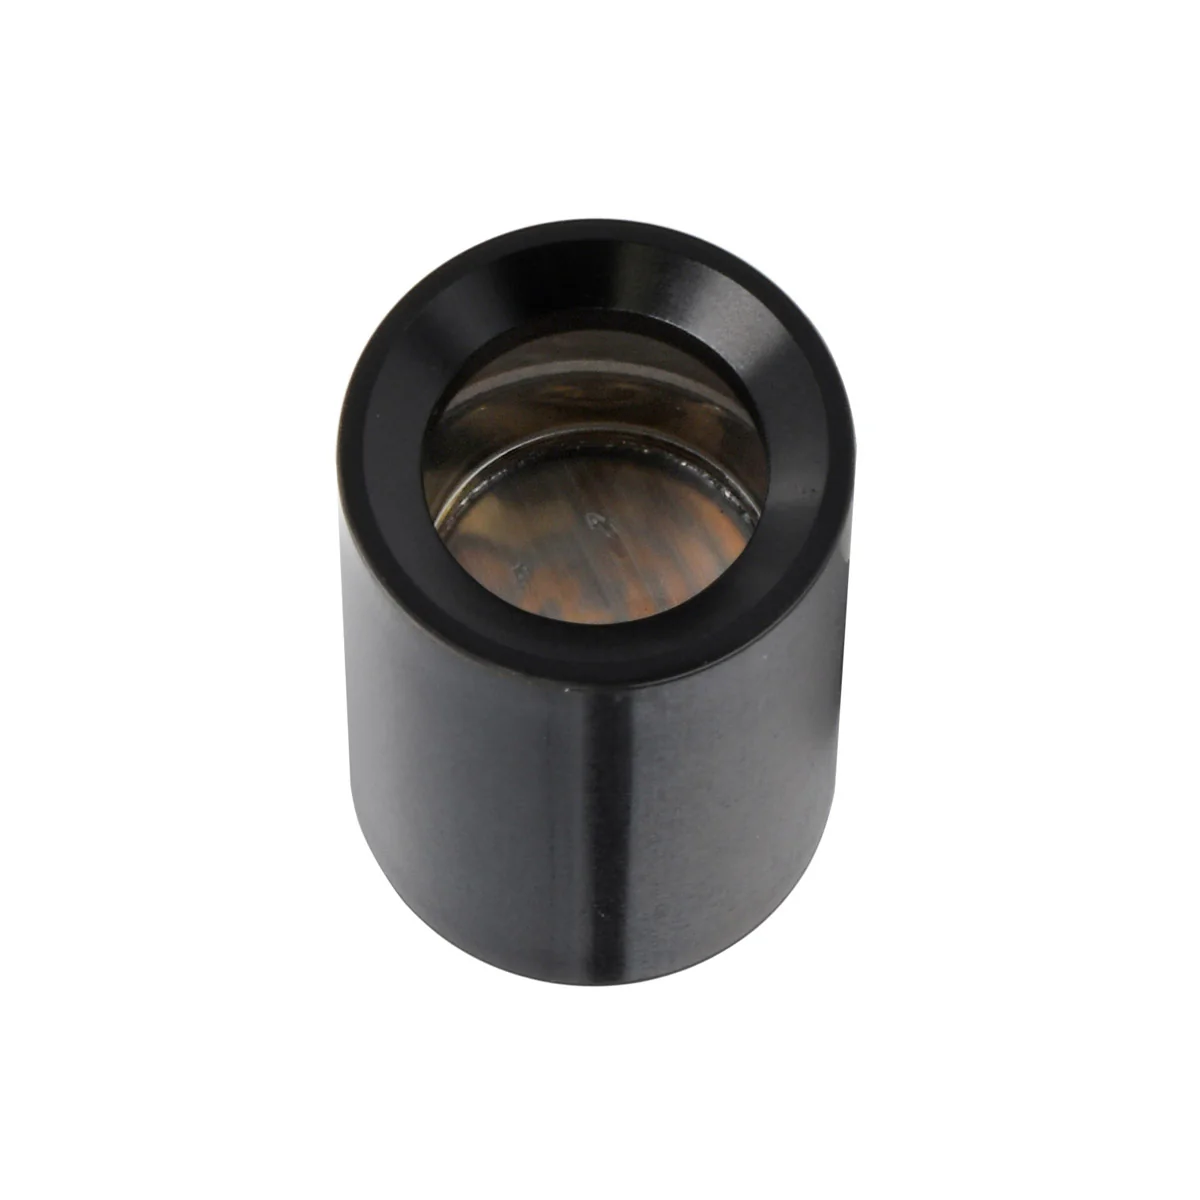
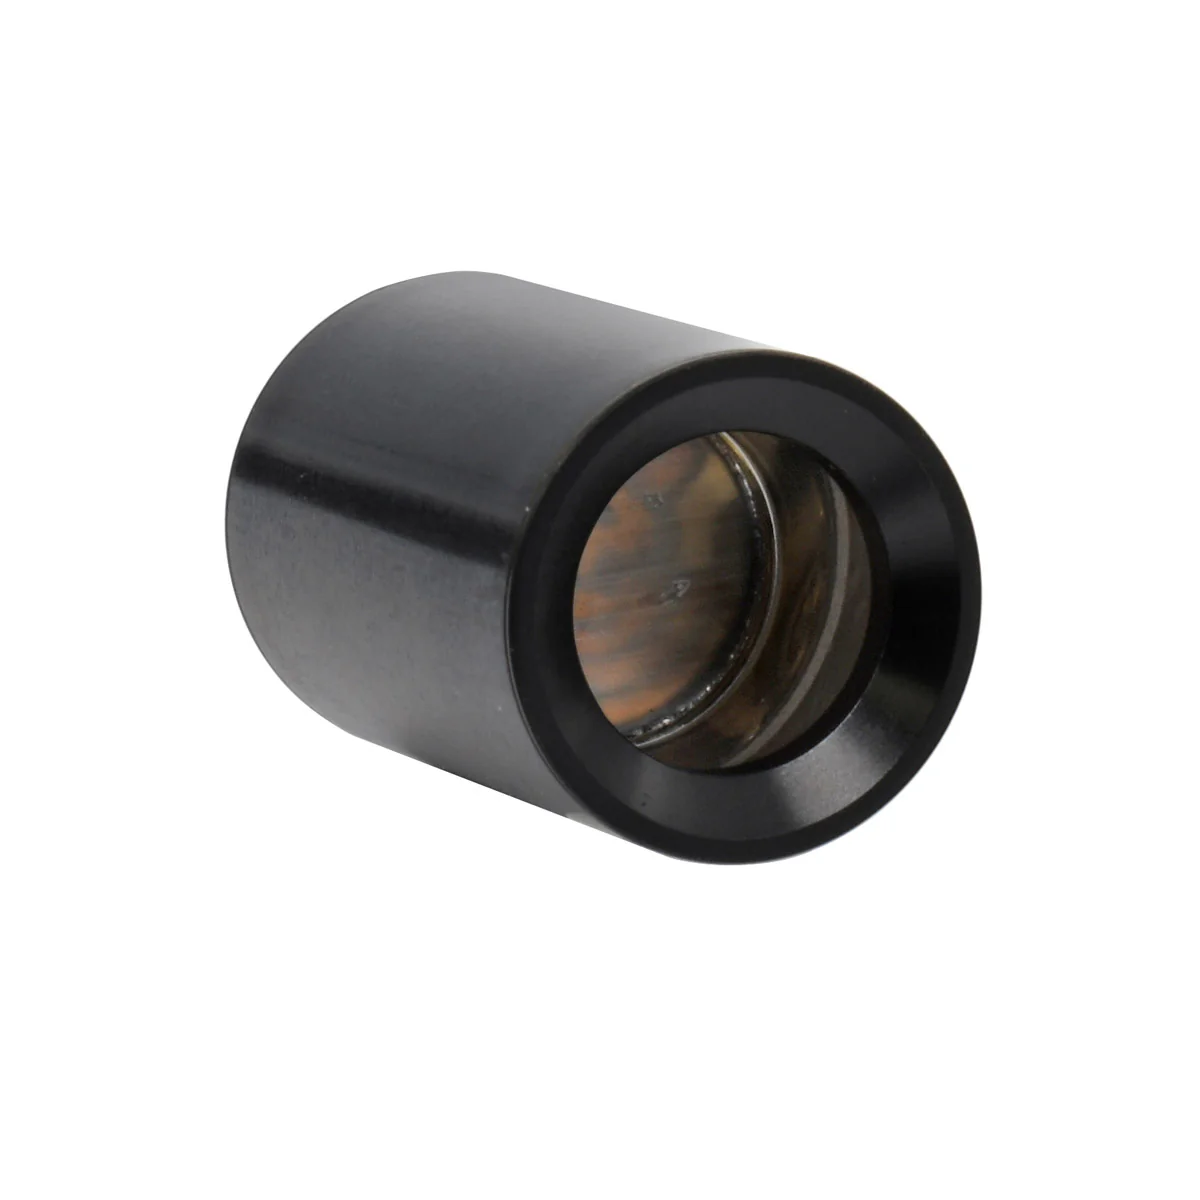
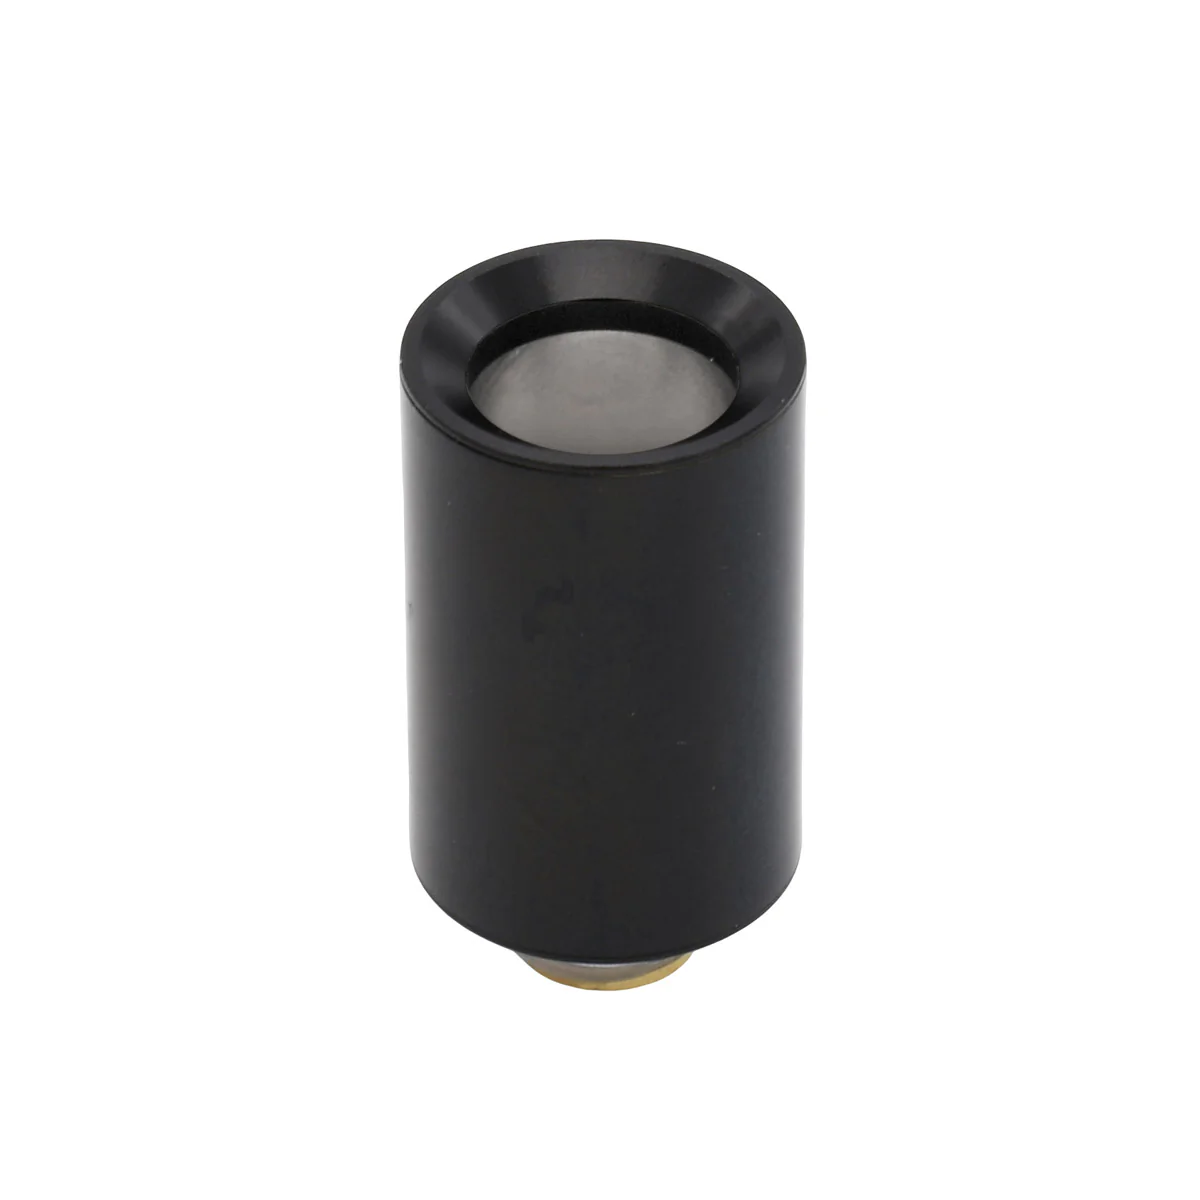
- Wax Atomizer with Coiless Quartz Cup
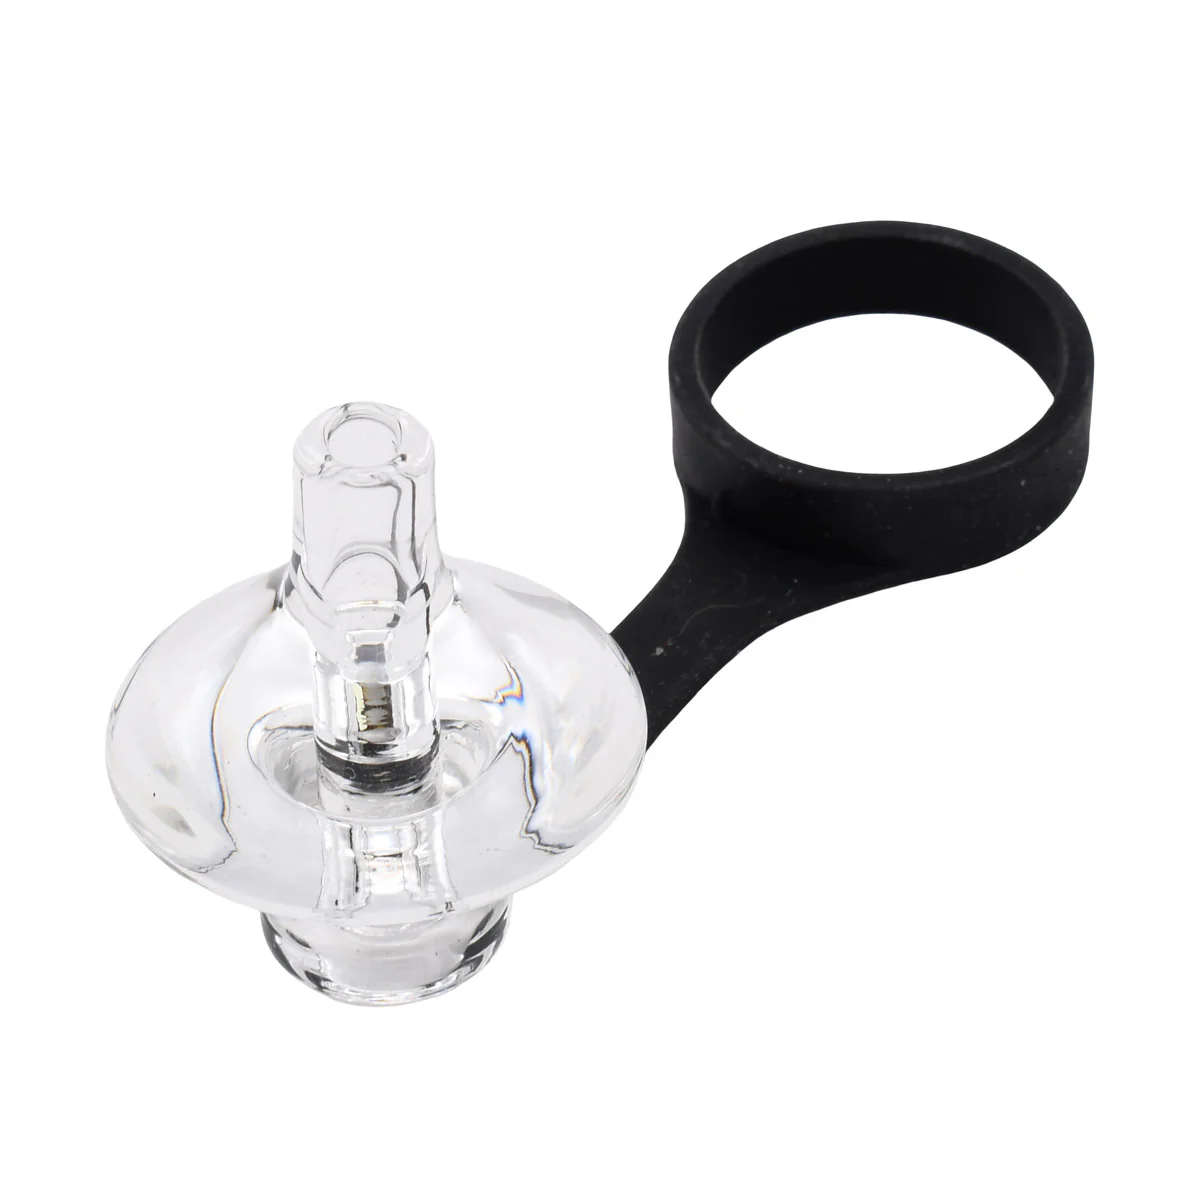
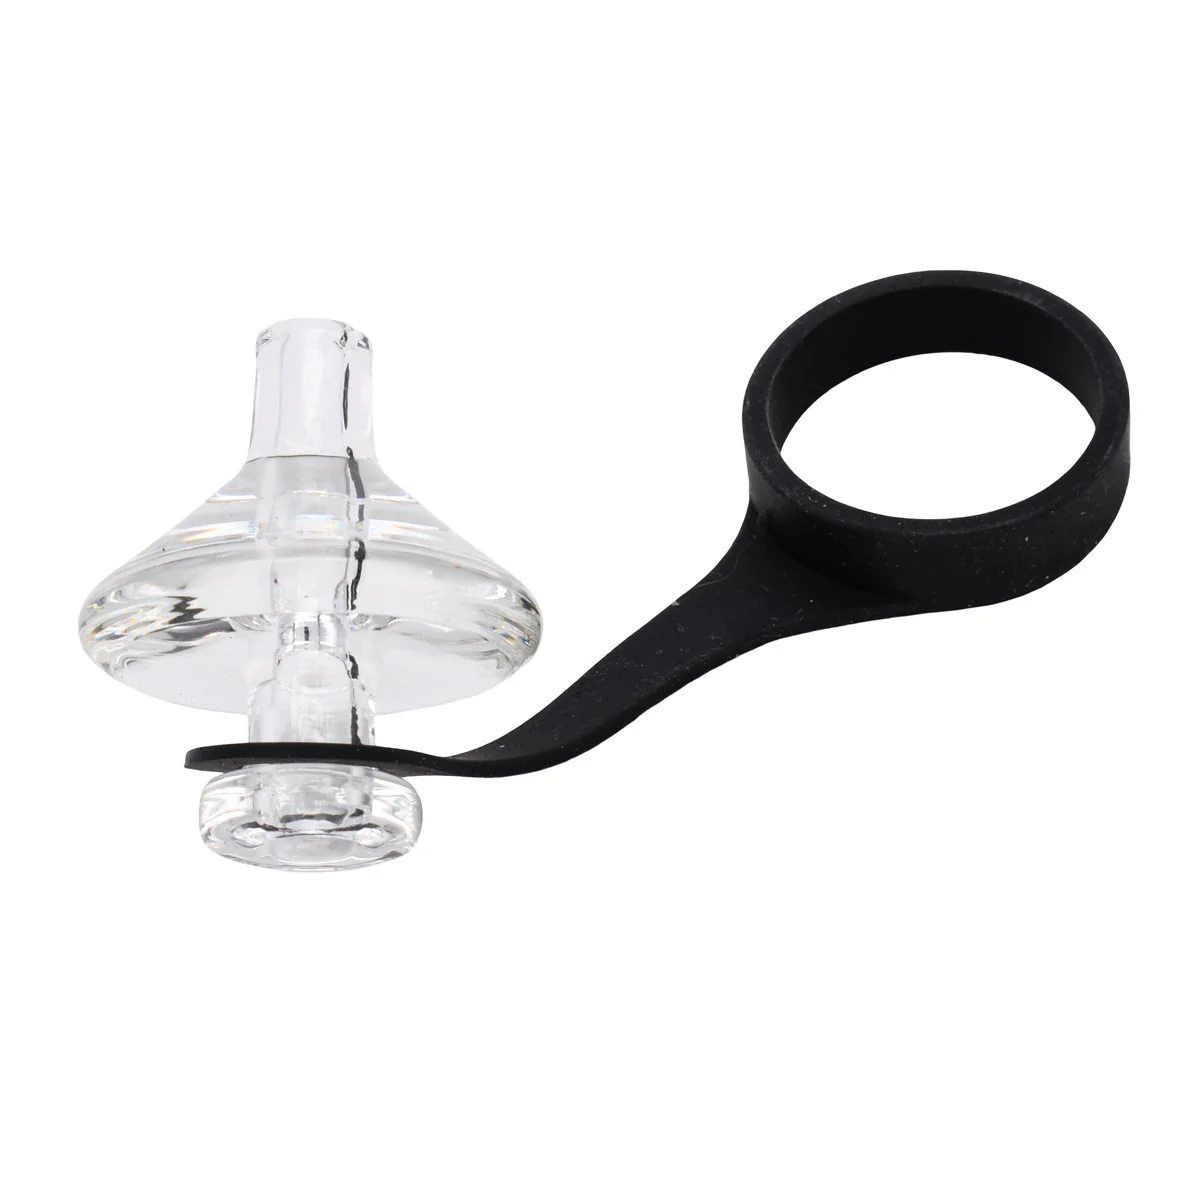
- Glass Carb Cap Atomizer Cover (with Silicone Tether)
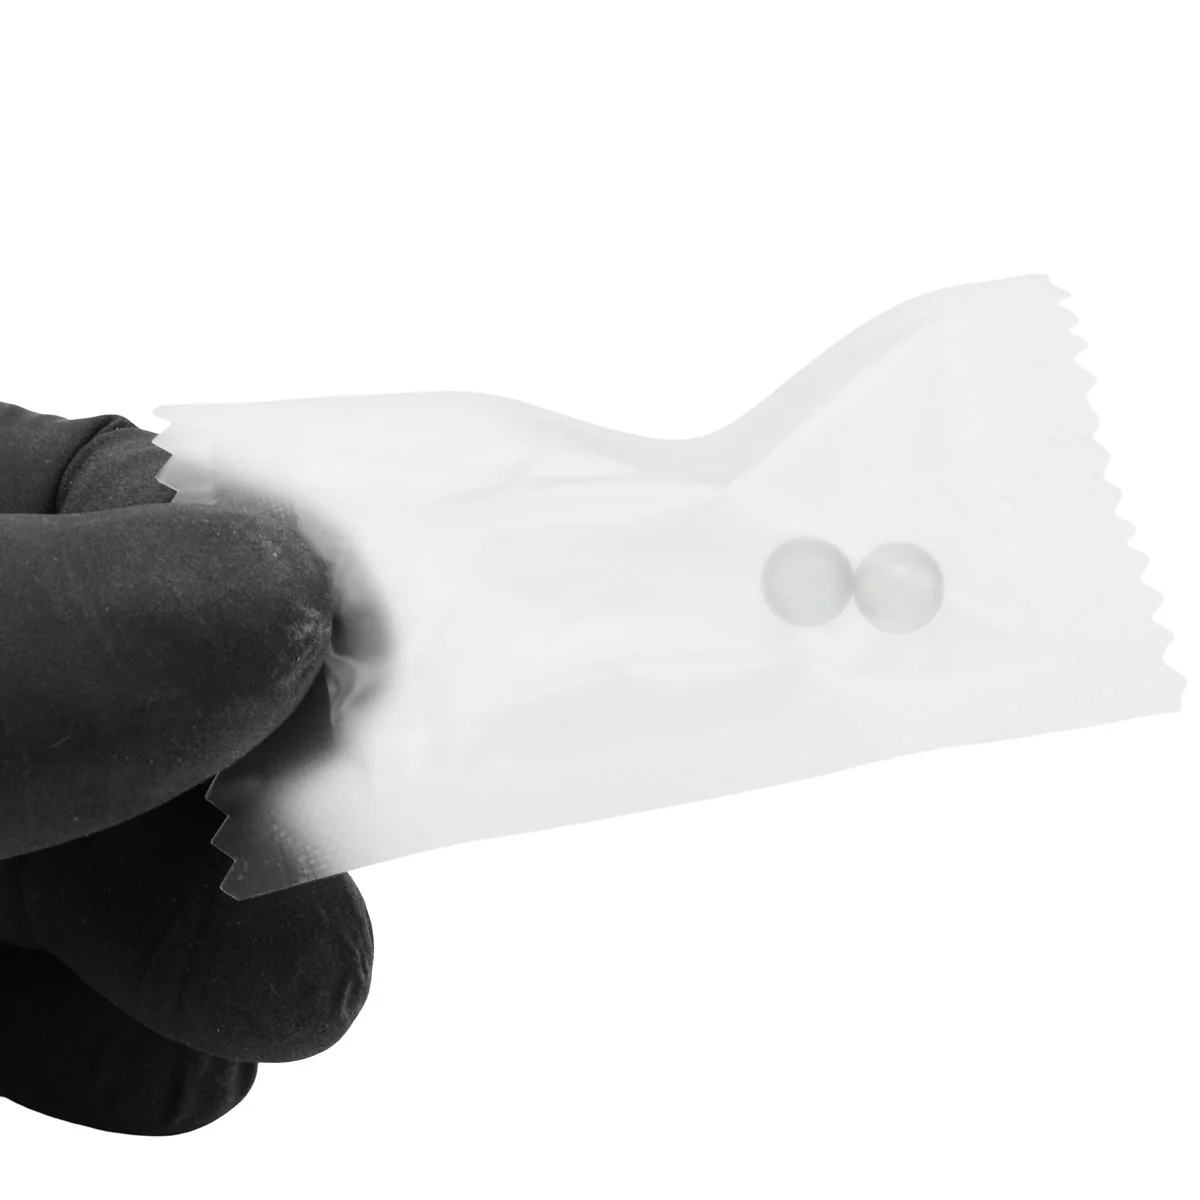
- 2 x Quartz Balls For Dabs
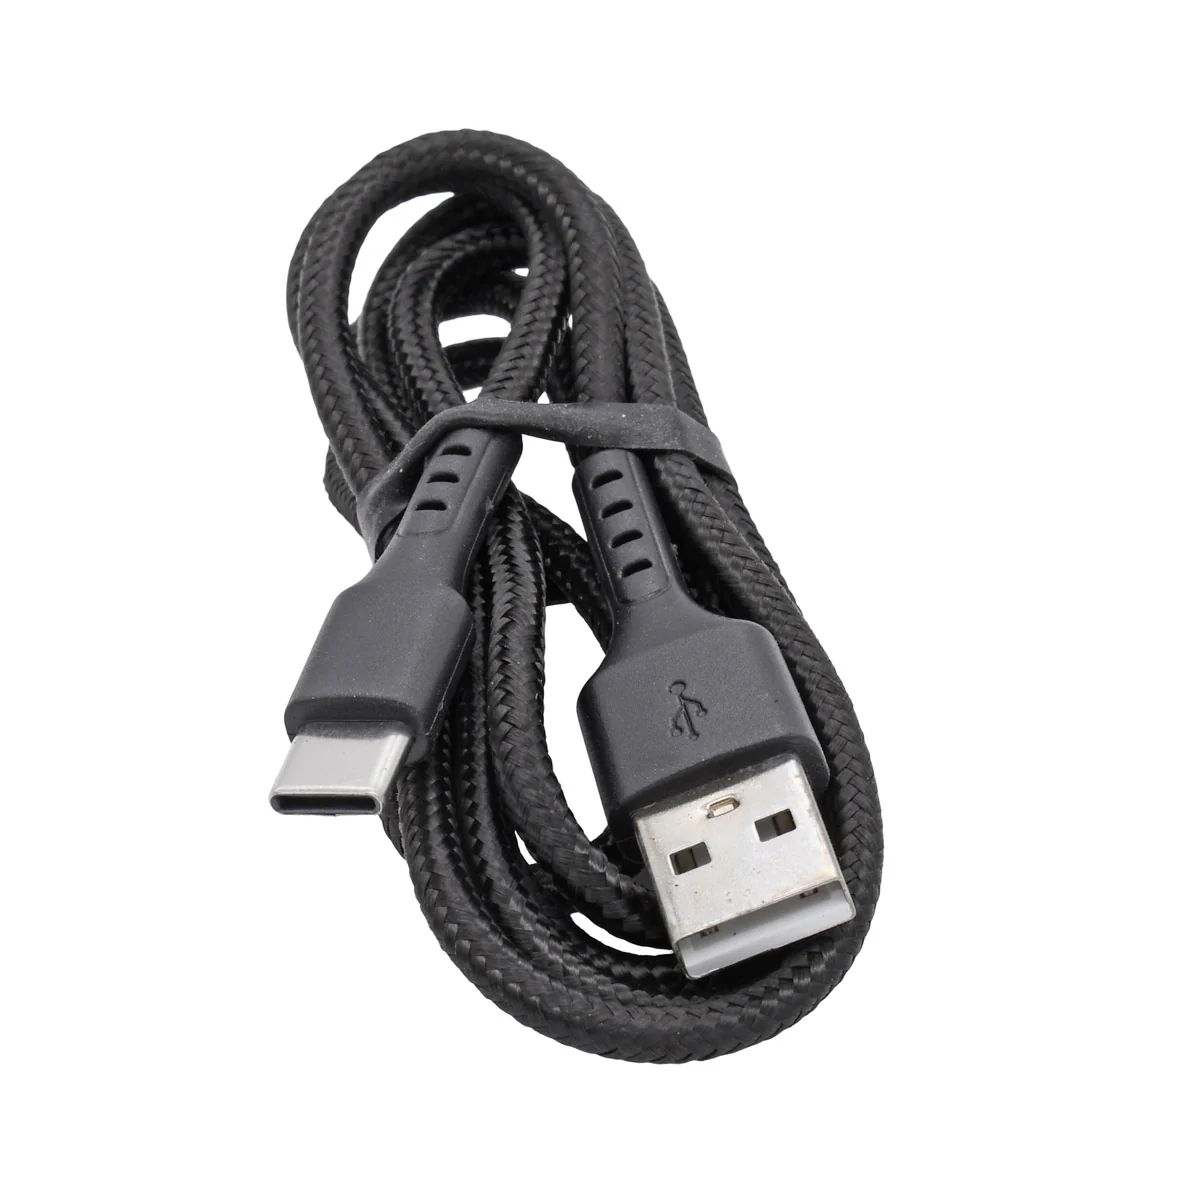
- USB-C Charging Cable
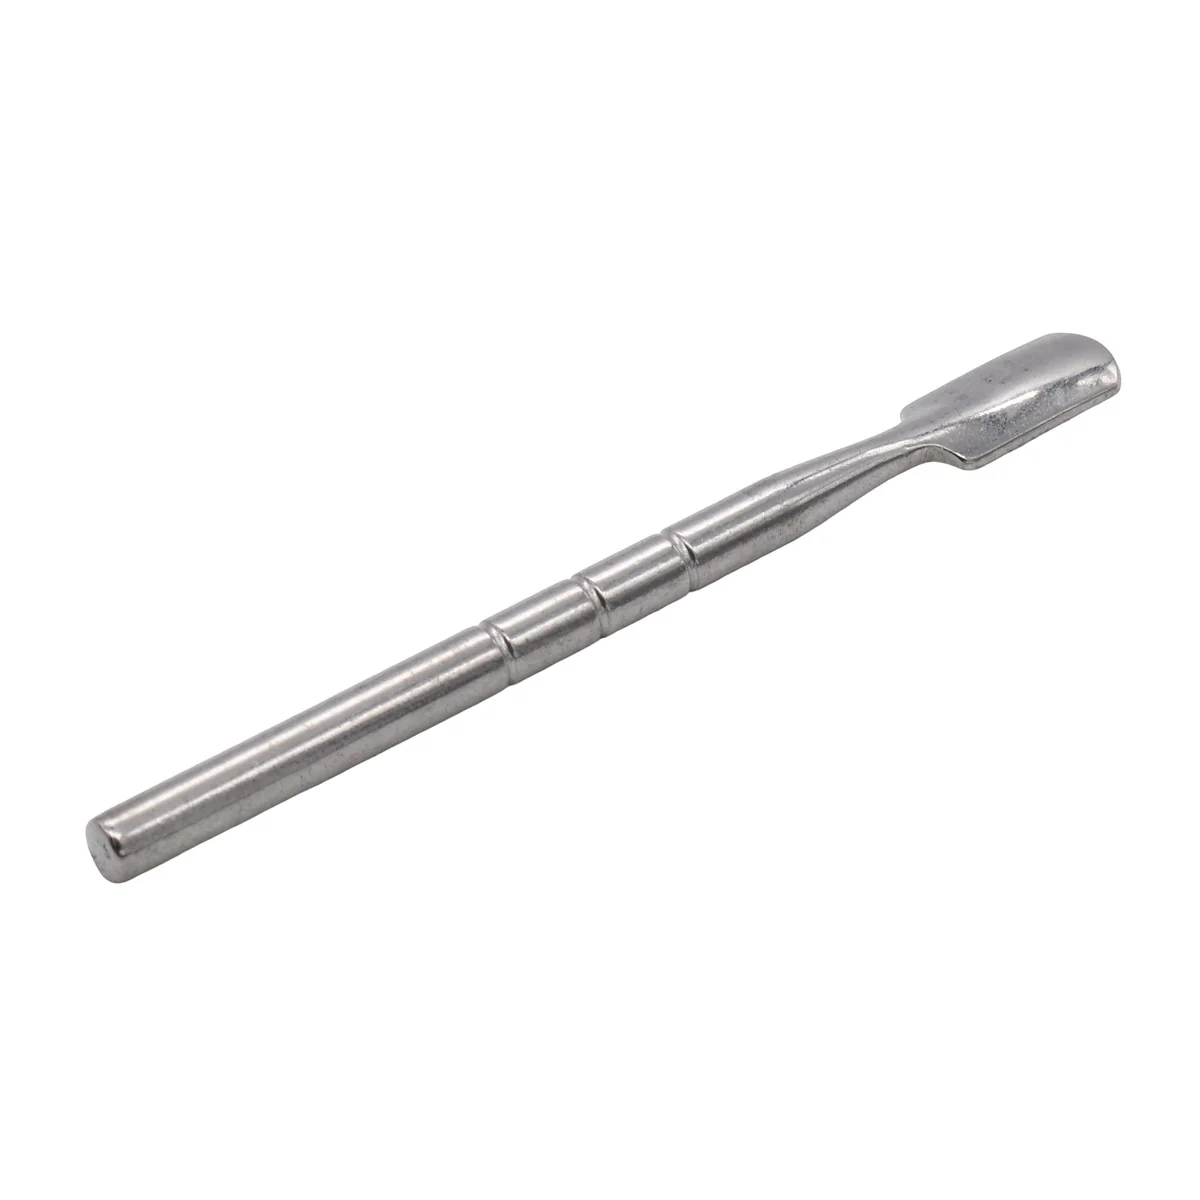
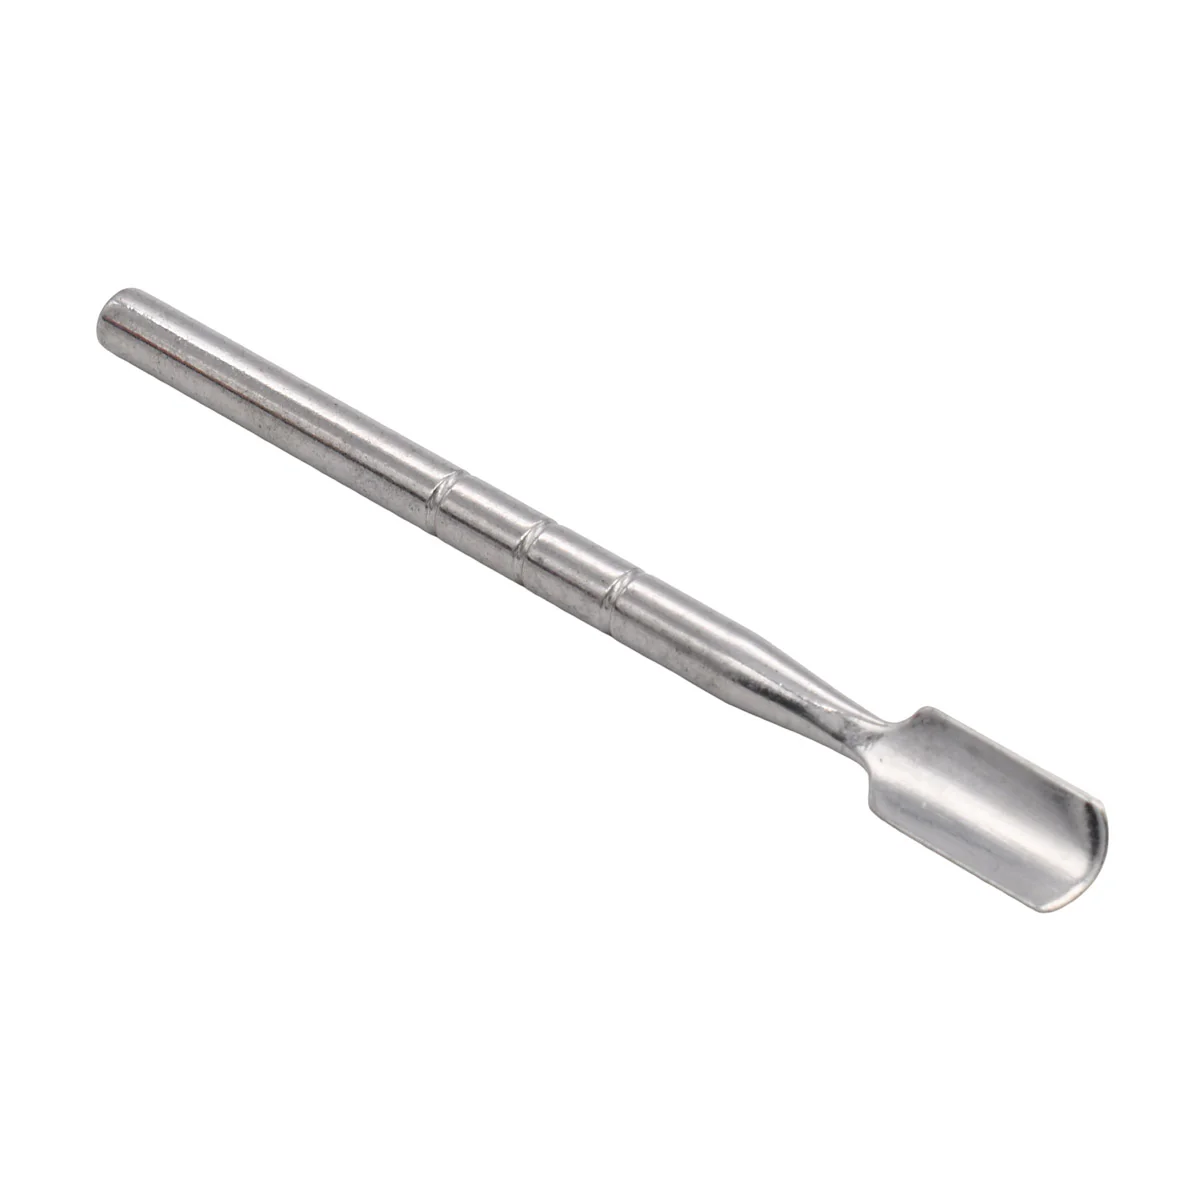
- Packaging Dab Tool
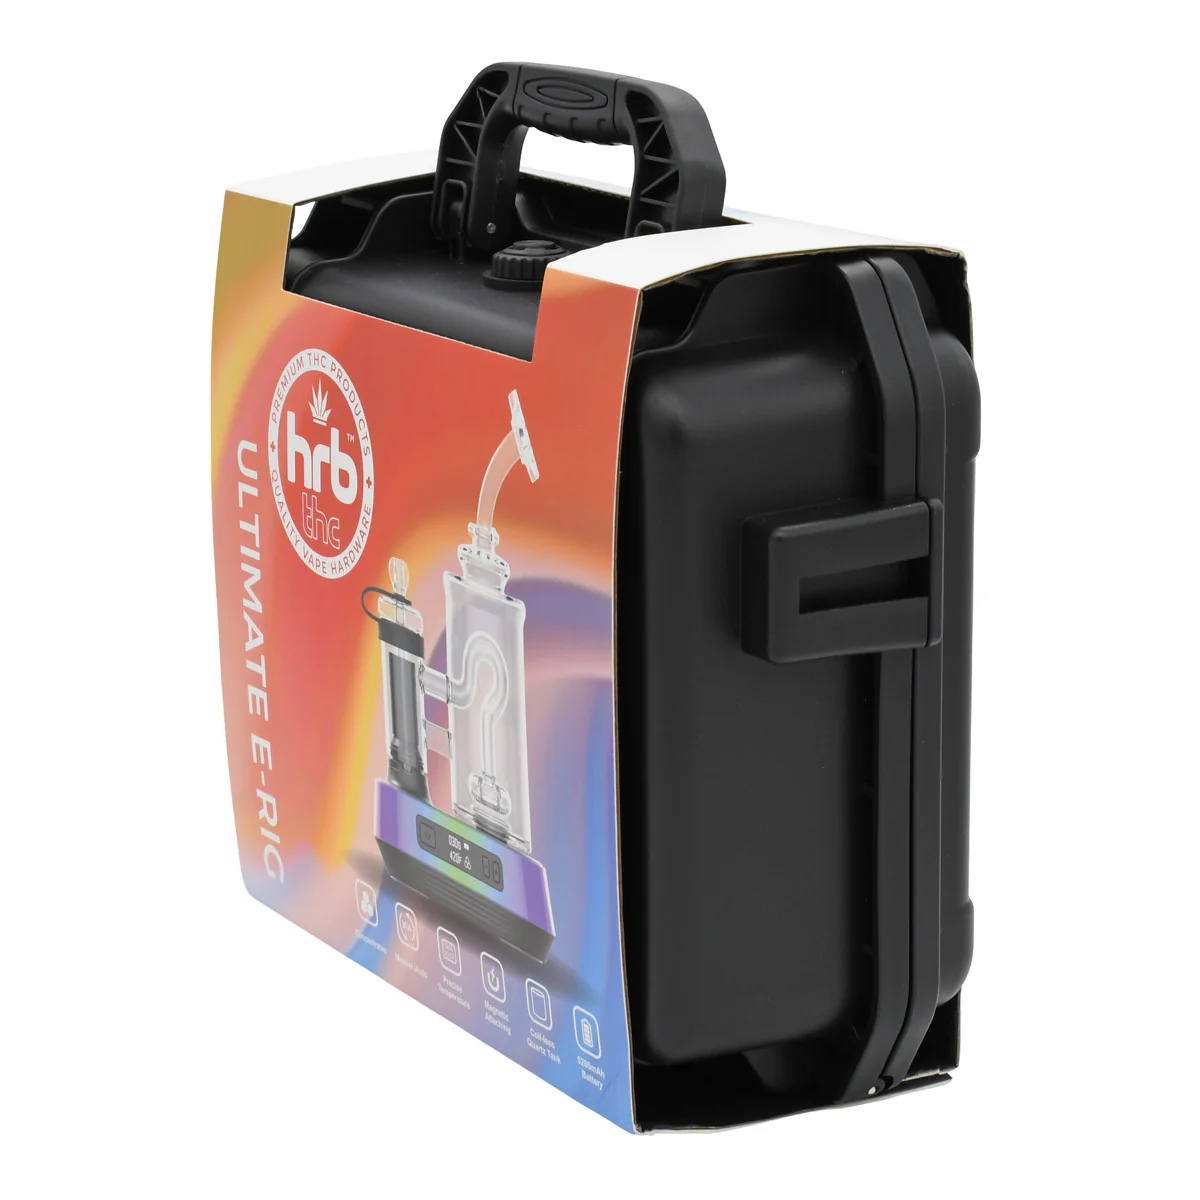
- 10.0"/ 8.0"/ 3.75" Airtight Waterproof Carrying Case
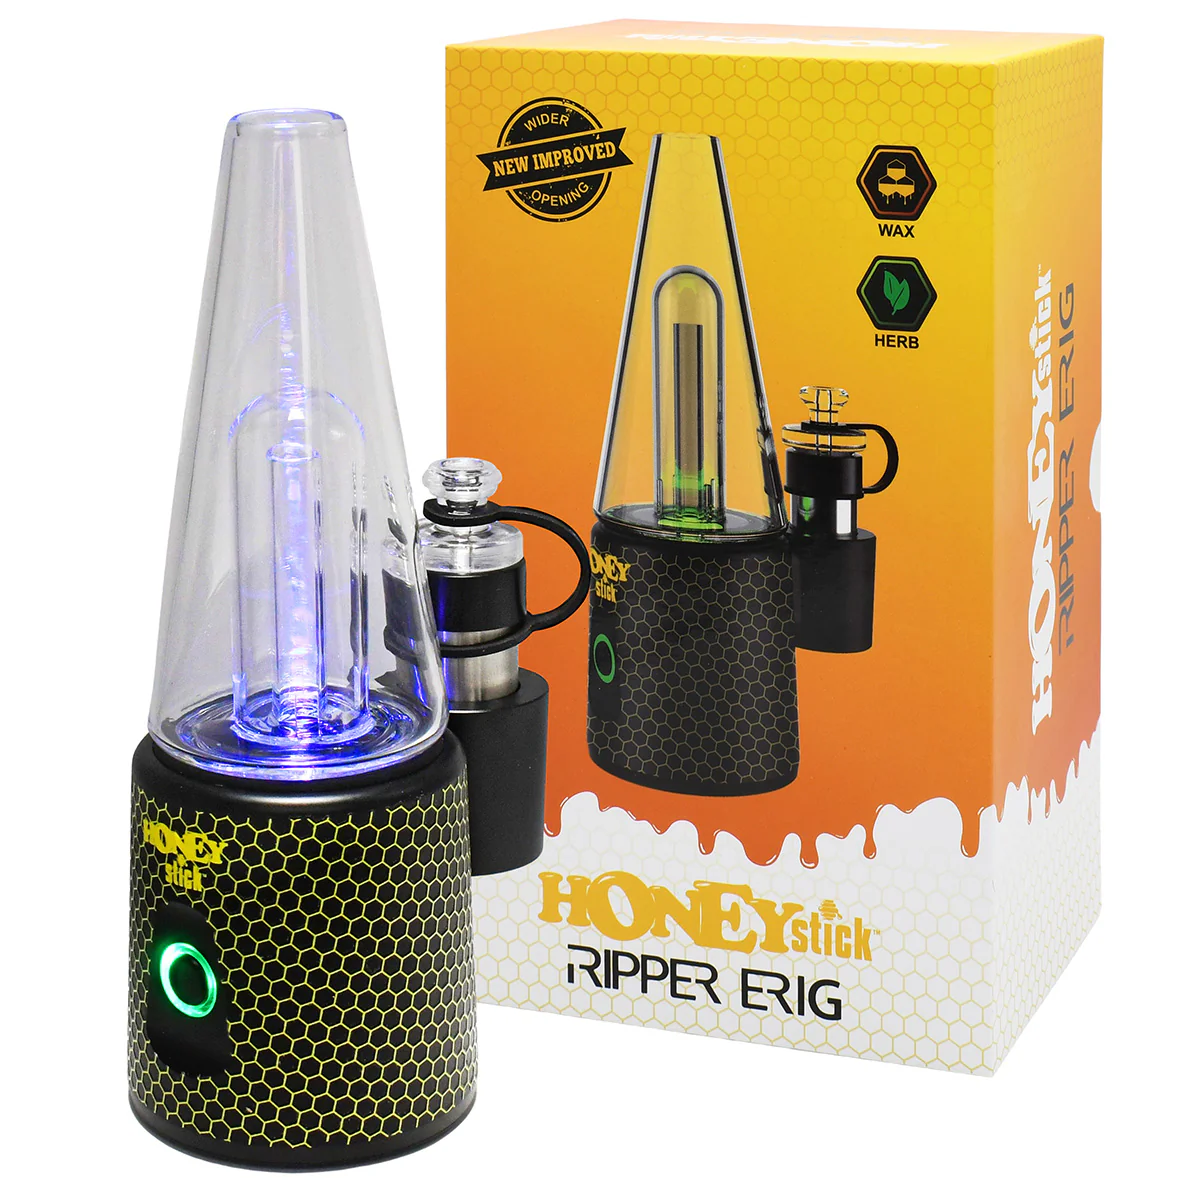
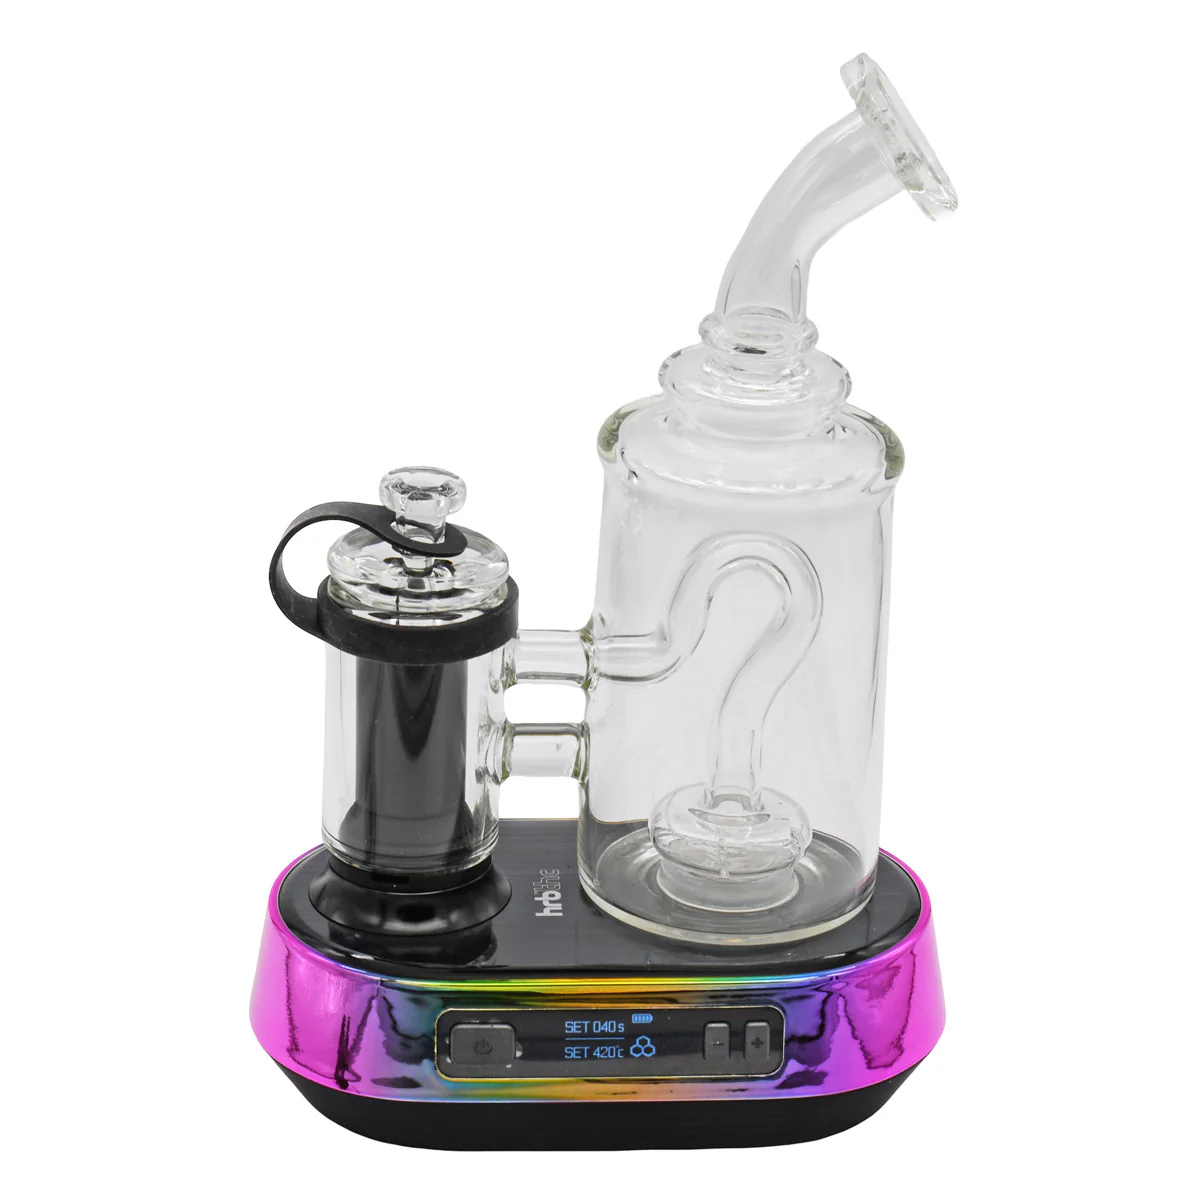
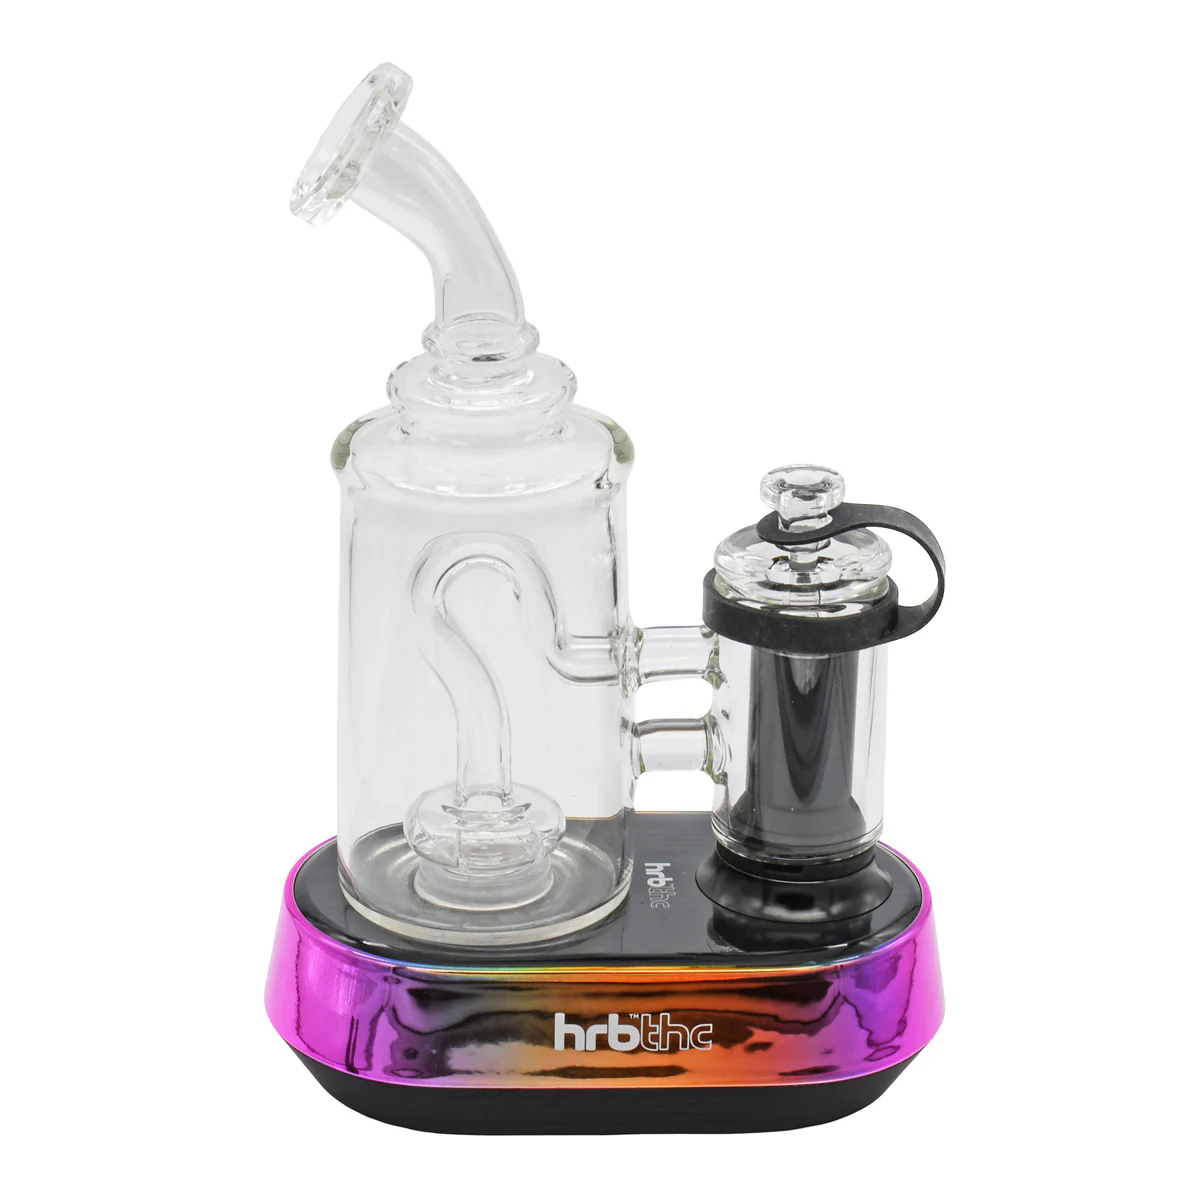
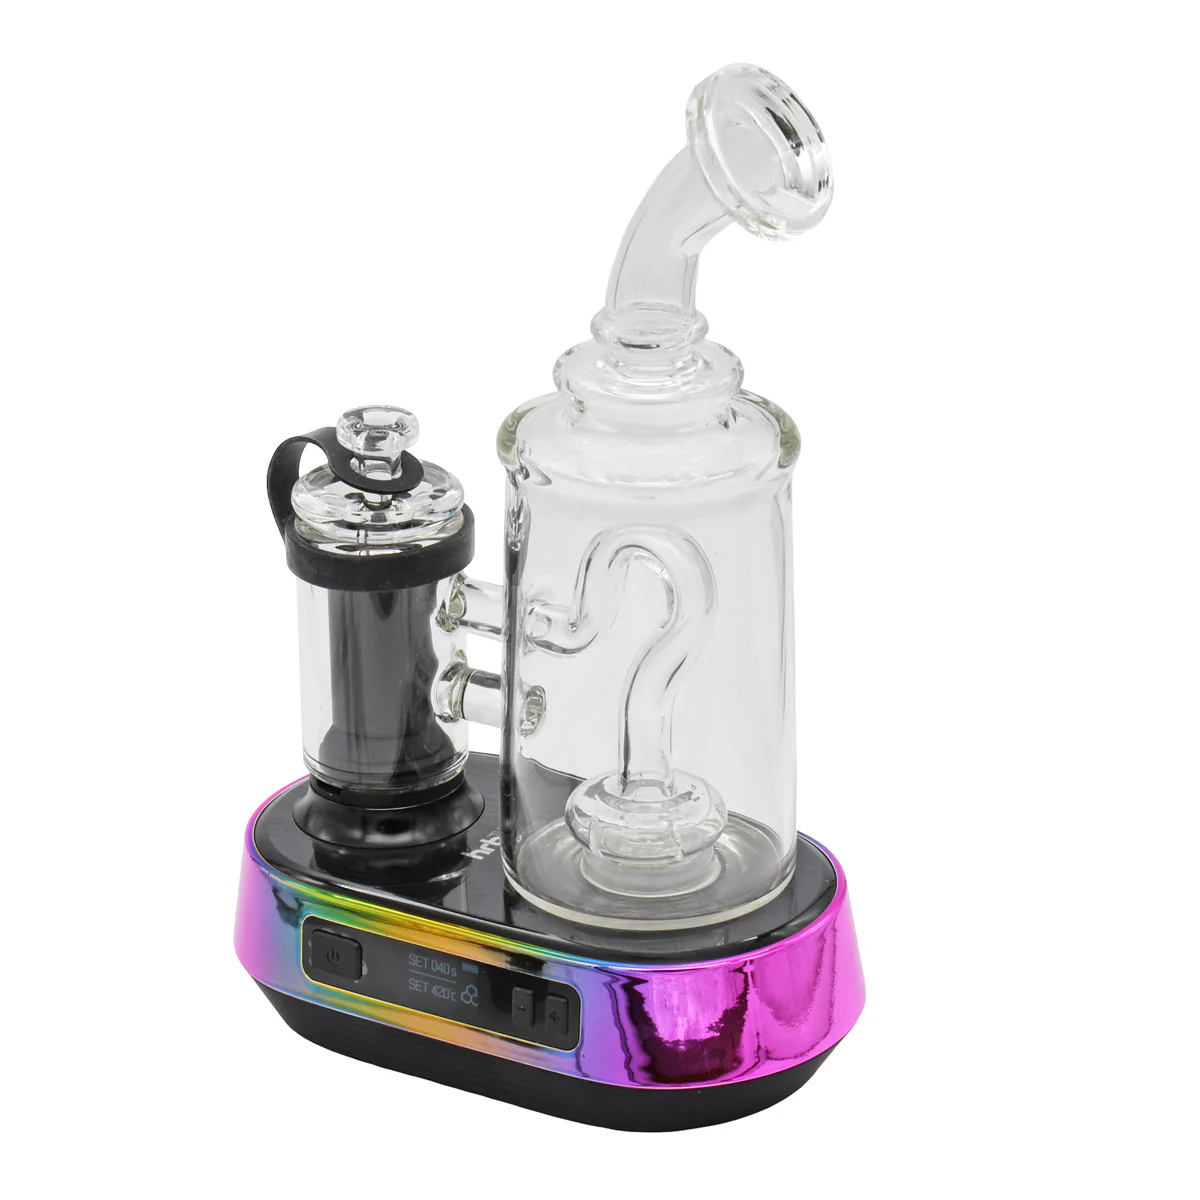
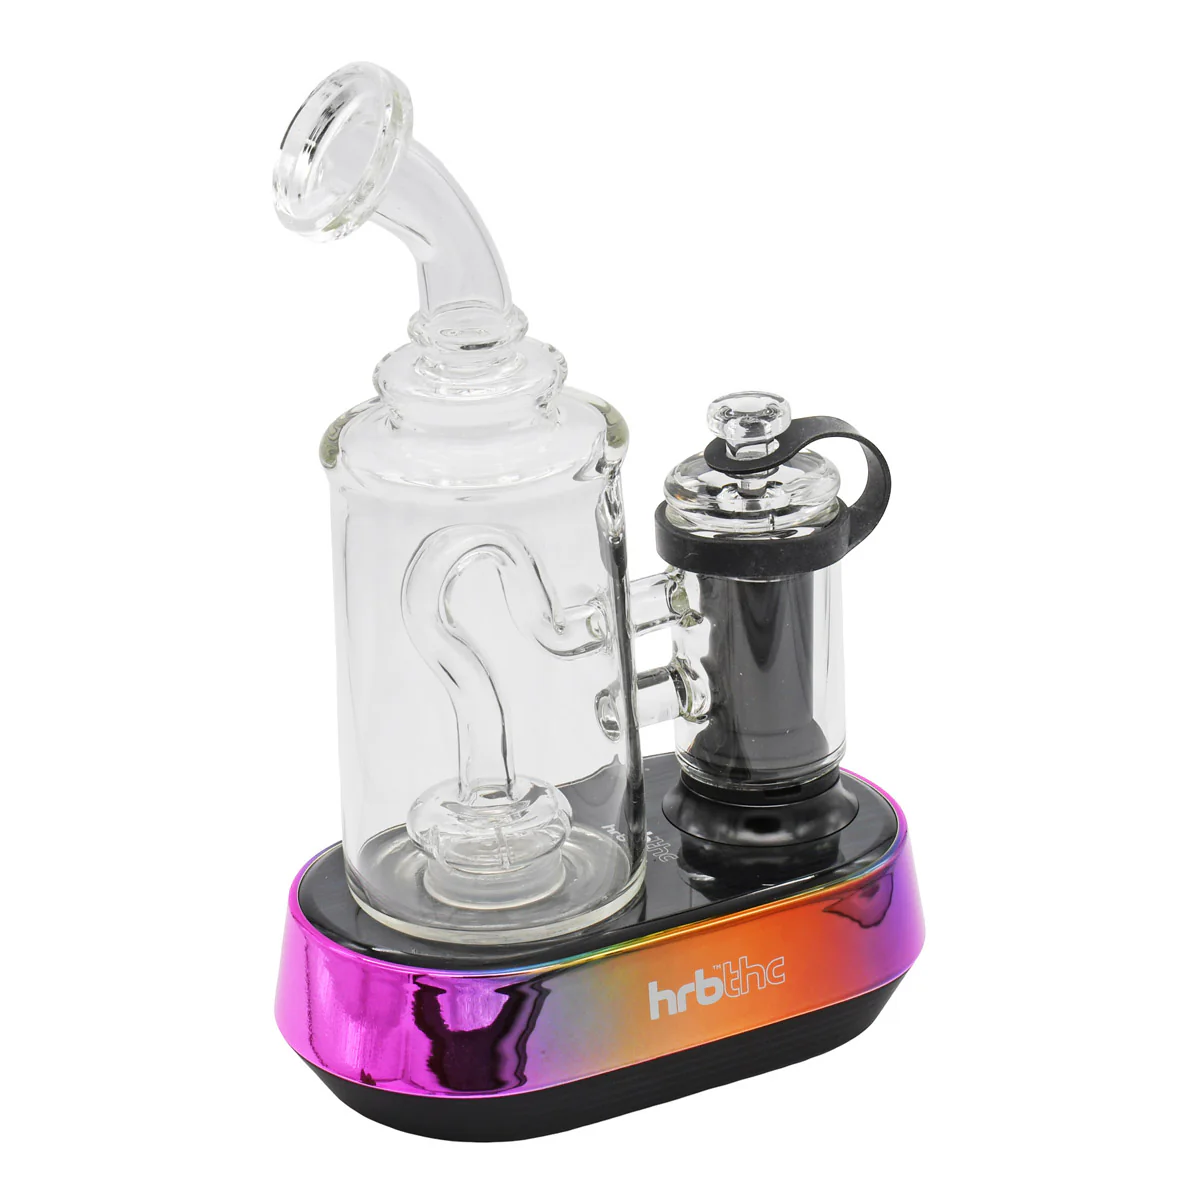
Hrb'Dup Electric Dab Rig
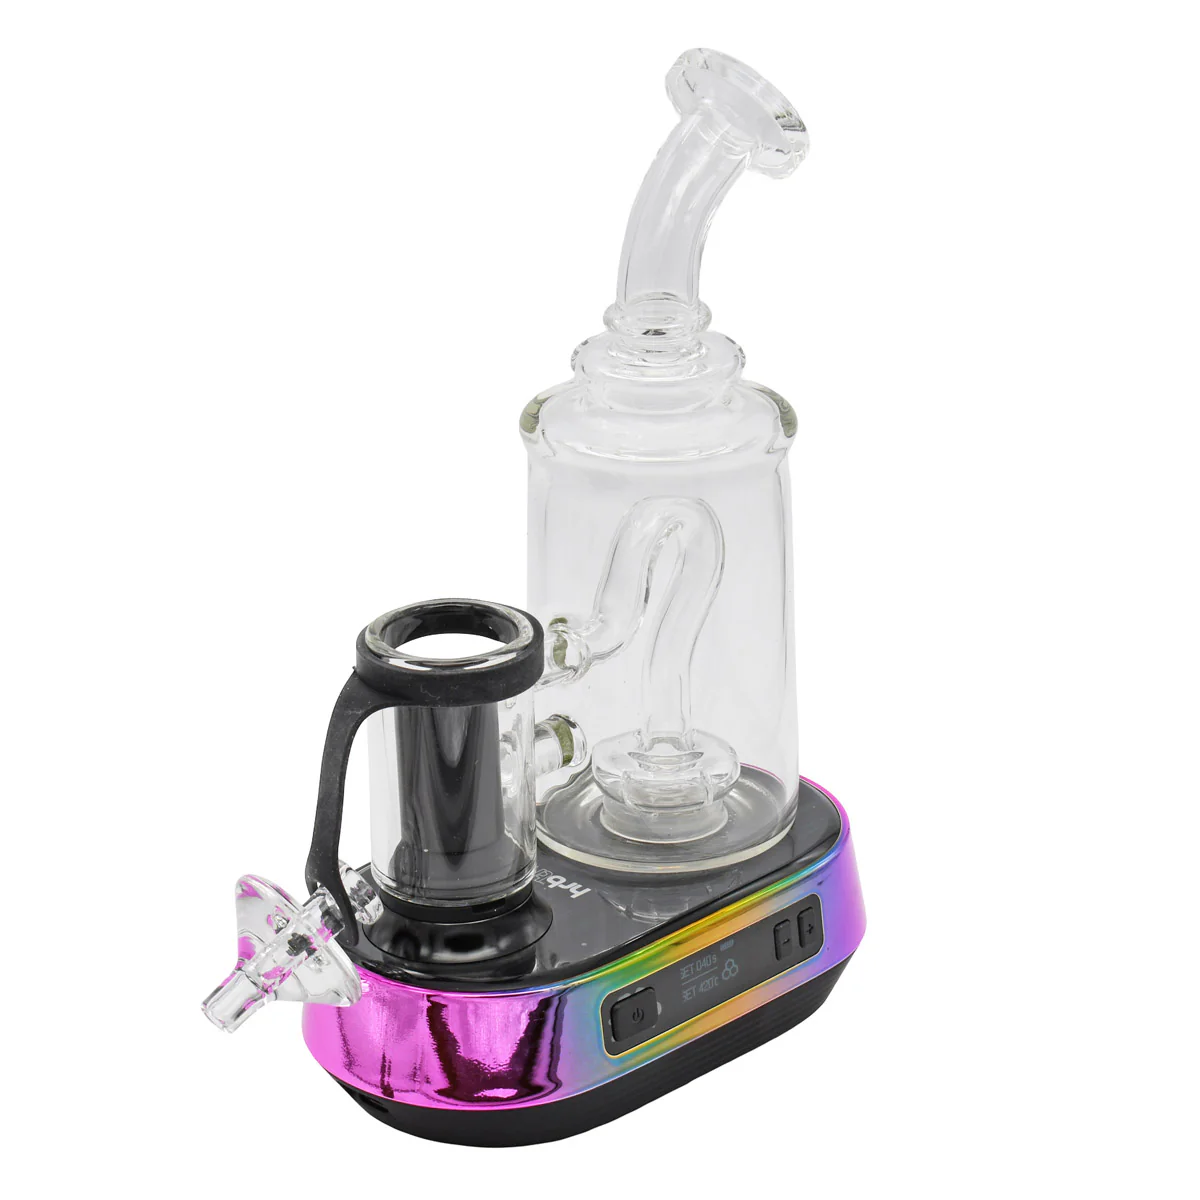
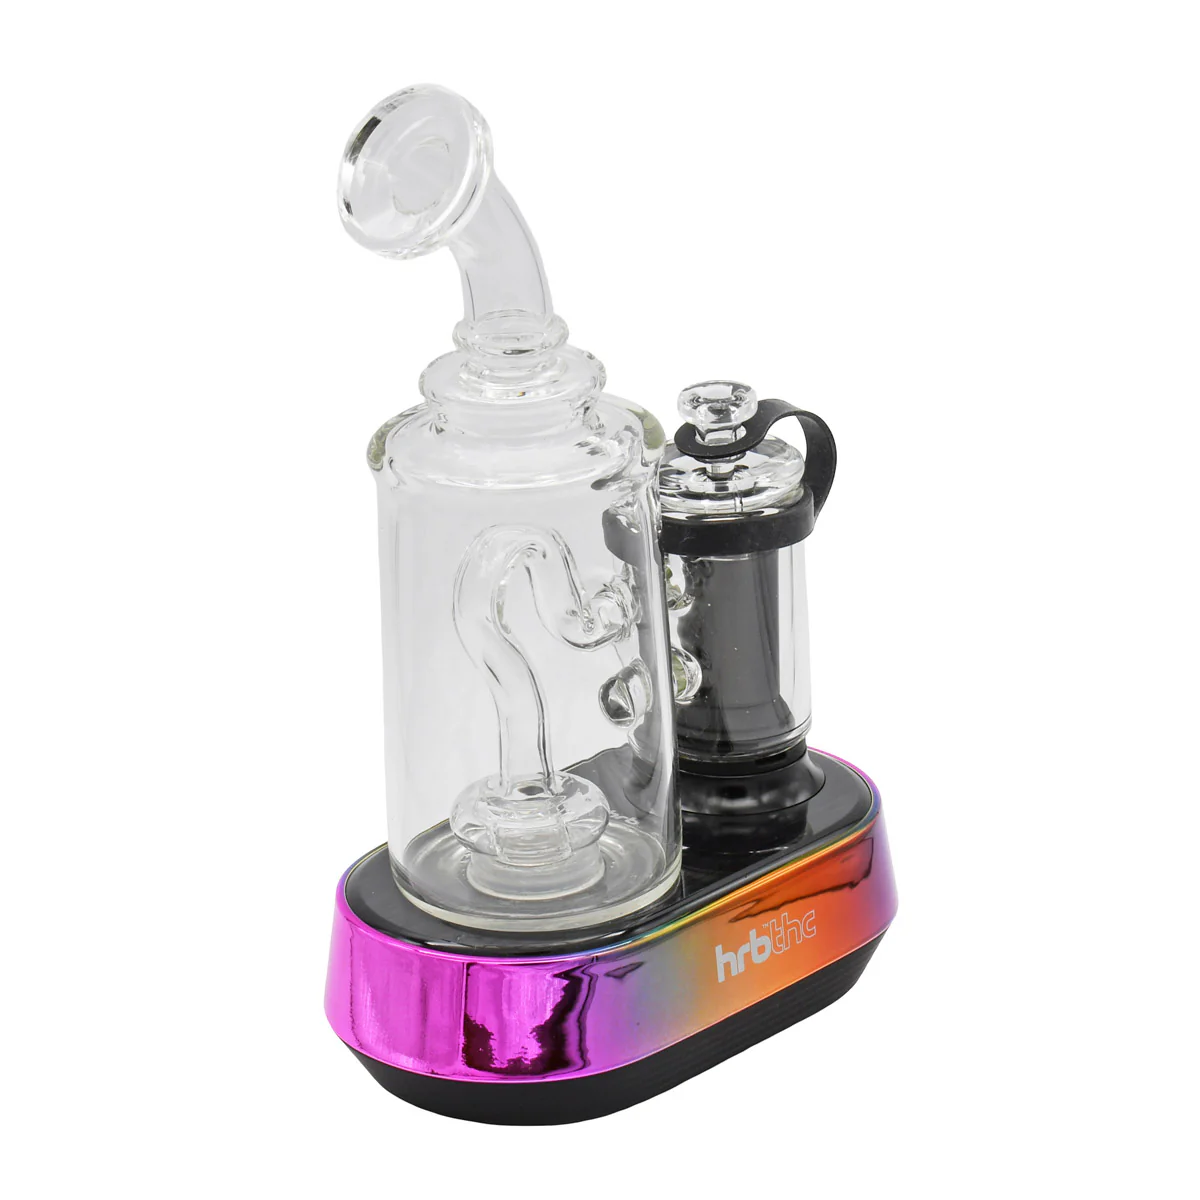
The HRB’Dup Ultimate Dab E-Rig brings desktop-style dab sessions into a sleek, portable, and easy-to-use electric rig. Designed for concentrate lovers who want smoother pulls without the torch drama, this e-rig features a coil-less quartz heating chamber, glass percolator, glass carb cap, and adjustable temperature control from 392°F to 932°F for everything from low-temp flavor chasing to thicker hits production.
With a powerful 5200mAh rechargeable battery, USB-C fast charging, OLED display, 10–60 second session timer, manual and automatic heating modes, LED lights, and audible feedback, the HRB’Dup makes dabbing feel cleaner, smarter, and more controlled. Just load your concentrate, set your temp, start the session, and let the rig do the heavy lifting.
⬇ INSTRUCTION MANUAL ⬇
1. Safety Notice & Intended Use
Please read this guide fully before using the Hrb’Dup E-Rig for dabs. Improper operation, incorrect cleaning, water overfilling, overheating, or misuse may damage the unit, void warranty coverage, or create a safety risk.
The Hrb’Dup E-Rig is intended for use by adults of legal smoking age only. It should not be used by children, non-smokers, pregnant or breastfeeding individuals, or anyone advised by a physician to avoid vapor products.
Do not use this device if you have heart disease, blood pressure concerns, hypertension, diabetes, asthma, or similar health risks. Stop use immediately and consult a physician if you experience nausea, vomiting, dizziness, diarrhea, weakness, rapid heartbeat, or other unusual symptoms.
This product is not intended to diagnose, treat, cure, or prevent any disease.
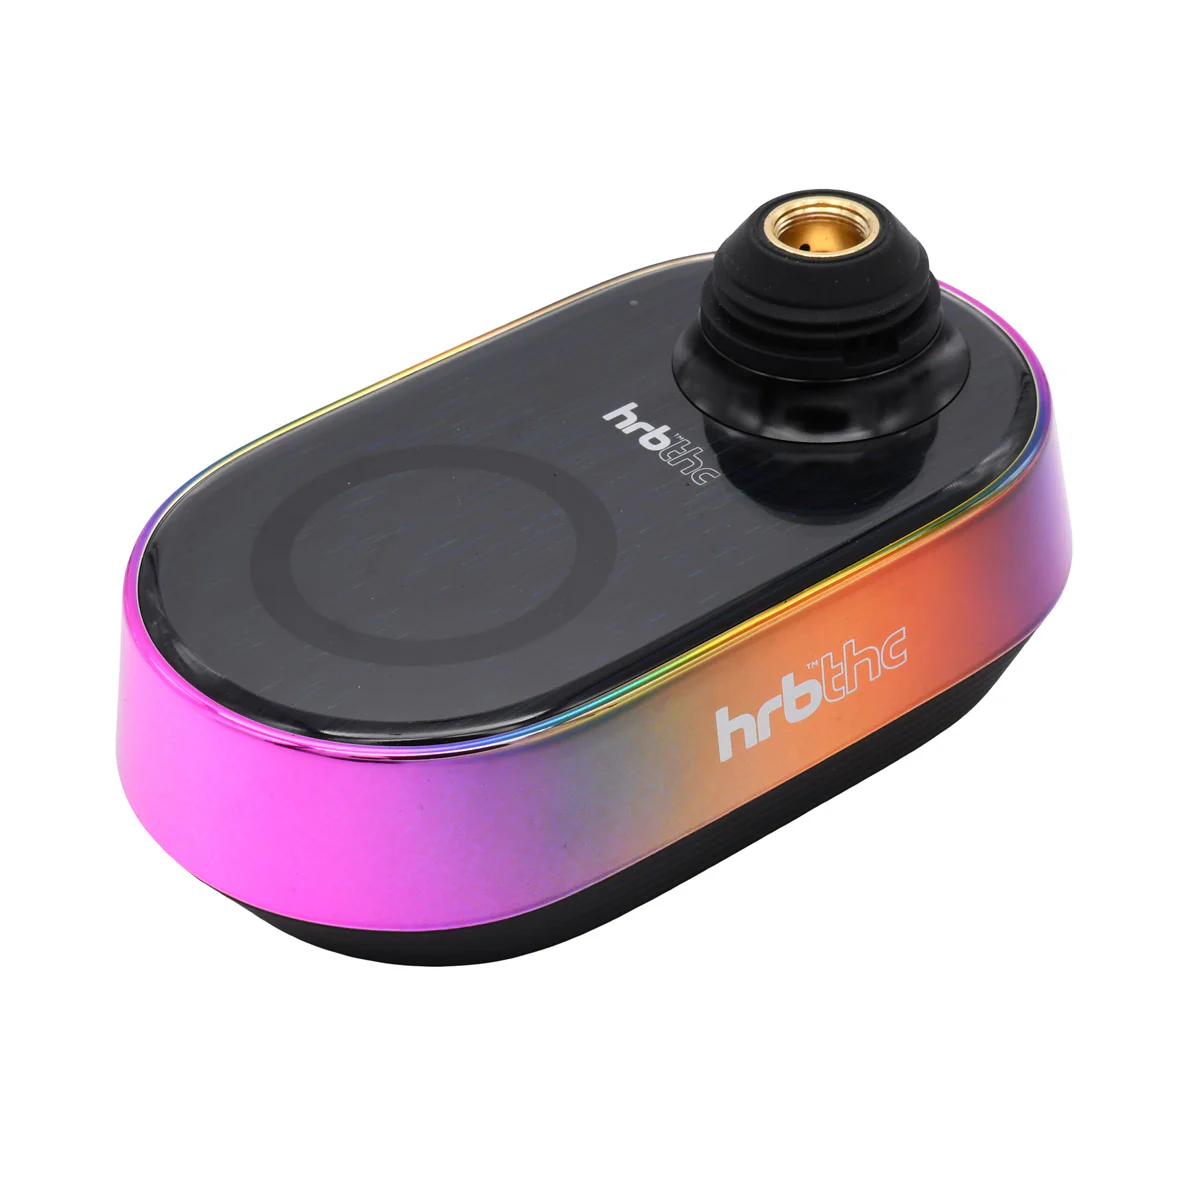
2. Hrb’Dup Ultimate E-Rig Product Overview
The HRB’Dup Ultimate E-Rig is a portable electronic dab rig designed for concentrates. It combines a rechargeable base, OLED display, adjustable temperature controls, session timer, coil-less quartz heating chamber, glass percolator, carb cap, and LED lighting.

3. What’s Included
Before first use, confirm that all major parts and accessories are included. If anything is missing, damaged, cracked, or not fitting correctly, do not operate the device.

| Included Part | Purpose |
|---|---|
| (A) Ultimate E-Rig Base | Main power unit with battery, buttons, OLED display, and electronics. |
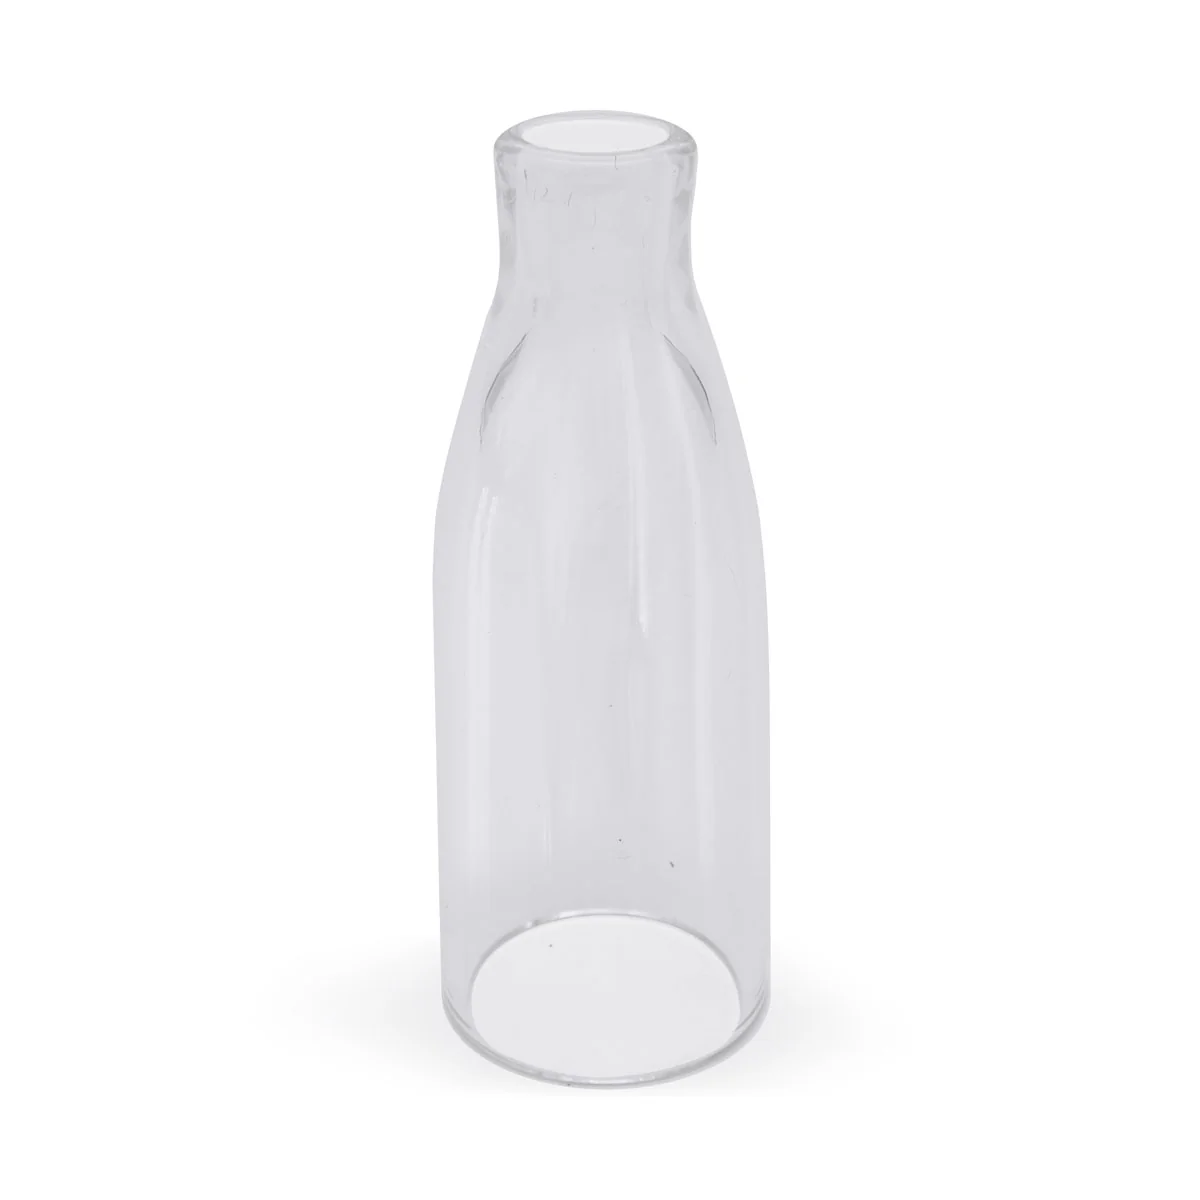
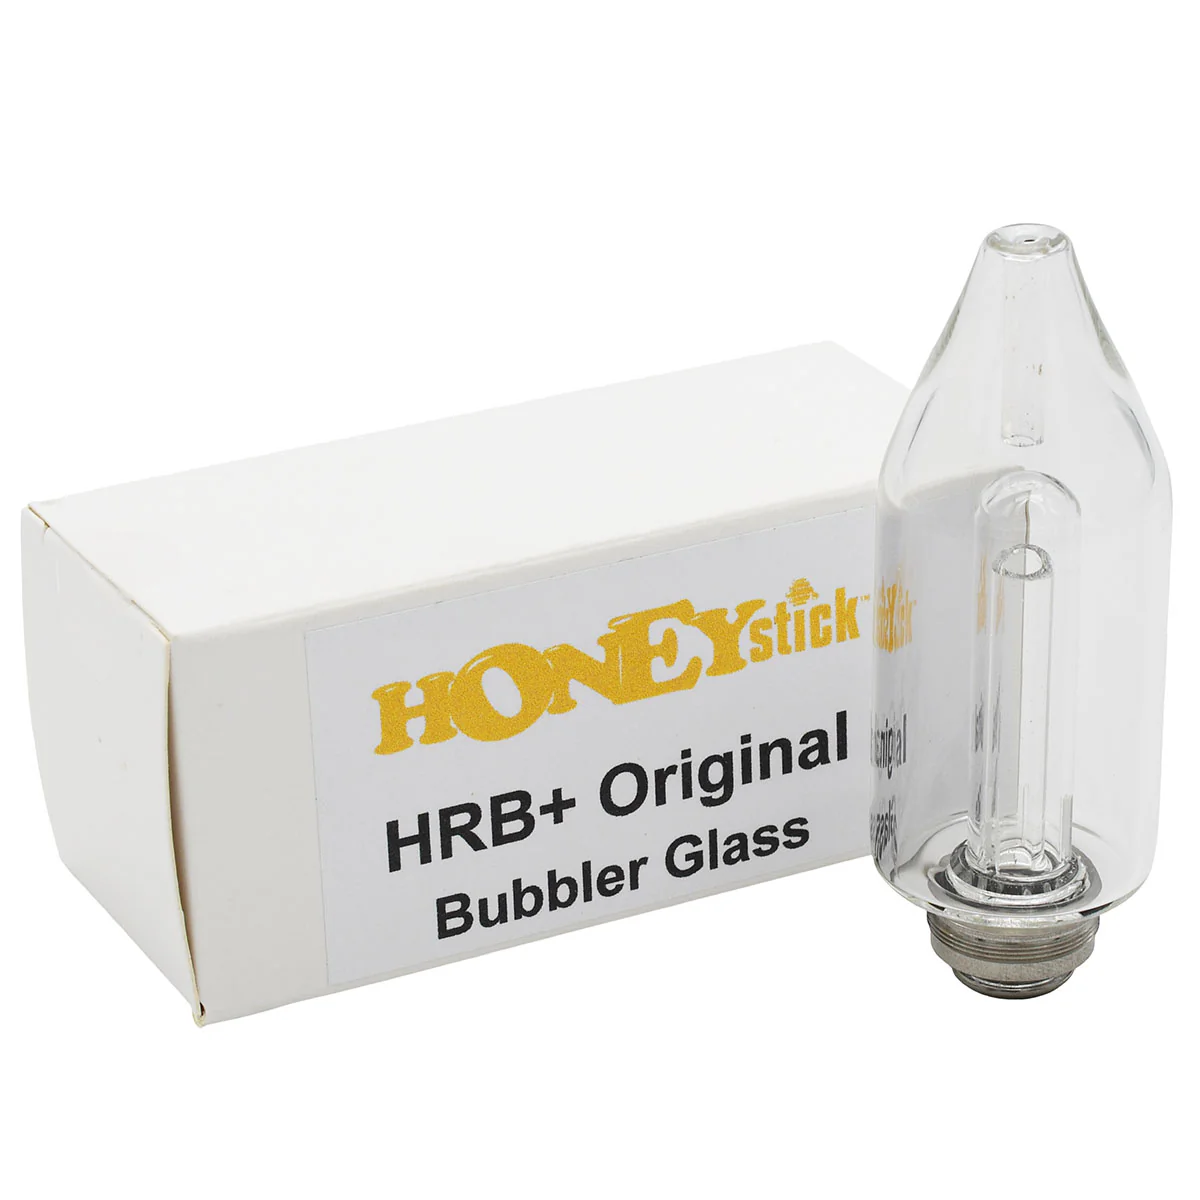
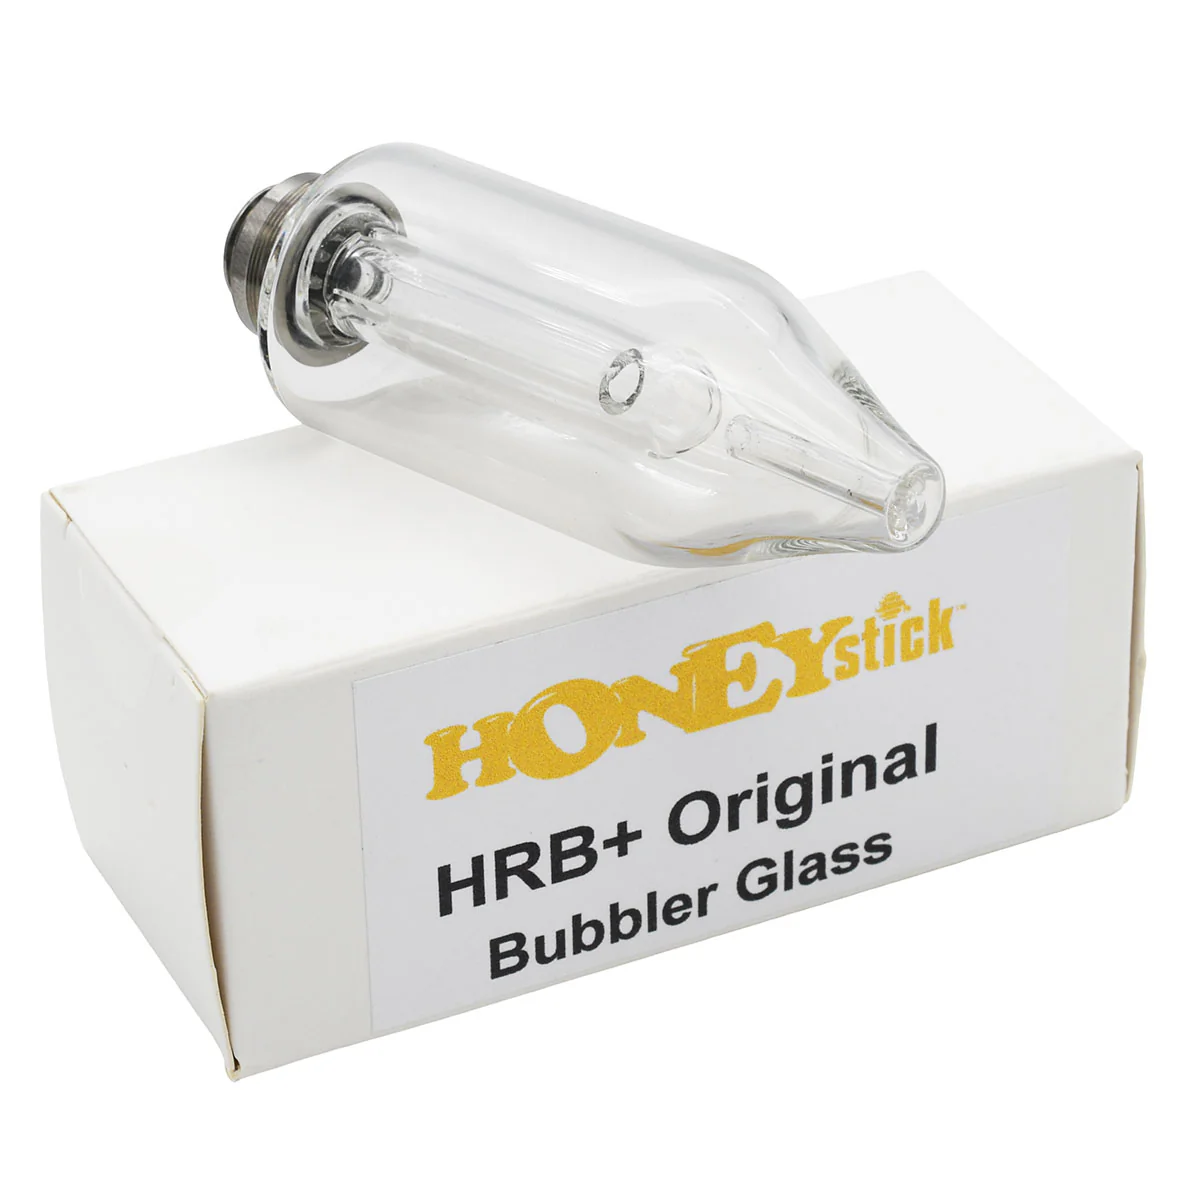
| (B) Glass Percolator | Water filtration attachment for smoother vapor. |
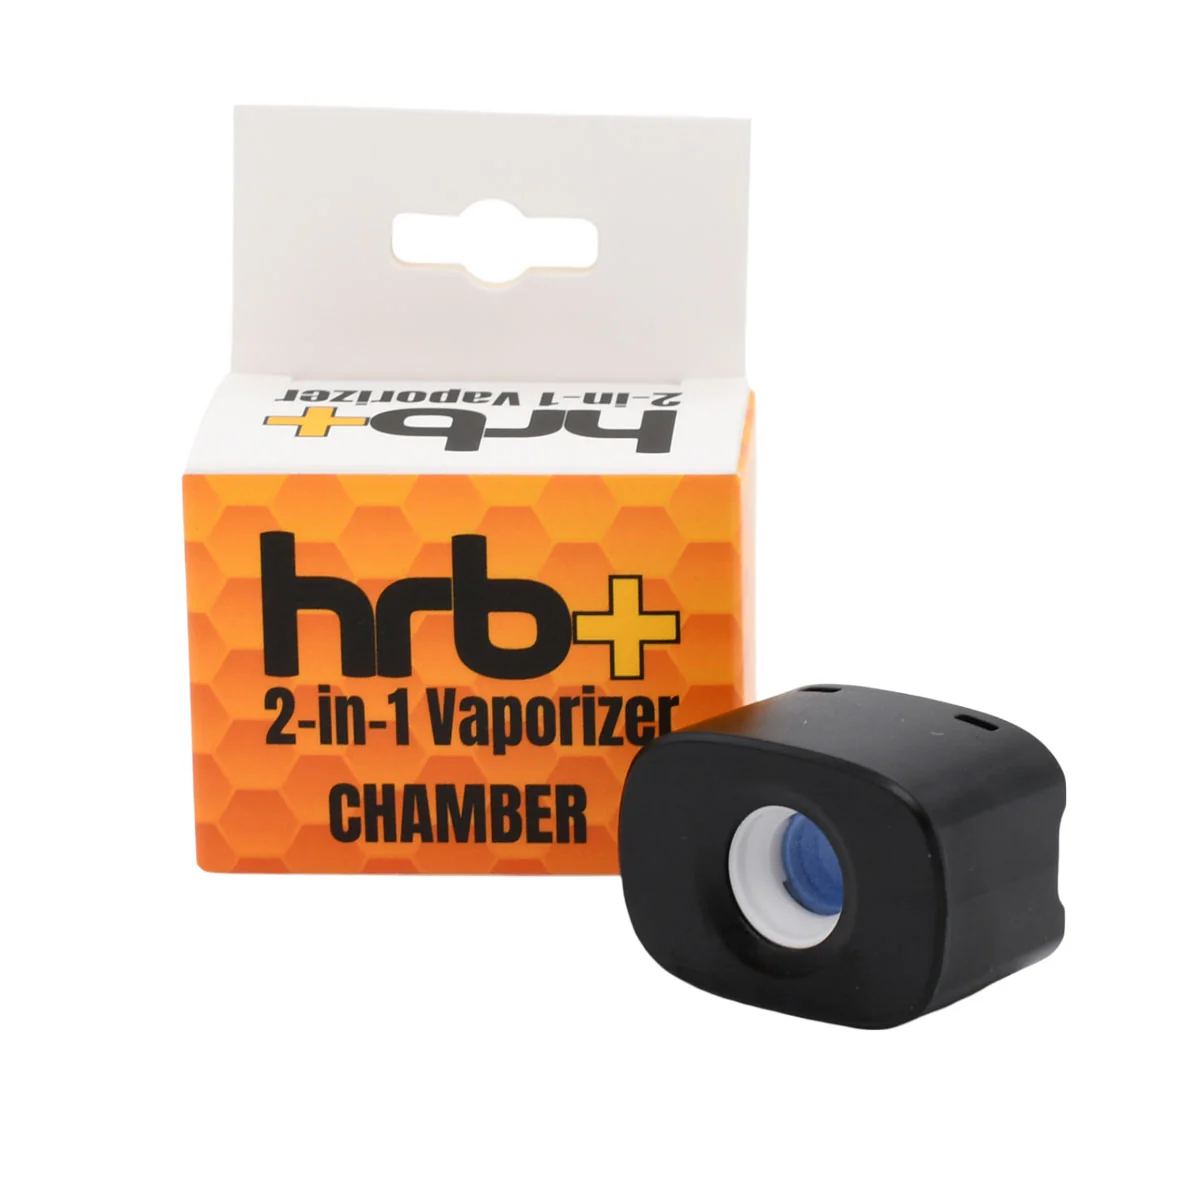
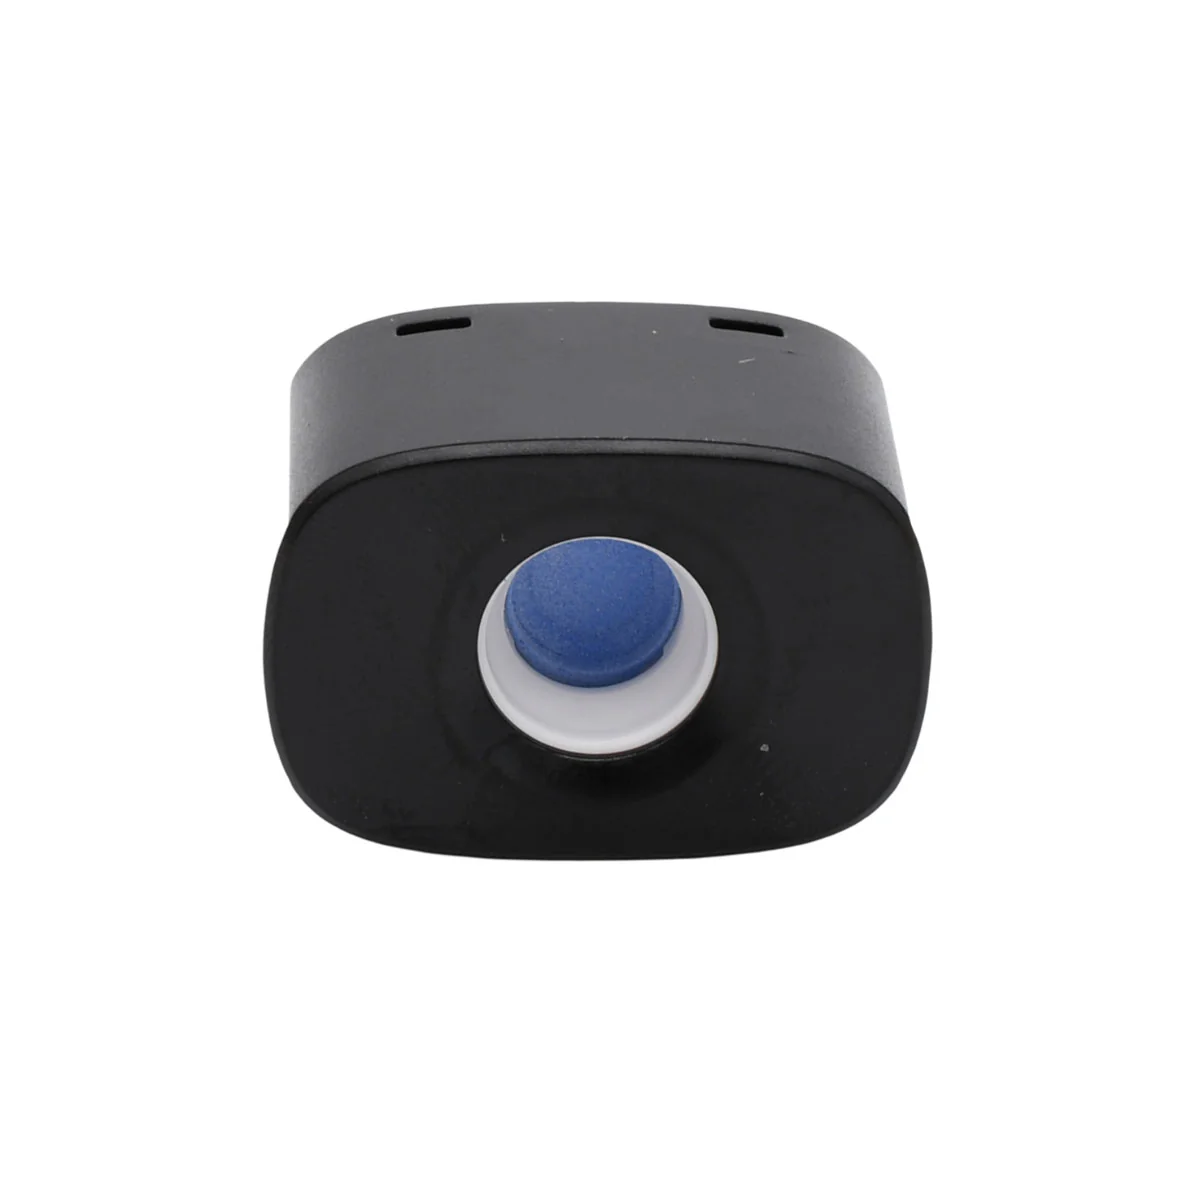
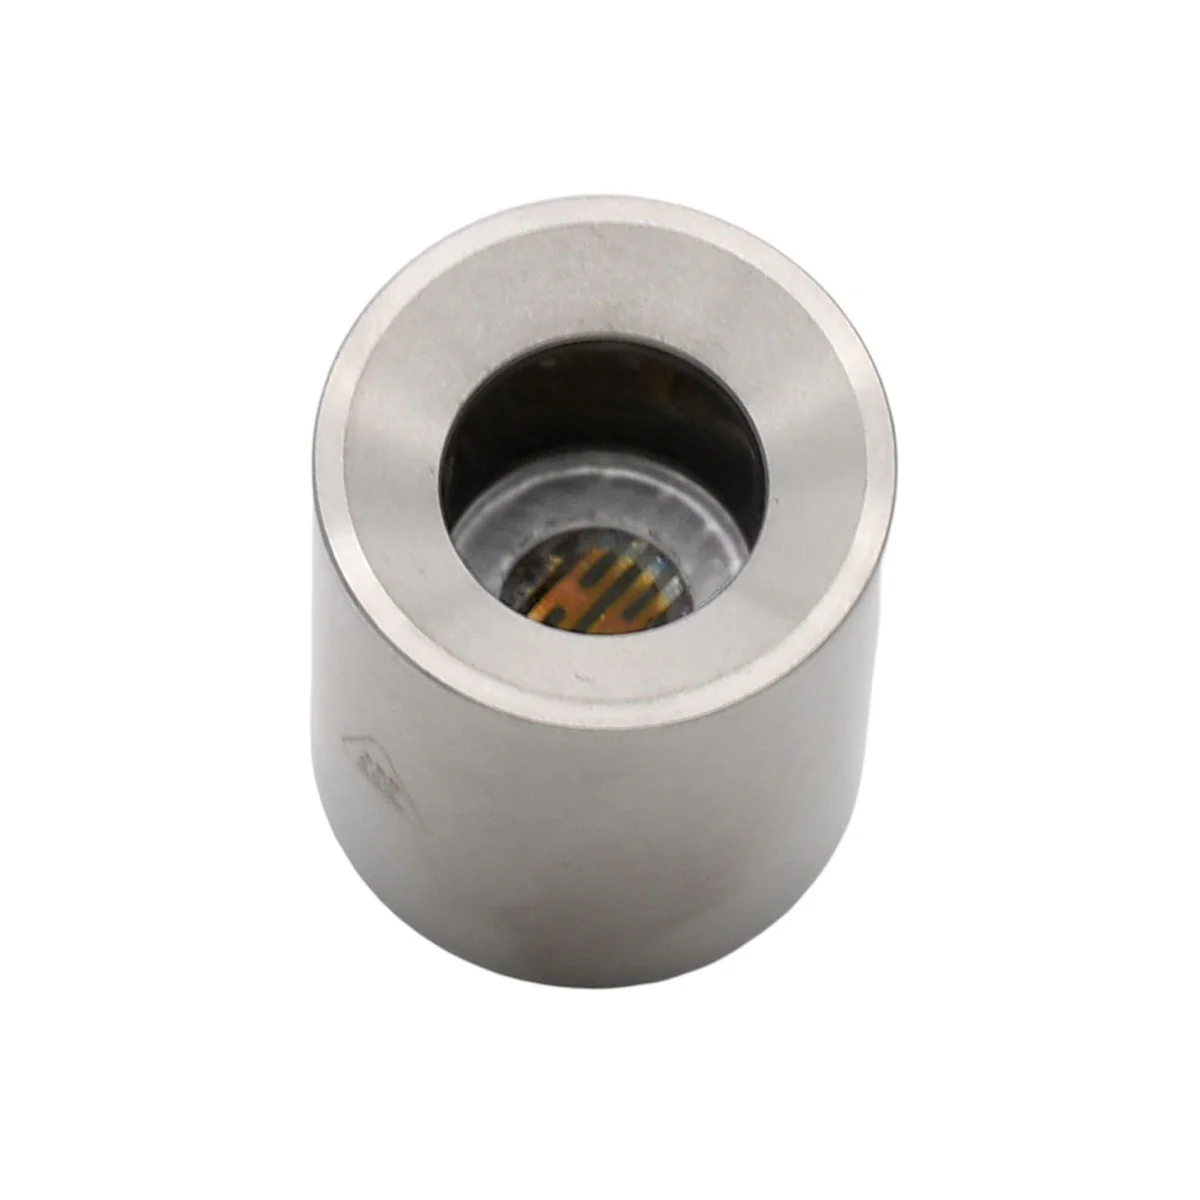
| (C) Coil-Less Quartz Chamber | Heating chamber where concentrate is placed. |
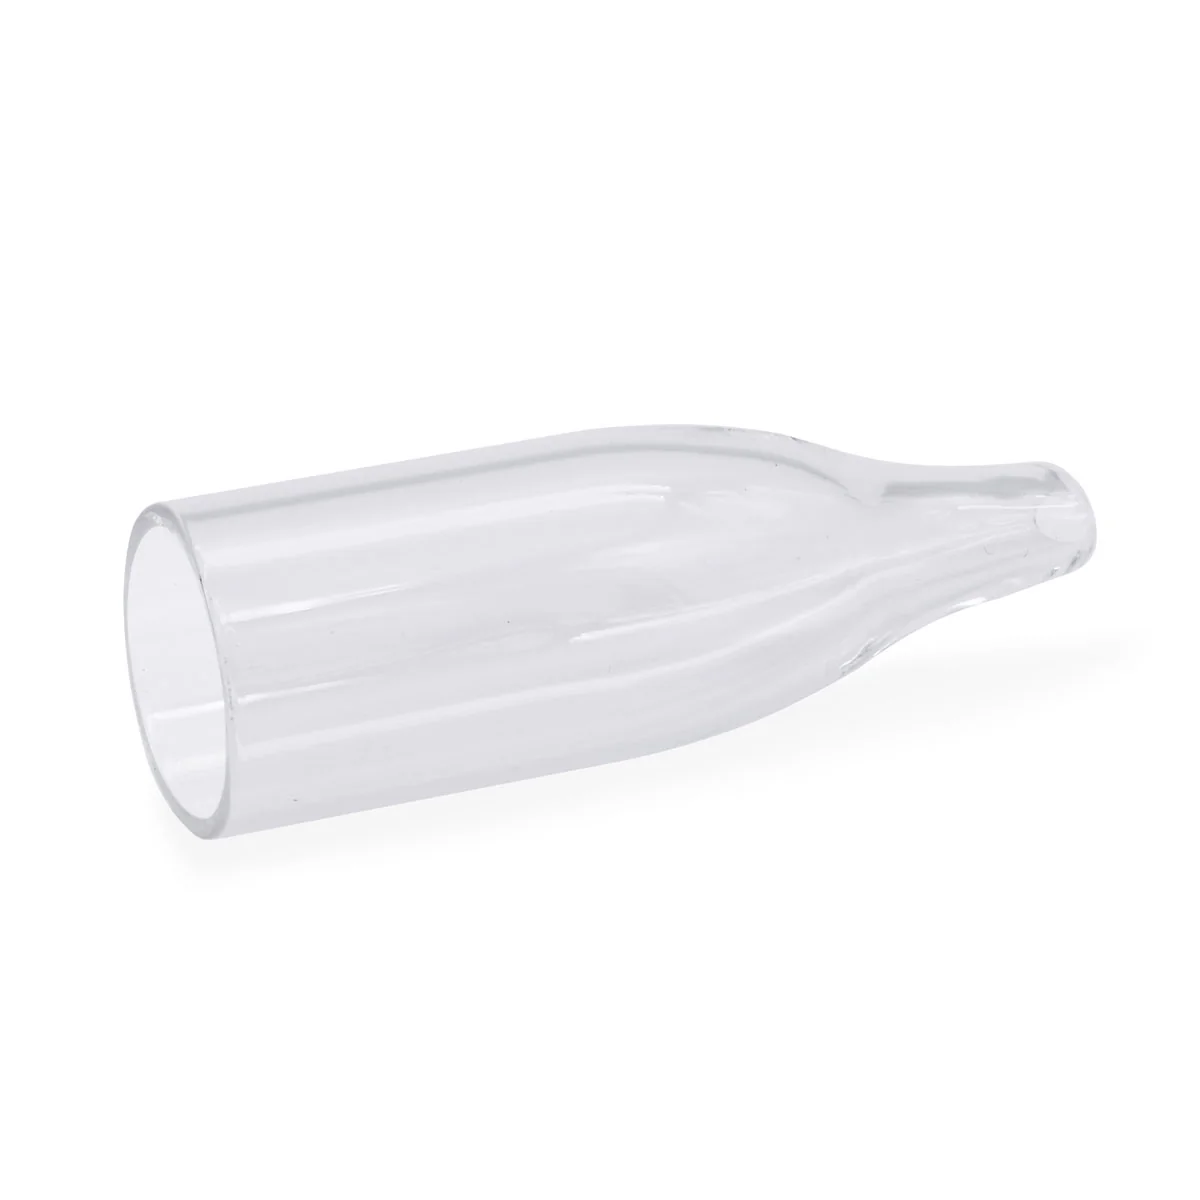
| (D) Glass Carb Cap | Controls airflow and helps vaporize concentrate efficiently. |
| (E) Silicone Tether | Keeps the carb cap attached to the device during use. |
| (F) Quartz Balls | Two quartz beads for better heat retention. |
| (G) USB-C Cable | Used to charge the device. |
| (H) Packing Tool | Used to place concentrate into the quartz chamber. |
4. Button Controls & Main Functions
The device uses a main power button and two control buttons: plus and minus. These buttons control power, heating mode, temperature, timer, LED lights, sound, and display settings.

| Function | Button Action |
|---|---|
| Turn device ON/OFF | Rapidly press the power button 5 times. |
| Manual heating mode | Press and hold the power button. Release to stop heating. |
| Automatic heating mode | Rapidly press the power button 2 times. |
| Stop automatic heating | Rapidly press the power button 2 times again. |
| Adjust temperature | Press the plus or minus button. |
| Enter timer setting menu | Hold plus and minus together for 2 seconds. |
| Switch Fahrenheit / Celsius | Hold power, plus, and minus together for 2 seconds. |
| Quick battery check | When device is off, tap the power button once. |
| Turn LED lights ON/OFF | Hold power and plus together for 2 seconds. |
| Turn audible feedback ON/OFF | Hold power and minus together for 2 seconds. |
5. OLED Display Information
The OLED screen shows selected temperature, session time, remaining time, and battery life. During setup, it displays your chosen settings. During heating, it shows the active countdown.
Temperature Setting
┌──────────────────┐
│ SET 030s   🔋     │
│ SET 420°F        │
└──────────────────┘
Shows your selected temperature and session time.
Timer Setting
┌──────────────────┐
│ SET 030s   🔋     │
│ SET 420°F        │
└──────────────────┘
Used when adjusting the active heating duration.
Remaining Time
┌──────────────────┐
│ 015s       🔋     │
│ 420°F            │
└──────────────────┘
Shows how many seconds remain in the current session.
6. Charging Instructions
Charge the HRB’Dup Ultimate E-Rig fully before first use. The manual recommends an initial charge time of approximately 3 hours.
| Charging Specification | Details |
|---|---|
| Battery Capacity | 5200mAh |
| Charging Type | USB-C fast charging |
| Suggested Input | 5V / 3A |
| Approximate First Charge Time | About 3 hours |
How to Charge
- Connect the USB-C cable to the charging port on the device base.
- Connect the other end to a compatible power source.
- Allow the device to fully charge before first use.
- Do not charge with wet parts, damaged cables, or unstable power sources.
Battery Level Icons
25%     50%      75%      100%
┌─ ┐    ┌──┐     ┌───┐    ┌────┐
│█ │    │██│     │███│    │████│
└──┘    └──┘     └───┘    └────┘
7. Temperature Settings
The HRB’Dup Ultimate E-Rig allows adjustable temperature control between 392°F and 932°F, or 200°C and 500°C.
Use the plus and minus buttons to raise or lower your selected temperature. The device will beep when the selected temperature has been reached.
| Temperature Range | General Session Style |
|---|---|
| 392°F–500°F | Lower-temperature flavor sessions with smoother vapor. |
| 500°F–650°F | Balanced flavor and vapor production. |
| 650°F–800°F | Stronger vapor and denser clouds. |
| 800°F–932°F | High-temperature sessions. Use carefully to avoid harsh vapor or residue buildup. |
New users should start lower and gradually increase temperature until they find their preferred balance of flavor, vapor, and smoothness.
8. Session Timer Settings
The device allows working/use time between 10 seconds and 60 seconds. This controls how long the automatic heating session runs.
How to Adjust Session Time
- Press and hold the plus and minus buttons together for 2 seconds.
- The device will enter the timer setting menu.
- Use the plus or minus button to adjust the session time.
- Stop pressing once the desired time is displayed.
9. Getting Started: First-Time Setup
Before use, make sure the device is fully charged and all parts are clean, dry, and properly assembled.
Step 1: Add Water
Fill the glass percolator with water to approximately one-third full. Do not fill past the 1/3 MAX line.

Step 2: Attach Chamber
Screw the coil-less quartz chamber clockwise onto the base. Tighten until secure, but do not overtighten.

Step 3: Attach Glass Percolator
Align the glass percolator with the base and allow the magnetic bottom to rest properly on the device.

Step 4: Attach Carb Cap
Place the glass carb cap on top of the chamber. Use the silicone tether to help keep the carb cap attached and secure.

10. Loading Dab / Concentrate
Use the included packing tool to place concentrate onto the bottom surface of the coil-less quartz cup. For best results, avoid smearing concentrate heavily along the chamber sides.
- Lift or remove the carb cap.
- Use the packing tool to collect a small amount of concentrate.
- Place the concentrate on the bottom center of the quartz cup.
- Do not overfill the chamber.
- Replace the carb cap before heating.

Overloading the quartz cup can cause bubbling, clogging, sticky residue, leaking, harsh vapor, and harder cleaning.
11. Heating Modes: Manual & Automatic
Manual Heating Mode
Manual heating gives you direct control. The chamber heats only while the power button is held.
- Turn the device on by pressing the power button 5 times quickly.
- Press and hold the power button to begin heating.
- Release the power button to stop heating.
Automatic Heating Mode
Automatic heating starts a timed session based on your selected temperature and timer.
- Turn the device on.
- Select your desired temperature.
- Select your preferred session time.
- Press the power button 2 times quickly to start automatic heating.
- Press the power button 2 times again to stop automatic heating.
12. Ready to Vape
Once the selected temperature is reached, the device will beep. At that point, inhale gently through the mouthpiece.

Use slow, steady inhales. Do not pull too hard and do not blow back into the glass. Strong inhalations or back pressure may cause water to splash or move toward the base.
13. LED Lights, Audible Feedback & Auto Shut-Off
LED Lights
Hold the power button and plus button together for 2 seconds to turn LED lights on or off.
Sound Feedback
Hold the power button and minus button together for 2 seconds to turn audible beeps on or off.
Auto Shut-Off
The device automatically shuts off after approximately 5 minutes of inactivity.
14. Cleaning Instructions
Allow all parts of the HRB’Dup Ultimate E-Rig to cool completely before disassembling or cleaning. The chamber and atomizer area may remain hot after use.
Recommended Cleaning Supplies
| Supply | Use |
|---|---|
| Cotton swabs | Cleaning chamber, connector, and residue areas. |
| Isopropyl alcohol | Removing sticky concentrate residue. |
| Soft cloth | Drying and wiping exterior parts. |
| Warm water | Rinsing glass parts only, when needed. |
Cleaning the Heating Chamber
- Turn the device off and allow the chamber to cool fully.
- Unscrew the chamber from the base.
- Use a cotton swab with isopropyl alcohol to gently remove residue.
- Wipe away any leftover alcohol.
- Allow the chamber to dry completely before reattaching.
Cleaning the Glass Percolator
- Remove the glass percolator from the base.
- Empty all water.
- Clean the glass with isopropyl alcohol.
- Rinse if needed.
- Allow glass components to dry completely before reattaching.
Cleaning the Base Connector
- Turn the device off.
- Remove the heating chamber.
- Lightly dampen a cotton swab with isopropyl alcohol.
- Clean the screw connection area.
- Let the connector dry fully before reattaching the chamber.
Cleaning Flow

Remove glass → Empty water → Clean → Dry fully → Reattach
15. Error Codes & Troubleshooting
| Issue / Display | Possible Cause | Solution |
|---|---|---|
| Low Battery / Auto Power-Off | Battery level is too low. | Charge the device using the USB-C cable. |
| CHECK ATOMIZER | Chamber is loose, dirty, not installed correctly, or damaged. | Remove and reinstall the chamber. Clean connector points. Replace chamber if needed. |
| PROTEXT / Protection Warning | Device may be overheating or detecting an operating error. | Stop use, power off, let the device cool, clean residue, and restart only when safe. |
| Weak Vapor | Temperature too low, concentrate not placed correctly, or chamber needs cleaning. | Increase temperature gradually, place concentrate at bottom center, and clean chamber. |
| Harsh Vapor | Temperature too high or old residue is burning. | Lower temperature and clean the quartz cup. |
| Water Splashing | Glass overfilled or inhale is too strong. | Reduce water level and inhale gently. |
16. Important Warnings
- Do not overfill the chamber.
- Do not blow or exhale hard into the glass.
- Do not drop the device.
- Do not lay the unit on its side.
- Do not store the device with water in the glass.
- Strong inhalations may cause spillage and damage to the heating chamber.
- Do not use the device for more than 4–5 consecutive sessions.
- Keep away from moisture and high humidity.
- Store in a cool, dark place when not in use.
- During use, the atomizer becomes hot and may create a burn hazard.
17. Storage & Best Practices
Proper storage helps protect the battery, glass, chamber, and internal electronics. Always empty the water, clean residue, and store the unit upright.
After Each Session
- Turn the device off.
- Allow all parts to cool.
- Empty water from the glass percolator.
- Wipe residue from the quartz chamber.
- Dry all glass parts before storage.
For Longer Device Life
- Use moderate-sized dabs.
- Do not overfill the water chamber.
- Keep the base dry at all times.
- Do not overtighten the chamber.
- Let the device rest after several sessions.
- Store in a cool, dry, dark place.
18. Quick Start Guide
Fast Setup Summary
1. Charge the device fully.
2. Add water to the glass percolator, about one-third full.
3. Screw the quartz chamber onto the base.
4. Attach the glass percolator.
5. Load concentrate onto the bottom center of the quartz cup.
6. Place the carb cap on the chamber.
7. Press the power button 5 times to turn the device on.
8. Set your preferred temperature and session timer.
9. Press the power button 2 times for automatic heating.
10. Wait for the beep, then inhale gently.
Quick Button Reference
| Action | Button Combination |
|---|---|
| Power on/off | Power button x5 |
| Manual heat | Hold power button |
| Auto heat start/stop | Power button x2 |
| Adjust temperature | Plus or minus button |
| Timer menu | Hold plus and minus for 2 seconds |
| Switch °F / °C | Hold power, plus, and minus for 2 seconds |
| Battery check | Tap power once while device is off |
| LED on/off | Hold power and plus for 2 seconds |
| Sound on/off | Hold power and minus for 2 seconds |
Original: $198.00
-65%$198.00
$69.30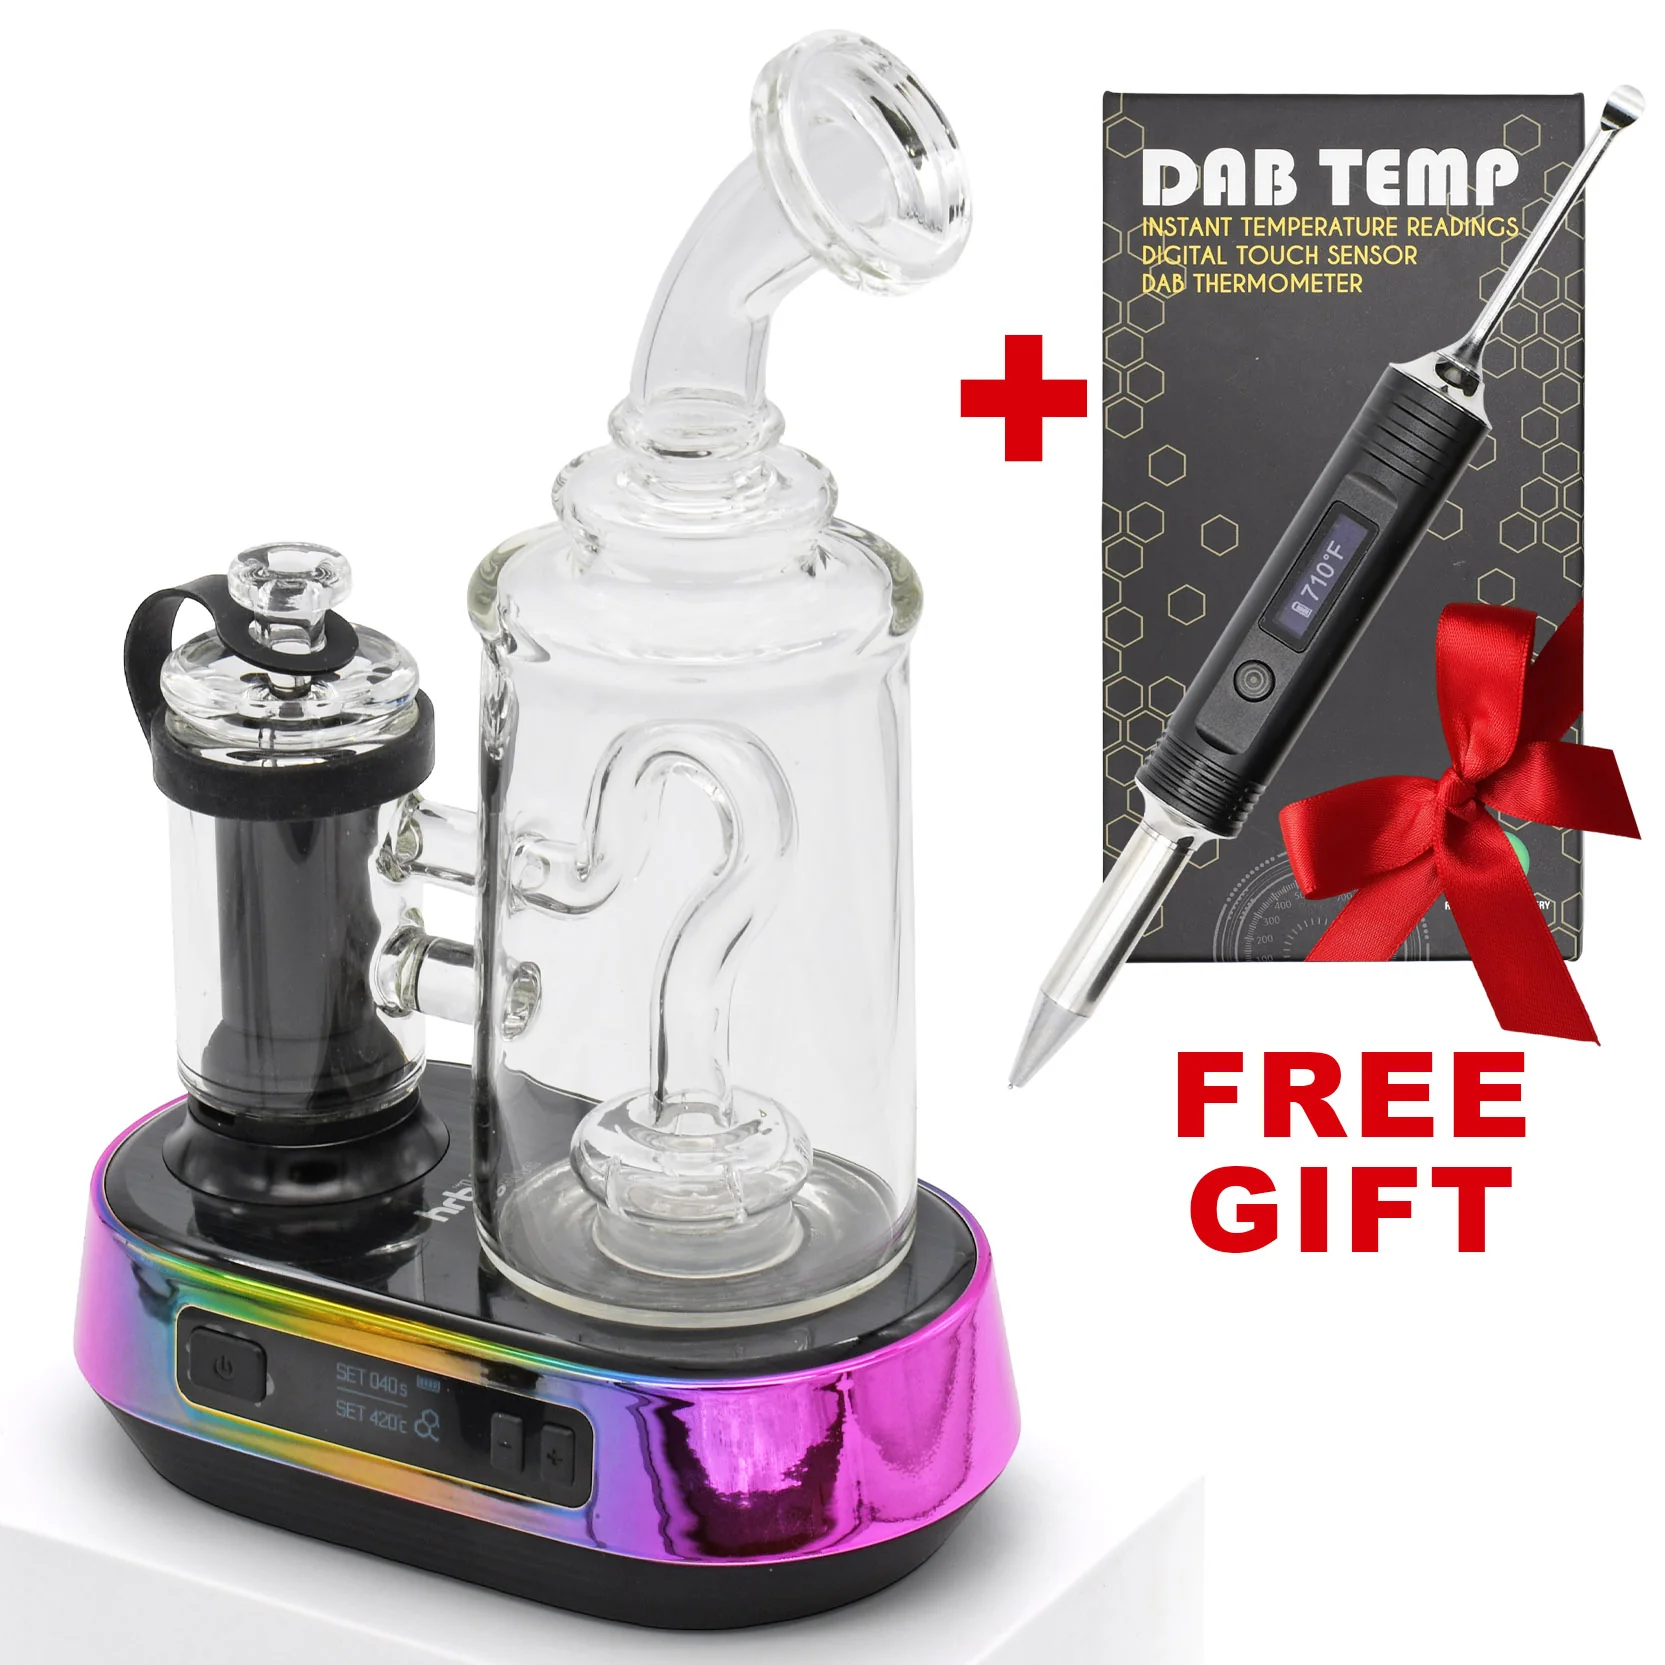

Description
Introducing the HRB'Dup E-Rig: Ultimate Powerhouse Electric Rig for Dab Concentrates.
HRB Dup E-Rig Kit Contains:
- FREE GIFT 1 x DAB-Temp Digital Thermometer
- Glass Percolator (Magnetic Attaching To Base)
- Ultimate Erig Base With 5200mAh Battery
- Wax Atomizer with Coiless Quartz Cup
- Glass Carb Cap Atomizer Cover (with Silicone Tether)
- 2 x Quartz Balls For Dabs
- USB-C Charging Cable
- Packaging Dab Tool
- 10.0"/ 8.0"/ 3.75" Airtight Waterproof Carrying Case
Hrb'Dup Electric Dab Rig
The HRB’Dup Ultimate Dab E-Rig brings desktop-style dab sessions into a sleek, portable, and easy-to-use electric rig. Designed for concentrate lovers who want smoother pulls without the torch drama, this e-rig features a coil-less quartz heating chamber, glass percolator, glass carb cap, and adjustable temperature control from 392°F to 932°F for everything from low-temp flavor chasing to thicker hits production.
With a powerful 5200mAh rechargeable battery, USB-C fast charging, OLED display, 10–60 second session timer, manual and automatic heating modes, LED lights, and audible feedback, the HRB’Dup makes dabbing feel cleaner, smarter, and more controlled. Just load your concentrate, set your temp, start the session, and let the rig do the heavy lifting.
⬇ INSTRUCTION MANUAL ⬇
1. Safety Notice & Intended Use
Please read this guide fully before using the Hrb’Dup E-Rig for dabs. Improper operation, incorrect cleaning, water overfilling, overheating, or misuse may damage the unit, void warranty coverage, or create a safety risk.
The Hrb’Dup E-Rig is intended for use by adults of legal smoking age only. It should not be used by children, non-smokers, pregnant or breastfeeding individuals, or anyone advised by a physician to avoid vapor products.
Do not use this device if you have heart disease, blood pressure concerns, hypertension, diabetes, asthma, or similar health risks. Stop use immediately and consult a physician if you experience nausea, vomiting, dizziness, diarrhea, weakness, rapid heartbeat, or other unusual symptoms.
This product is not intended to diagnose, treat, cure, or prevent any disease.
2. Hrb’Dup Ultimate E-Rig Product Overview
The HRB’Dup Ultimate E-Rig is a portable electronic dab rig designed for concentrates. It combines a rechargeable base, OLED display, adjustable temperature controls, session timer, coil-less quartz heating chamber, glass percolator, carb cap, and LED lighting.
3. What’s Included
Before first use, confirm that all major parts and accessories are included. If anything is missing, damaged, cracked, or not fitting correctly, do not operate the device.
| Included Part | Purpose |
|---|---|
| (A) Ultimate E-Rig Base | Main power unit with battery, buttons, OLED display, and electronics. |
| (B) Glass Percolator | Water filtration attachment for smoother vapor. |
| (C) Coil-Less Quartz Chamber | Heating chamber where concentrate is placed. |
| (D) Glass Carb Cap | Controls airflow and helps vaporize concentrate efficiently. |
| (E) Silicone Tether | Keeps the carb cap attached to the device during use. |
| (F) Quartz Balls | Two quartz beads for better heat retention. |
| (G) USB-C Cable | Used to charge the device. |
| (H) Packing Tool | Used to place concentrate into the quartz chamber. |
4. Button Controls & Main Functions
The device uses a main power button and two control buttons: plus and minus. These buttons control power, heating mode, temperature, timer, LED lights, sound, and display settings.
| Function | Button Action |
|---|---|
| Turn device ON/OFF | Rapidly press the power button 5 times. |
| Manual heating mode | Press and hold the power button. Release to stop heating. |
| Automatic heating mode | Rapidly press the power button 2 times. |
| Stop automatic heating | Rapidly press the power button 2 times again. |
| Adjust temperature | Press the plus or minus button. |
| Enter timer setting menu | Hold plus and minus together for 2 seconds. |
| Switch Fahrenheit / Celsius | Hold power, plus, and minus together for 2 seconds. |
| Quick battery check | When device is off, tap the power button once. |
| Turn LED lights ON/OFF | Hold power and plus together for 2 seconds. |
| Turn audible feedback ON/OFF | Hold power and minus together for 2 seconds. |
5. OLED Display Information
The OLED screen shows selected temperature, session time, remaining time, and battery life. During setup, it displays your chosen settings. During heating, it shows the active countdown.
Temperature Setting
┌──────────────────┐
│ SET 030s   🔋     │
│ SET 420°F        │
└──────────────────┘
Shows your selected temperature and session time.
Timer Setting
┌──────────────────┐
│ SET 030s   🔋     │
│ SET 420°F        │
└──────────────────┘
Used when adjusting the active heating duration.
Remaining Time
┌──────────────────┐
│ 015s       🔋     │
│ 420°F            │
└──────────────────┘
Shows how many seconds remain in the current session.
6. Charging Instructions
Charge the HRB’Dup Ultimate E-Rig fully before first use. The manual recommends an initial charge time of approximately 3 hours.
| Charging Specification | Details |
|---|---|
| Battery Capacity | 5200mAh |
| Charging Type | USB-C fast charging |
| Suggested Input | 5V / 3A |
| Approximate First Charge Time | About 3 hours |
How to Charge
- Connect the USB-C cable to the charging port on the device base.
- Connect the other end to a compatible power source.
- Allow the device to fully charge before first use.
- Do not charge with wet parts, damaged cables, or unstable power sources.
Battery Level Icons
25%     50%      75%      100%
┌─ ┐    ┌──┐     ┌───┐    ┌────┐
│█ │    │██│     │███│    │████│
└──┘    └──┘     └───┘    └────┘
7. Temperature Settings
The HRB’Dup Ultimate E-Rig allows adjustable temperature control between 392°F and 932°F, or 200°C and 500°C.
Use the plus and minus buttons to raise or lower your selected temperature. The device will beep when the selected temperature has been reached.
| Temperature Range | General Session Style |
|---|---|
| 392°F–500°F | Lower-temperature flavor sessions with smoother vapor. |
| 500°F–650°F | Balanced flavor and vapor production. |
| 650°F–800°F | Stronger vapor and denser clouds. |
| 800°F–932°F | High-temperature sessions. Use carefully to avoid harsh vapor or residue buildup. |
New users should start lower and gradually increase temperature until they find their preferred balance of flavor, vapor, and smoothness.
8. Session Timer Settings
The device allows working/use time between 10 seconds and 60 seconds. This controls how long the automatic heating session runs.
How to Adjust Session Time
- Press and hold the plus and minus buttons together for 2 seconds.
- The device will enter the timer setting menu.
- Use the plus or minus button to adjust the session time.
- Stop pressing once the desired time is displayed.
9. Getting Started: First-Time Setup
Before use, make sure the device is fully charged and all parts are clean, dry, and properly assembled.
Step 1: Add Water
Fill the glass percolator with water to approximately one-third full. Do not fill past the 1/3 MAX line.
Step 2: Attach Chamber
Screw the coil-less quartz chamber clockwise onto the base. Tighten until secure, but do not overtighten.
Step 3: Attach Glass Percolator
Align the glass percolator with the base and allow the magnetic bottom to rest properly on the device.
Step 4: Attach Carb Cap
Place the glass carb cap on top of the chamber. Use the silicone tether to help keep the carb cap attached and secure.
10. Loading Dab / Concentrate
Use the included packing tool to place concentrate onto the bottom surface of the coil-less quartz cup. For best results, avoid smearing concentrate heavily along the chamber sides.
- Lift or remove the carb cap.
- Use the packing tool to collect a small amount of concentrate.
- Place the concentrate on the bottom center of the quartz cup.
- Do not overfill the chamber.
- Replace the carb cap before heating.
Overloading the quartz cup can cause bubbling, clogging, sticky residue, leaking, harsh vapor, and harder cleaning.
11. Heating Modes: Manual & Automatic
Manual Heating Mode
Manual heating gives you direct control. The chamber heats only while the power button is held.
- Turn the device on by pressing the power button 5 times quickly.
- Press and hold the power button to begin heating.
- Release the power button to stop heating.
Automatic Heating Mode
Automatic heating starts a timed session based on your selected temperature and timer.
- Turn the device on.
- Select your desired temperature.
- Select your preferred session time.
- Press the power button 2 times quickly to start automatic heating.
- Press the power button 2 times again to stop automatic heating.
12. Ready to Vape
Once the selected temperature is reached, the device will beep. At that point, inhale gently through the mouthpiece.
Use slow, steady inhales. Do not pull too hard and do not blow back into the glass. Strong inhalations or back pressure may cause water to splash or move toward the base.
13. LED Lights, Audible Feedback & Auto Shut-Off
LED Lights
Hold the power button and plus button together for 2 seconds to turn LED lights on or off.
Sound Feedback
Hold the power button and minus button together for 2 seconds to turn audible beeps on or off.
Auto Shut-Off
The device automatically shuts off after approximately 5 minutes of inactivity.
14. Cleaning Instructions
Allow all parts of the HRB’Dup Ultimate E-Rig to cool completely before disassembling or cleaning. The chamber and atomizer area may remain hot after use.
Recommended Cleaning Supplies
| Supply | Use |
|---|---|
| Cotton swabs | Cleaning chamber, connector, and residue areas. |
| Isopropyl alcohol | Removing sticky concentrate residue. |
| Soft cloth | Drying and wiping exterior parts. |
| Warm water | Rinsing glass parts only, when needed. |
Cleaning the Heating Chamber
- Turn the device off and allow the chamber to cool fully.
- Unscrew the chamber from the base.
- Use a cotton swab with isopropyl alcohol to gently remove residue.
- Wipe away any leftover alcohol.
- Allow the chamber to dry completely before reattaching.
Cleaning the Glass Percolator
- Remove the glass percolator from the base.
- Empty all water.
- Clean the glass with isopropyl alcohol.
- Rinse if needed.
- Allow glass components to dry completely before reattaching.
Cleaning the Base Connector
- Turn the device off.
- Remove the heating chamber.
- Lightly dampen a cotton swab with isopropyl alcohol.
- Clean the screw connection area.
- Let the connector dry fully before reattaching the chamber.
Cleaning Flow

Remove glass → Empty water → Clean → Dry fully → Reattach
15. Error Codes & Troubleshooting
| Issue / Display | Possible Cause | Solution |
|---|---|---|
| Low Battery / Auto Power-Off | Battery level is too low. | Charge the device using the USB-C cable. |
| CHECK ATOMIZER | Chamber is loose, dirty, not installed correctly, or damaged. | Remove and reinstall the chamber. Clean connector points. Replace chamber if needed. |
| PROTEXT / Protection Warning | Device may be overheating or detecting an operating error. | Stop use, power off, let the device cool, clean residue, and restart only when safe. |
| Weak Vapor | Temperature too low, concentrate not placed correctly, or chamber needs cleaning. | Increase temperature gradually, place concentrate at bottom center, and clean chamber. |
| Harsh Vapor | Temperature too high or old residue is burning. | Lower temperature and clean the quartz cup. |
| Water Splashing | Glass overfilled or inhale is too strong. | Reduce water level and inhale gently. |
16. Important Warnings
- Do not overfill the chamber.
- Do not blow or exhale hard into the glass.
- Do not drop the device.
- Do not lay the unit on its side.
- Do not store the device with water in the glass.
- Strong inhalations may cause spillage and damage to the heating chamber.
- Do not use the device for more than 4–5 consecutive sessions.
- Keep away from moisture and high humidity.
- Store in a cool, dark place when not in use.
- During use, the atomizer becomes hot and may create a burn hazard.
17. Storage & Best Practices
Proper storage helps protect the battery, glass, chamber, and internal electronics. Always empty the water, clean residue, and store the unit upright.
After Each Session
- Turn the device off.
- Allow all parts to cool.
- Empty water from the glass percolator.
- Wipe residue from the quartz chamber.
- Dry all glass parts before storage.
For Longer Device Life
- Use moderate-sized dabs.
- Do not overfill the water chamber.
- Keep the base dry at all times.
- Do not overtighten the chamber.
- Let the device rest after several sessions.
- Store in a cool, dry, dark place.
18. Quick Start Guide
Fast Setup Summary
1. Charge the device fully.
2. Add water to the glass percolator, about one-third full.
3. Screw the quartz chamber onto the base.
4. Attach the glass percolator.
5. Load concentrate onto the bottom center of the quartz cup.
6. Place the carb cap on the chamber.
7. Press the power button 5 times to turn the device on.
8. Set your preferred temperature and session timer.
9. Press the power button 2 times for automatic heating.
10. Wait for the beep, then inhale gently.
Quick Button Reference
| Action | Button Combination |
|---|---|
| Power on/off | Power button x5 |
| Manual heat | Hold power button |
| Auto heat start/stop | Power button x2 |
| Adjust temperature | Plus or minus button |
| Timer menu | Hold plus and minus for 2 seconds |
| Switch °F / °C | Hold power, plus, and minus for 2 seconds |
| Battery check | Tap power once while device is off |
| LED on/off | Hold power and plus for 2 seconds |
| Sound on/off | Hold power and minus for 2 seconds |